Swipe actions are an integral multitasking feature of any good email client, and Outlook is no exception. The application allows for two swipe actions at a time, but offers seven total options for those actions. We'll show you how to choose which actions go with which swipes to best tailor the app to your needs.
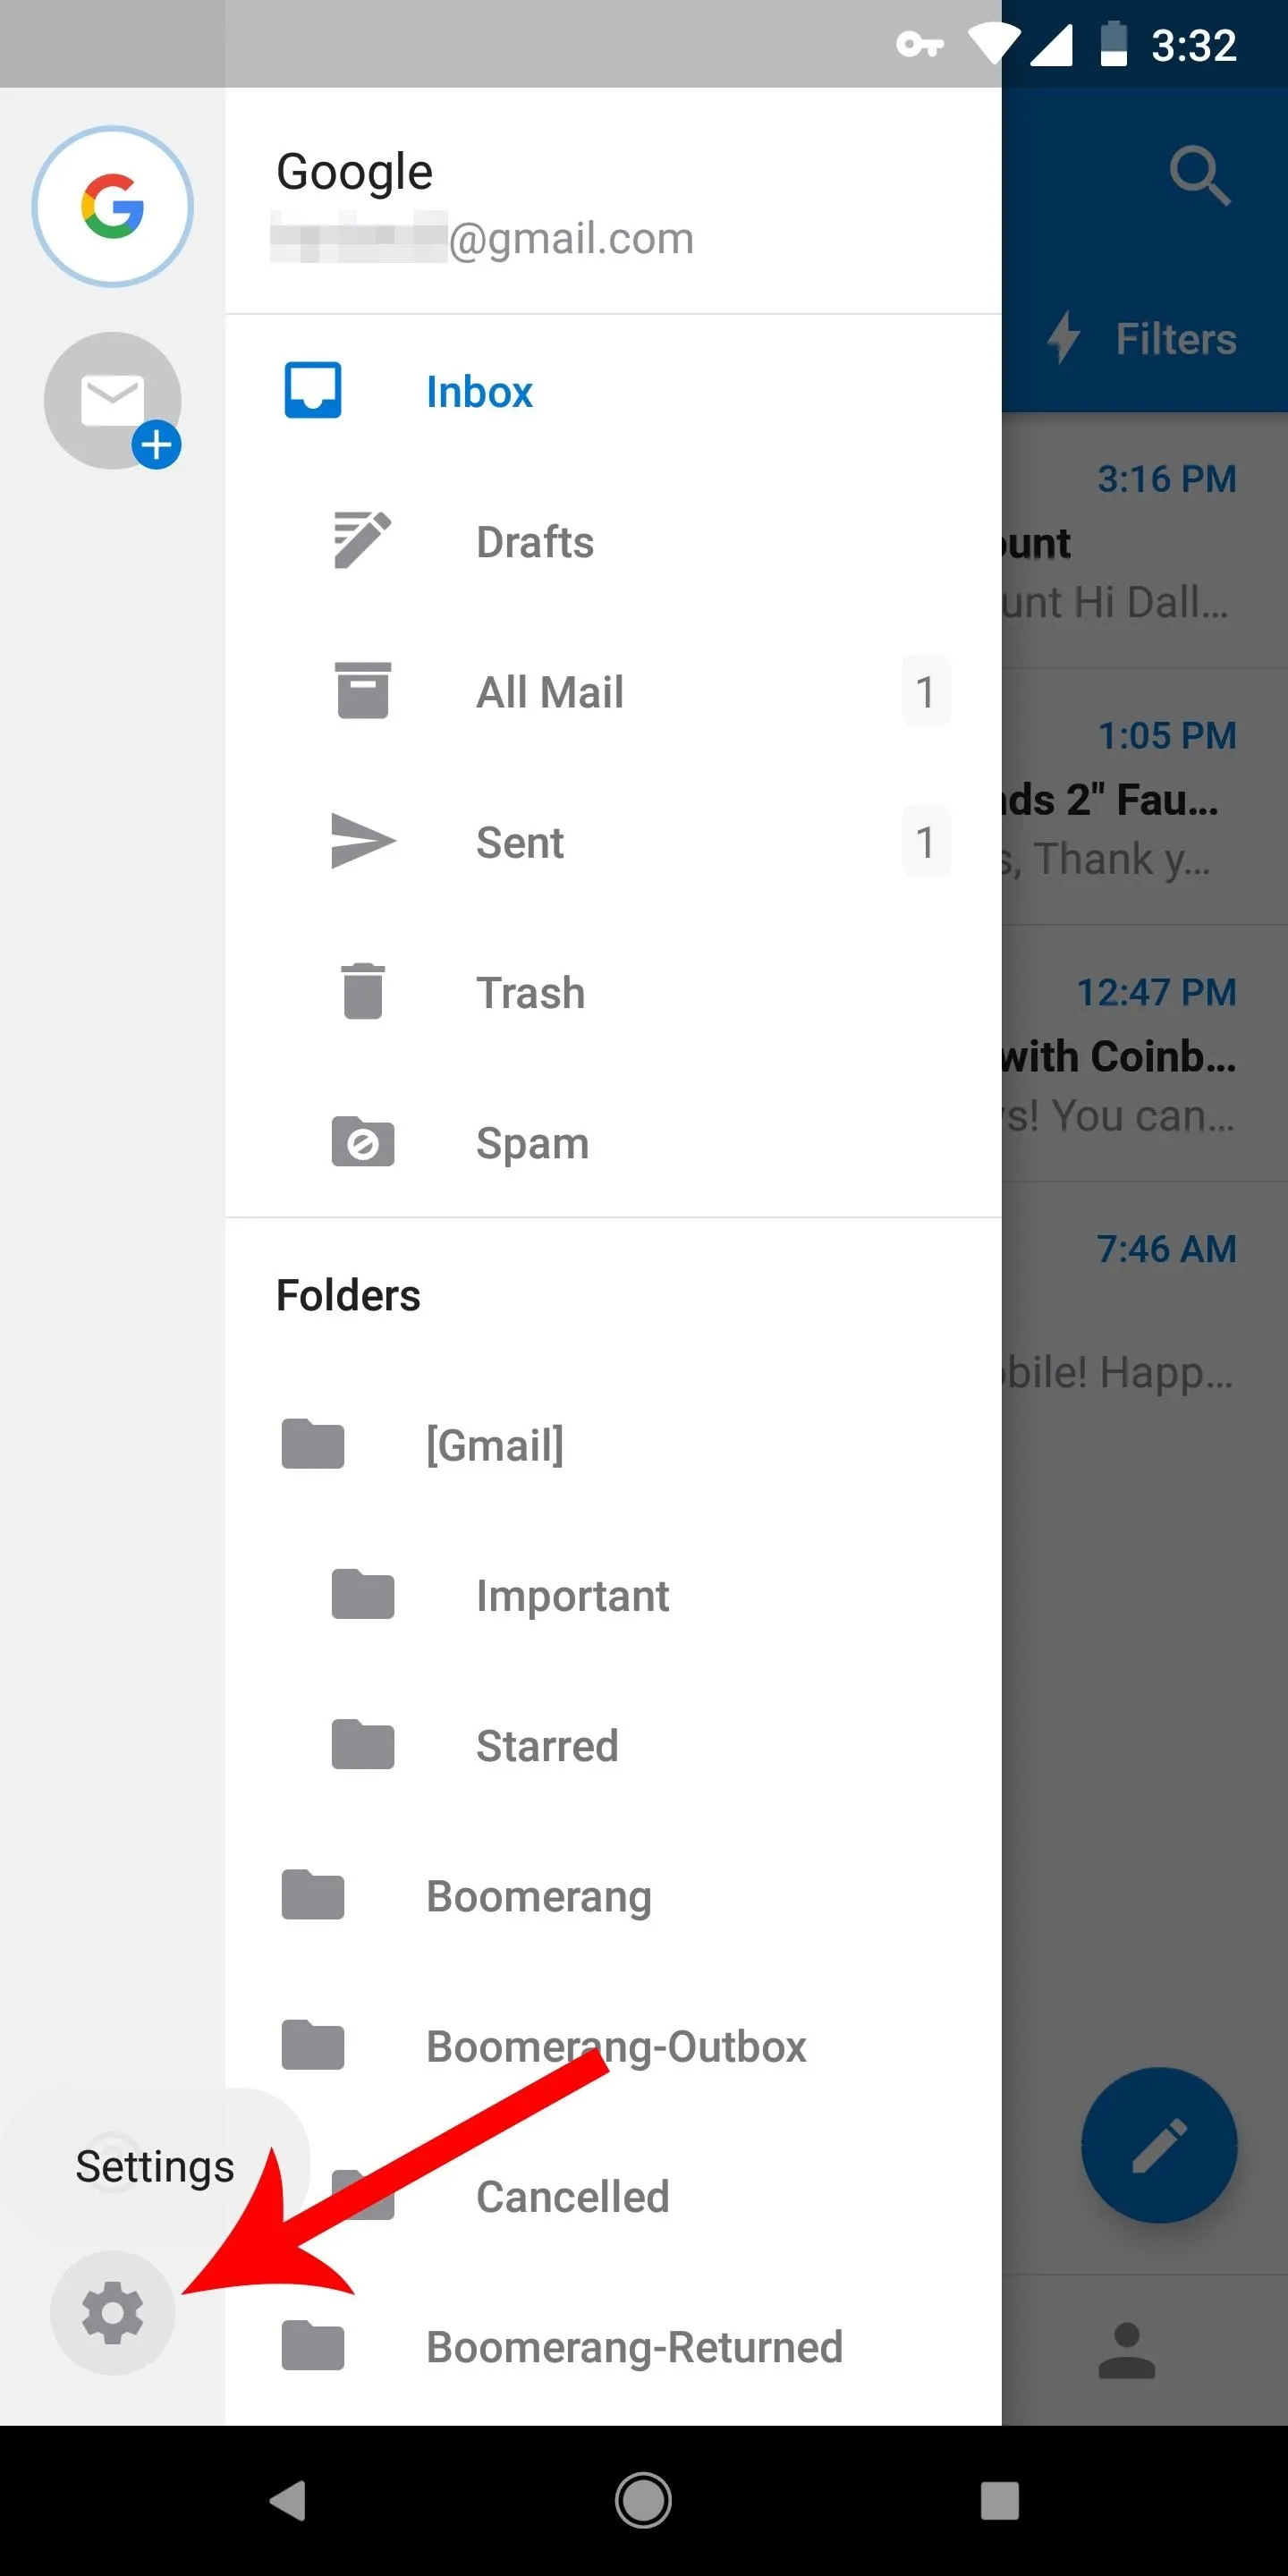
To start, you'll just need Microsoft's Outlook app for either Android or iOS. To do that, just tap the hamburger icon in the top-left corner, then tap the settings gear in the bottom-left corner.
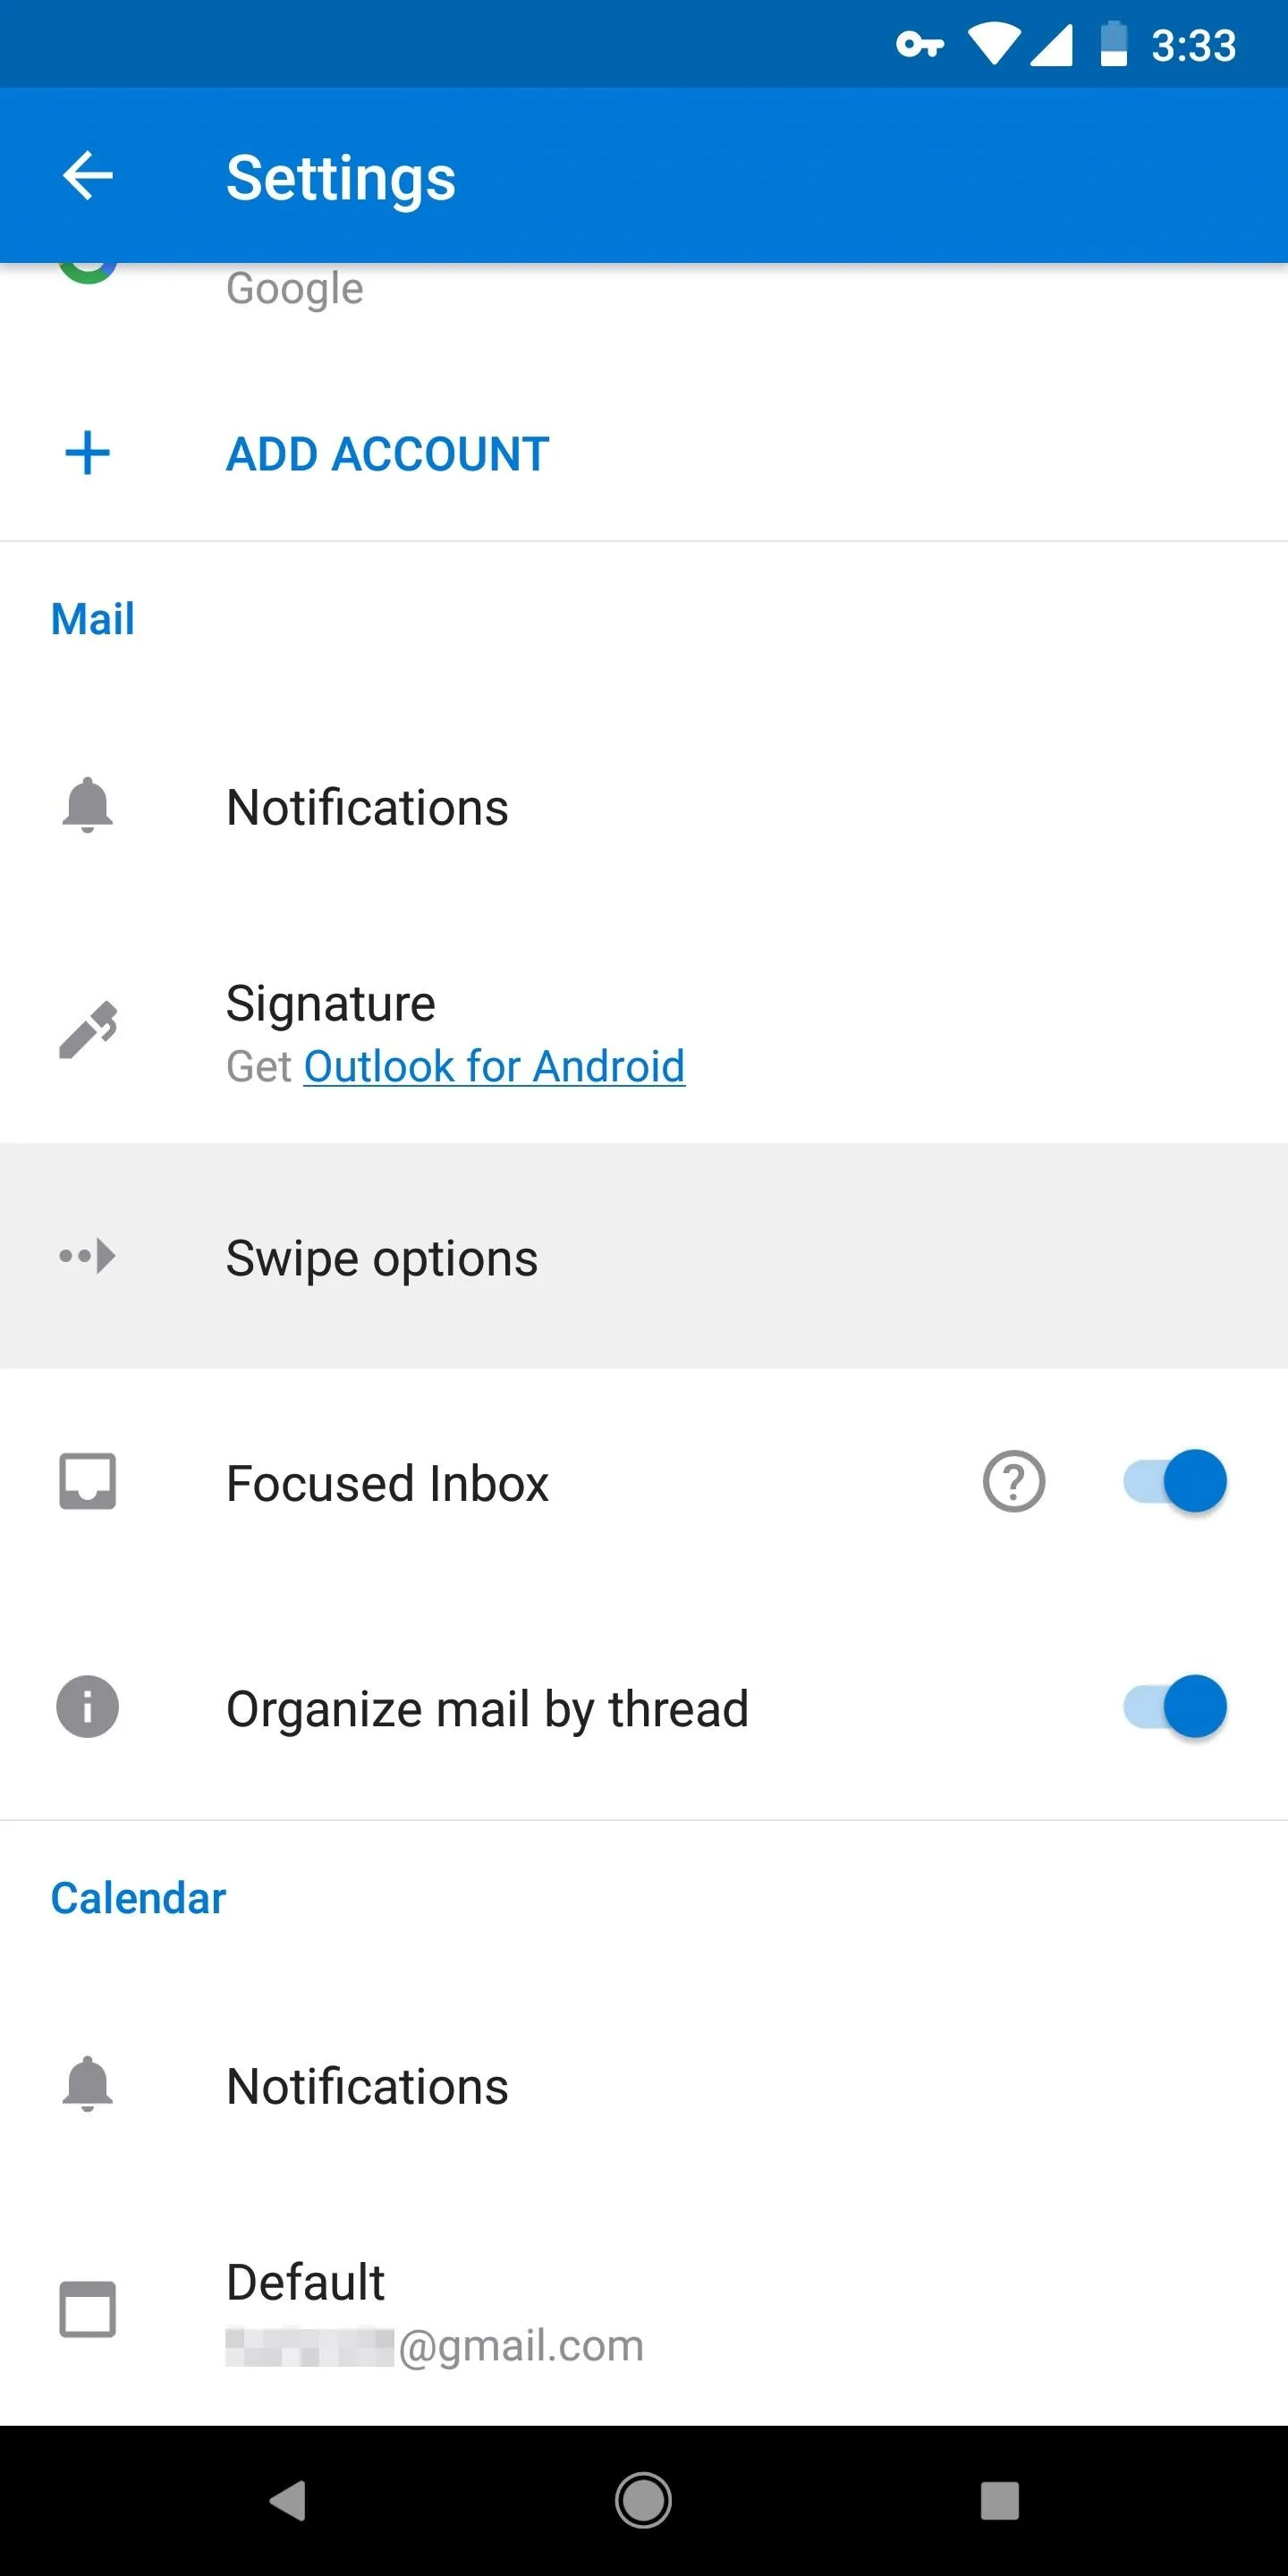
From here, you'll find "Swipe Options" under the Mail sub-header. Tap this option to pull up the "Swipe Options" page, where you can edit what swipe action appear for either a right or left swipe.
- Don't Miss: The 5 Best Free Email Clients for iOS


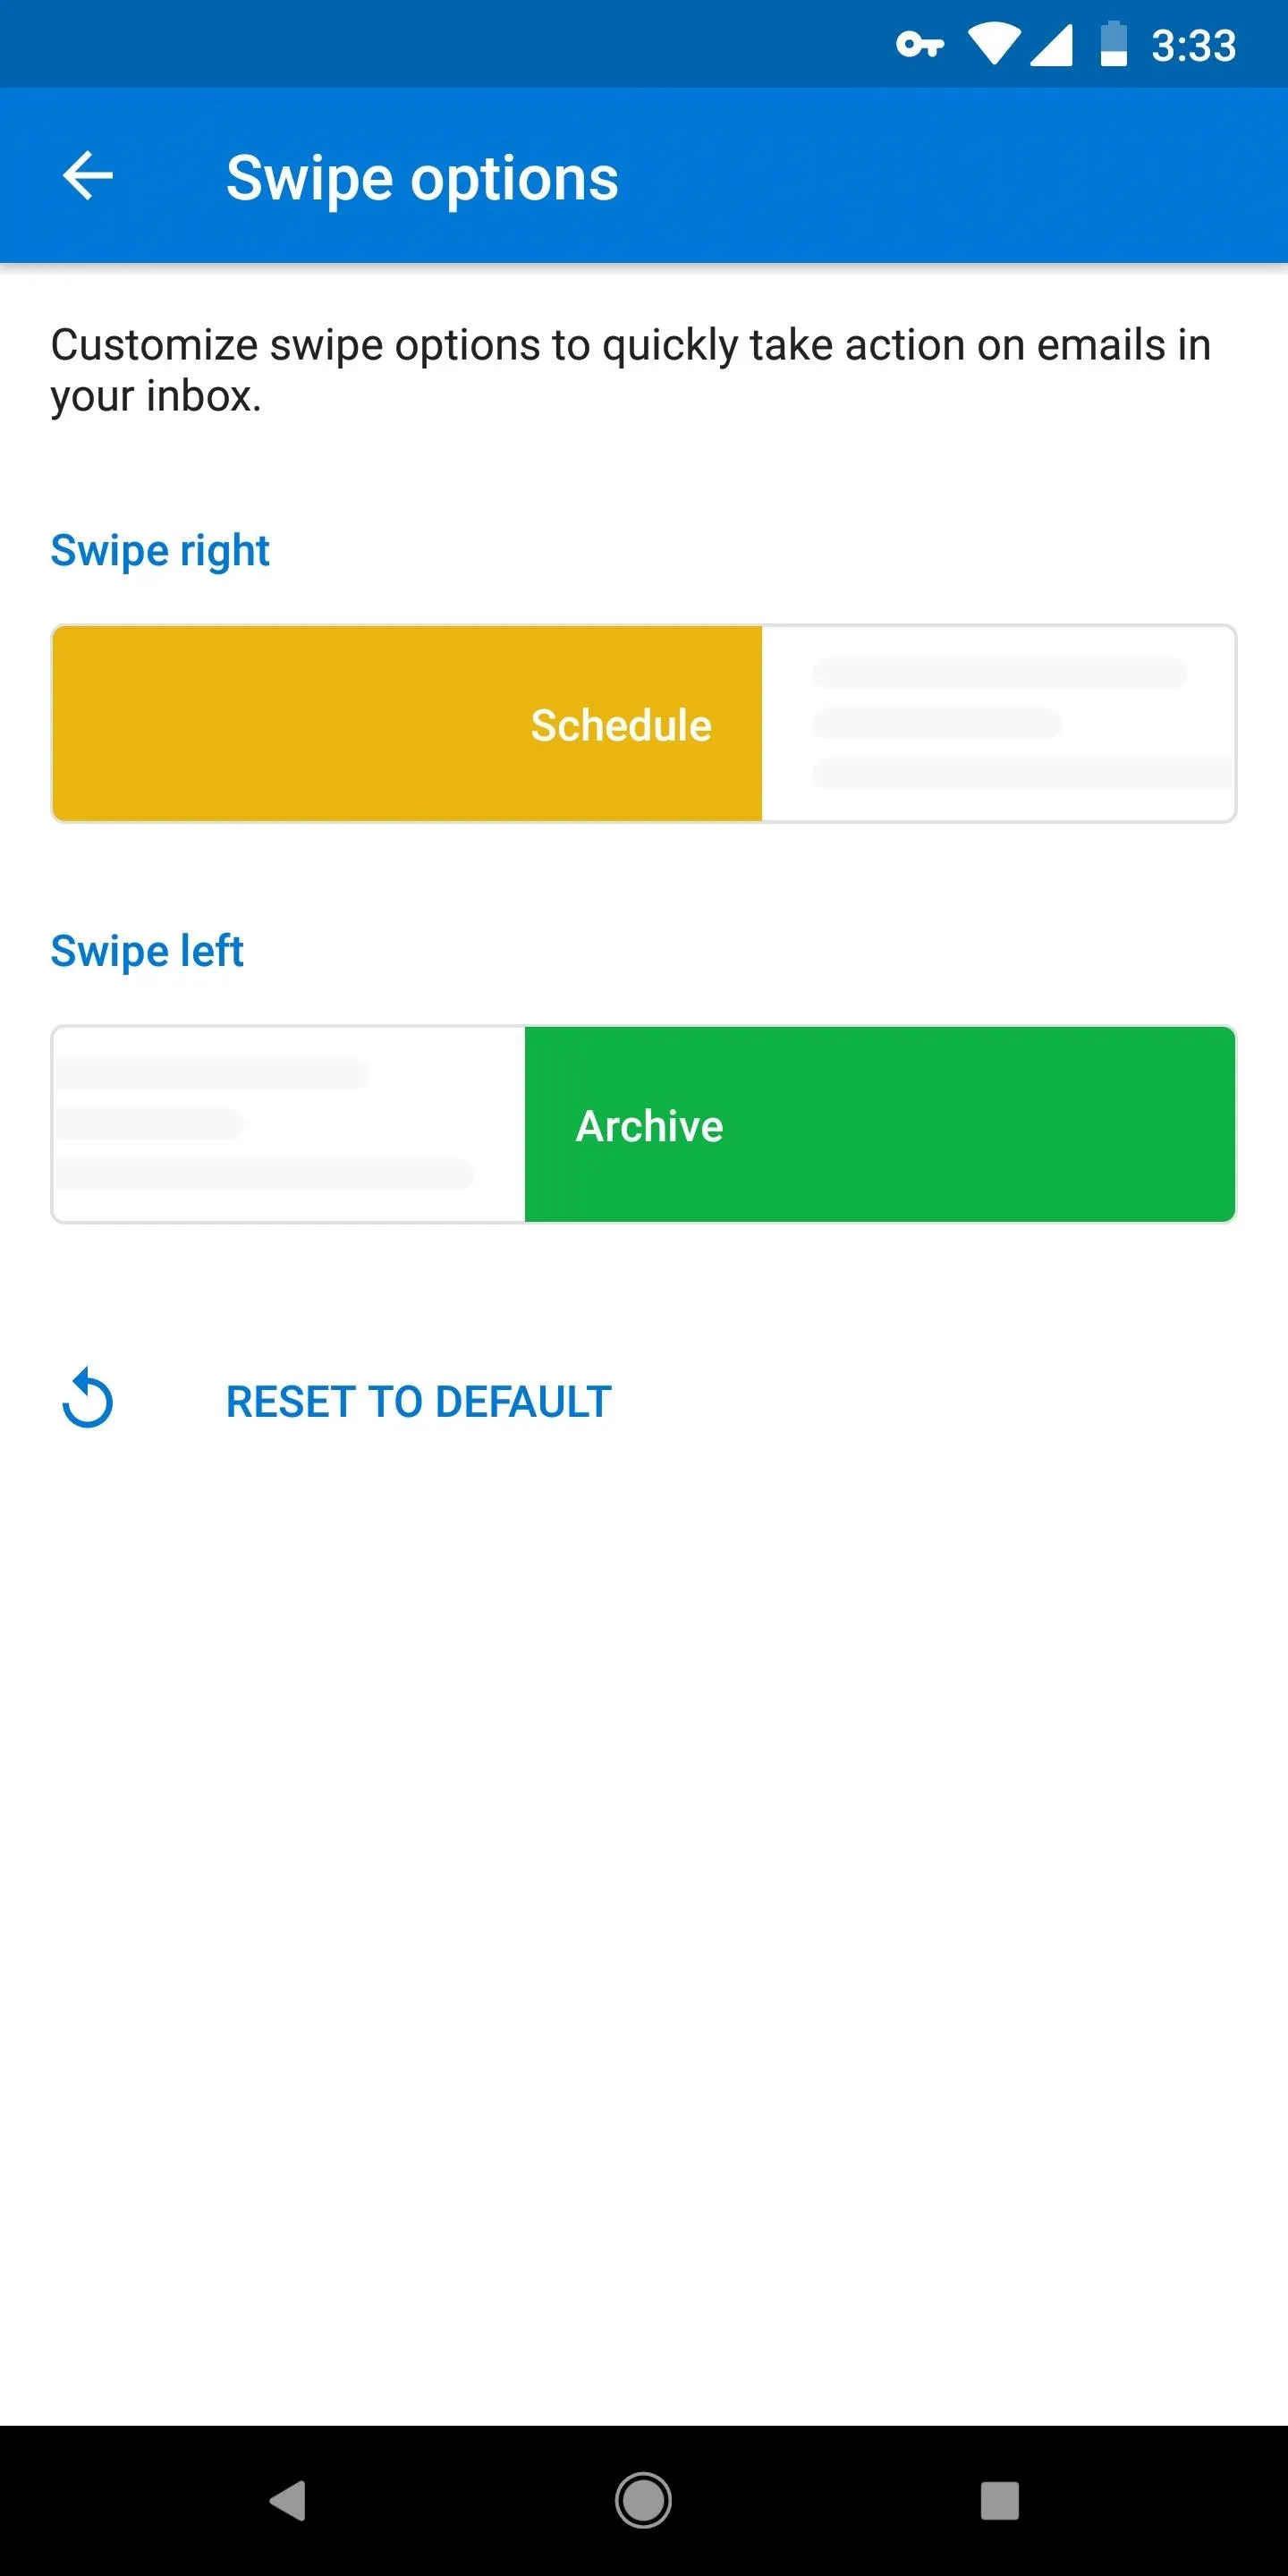
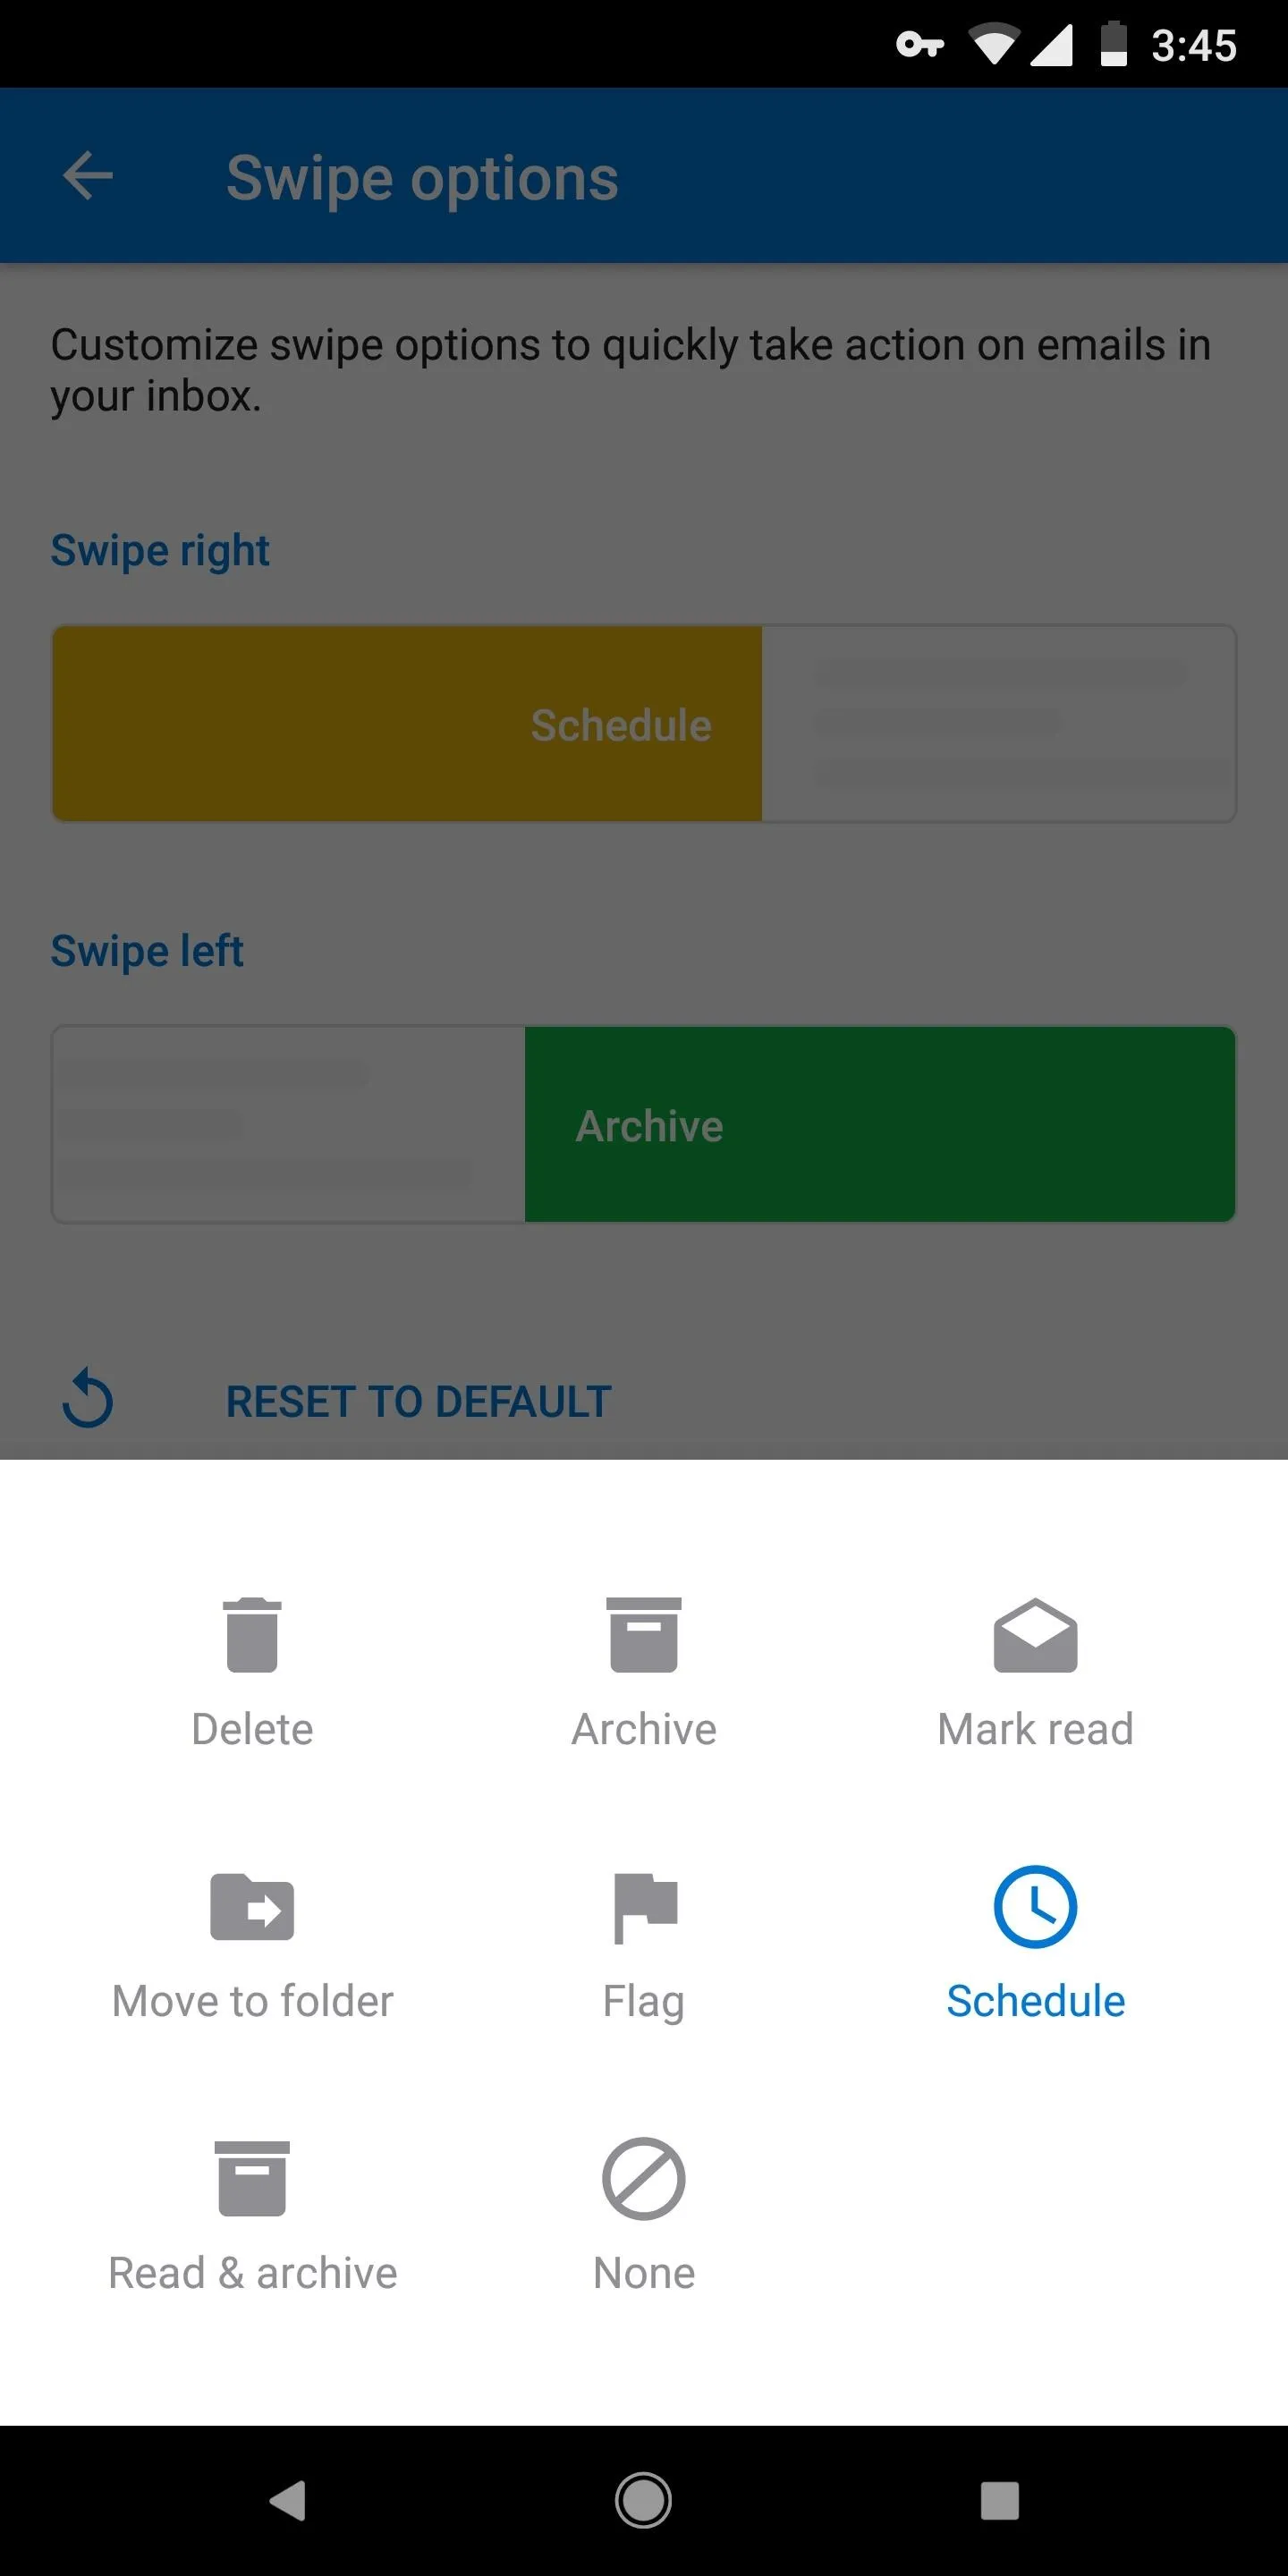
To edit your right swipe action, tap anywhere in the "Swipe Right" box. By default, the selection will be "Schedule," but when you tap here, you will find seven other options to choose from; "Delete," "Archive," "Mark Read," "Move," "Flag," "Read & Archive," or "None."
Each option has a color that appears when performing the swipe action in action; "Delete" is red, "Archive" is green, "Mark Read" and "Move" are blue, "Flag" and "Schedule" are yellow, and "Read & Archive" is green. "None" appears grey in the Settings, but if selected, no option will appear at all when swiping in your inbox.
When you're done there, repeat the same process for "Swipe Left."


Once you choose an action for each swipe, head back to your inbox to try them out. Choose an email. Swipe slightly to see a preview of the action in grey. Continue the swipe to highlight the action with its designated color. That color lets you know the action is now active, and will activate once you release your finger from the display.
In short, just perform a quick swipe left or right on any email to trigger your custom action!
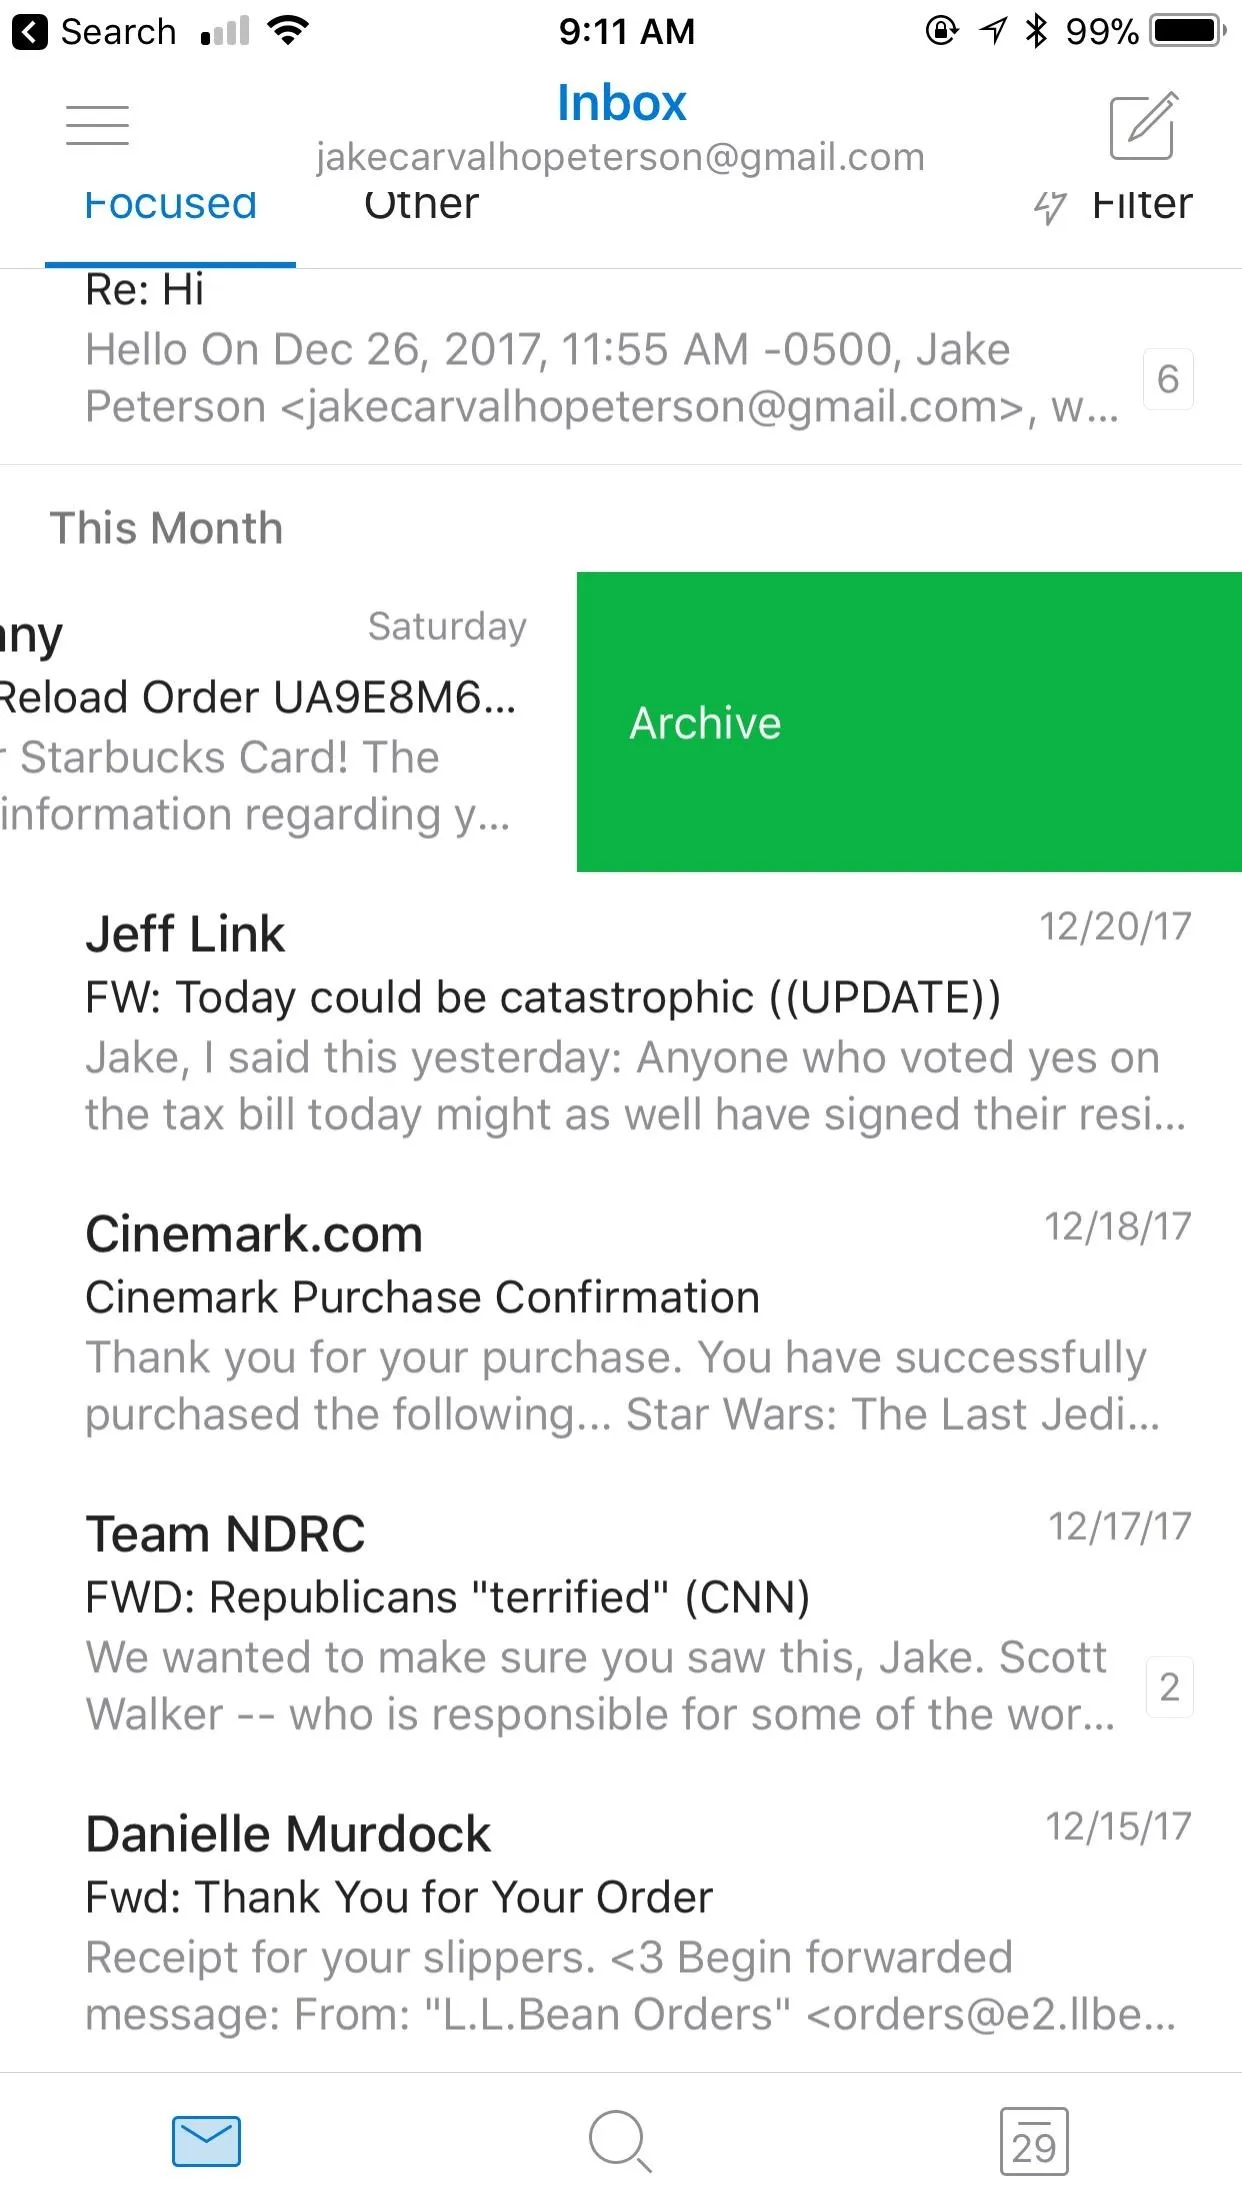
Left swipe.
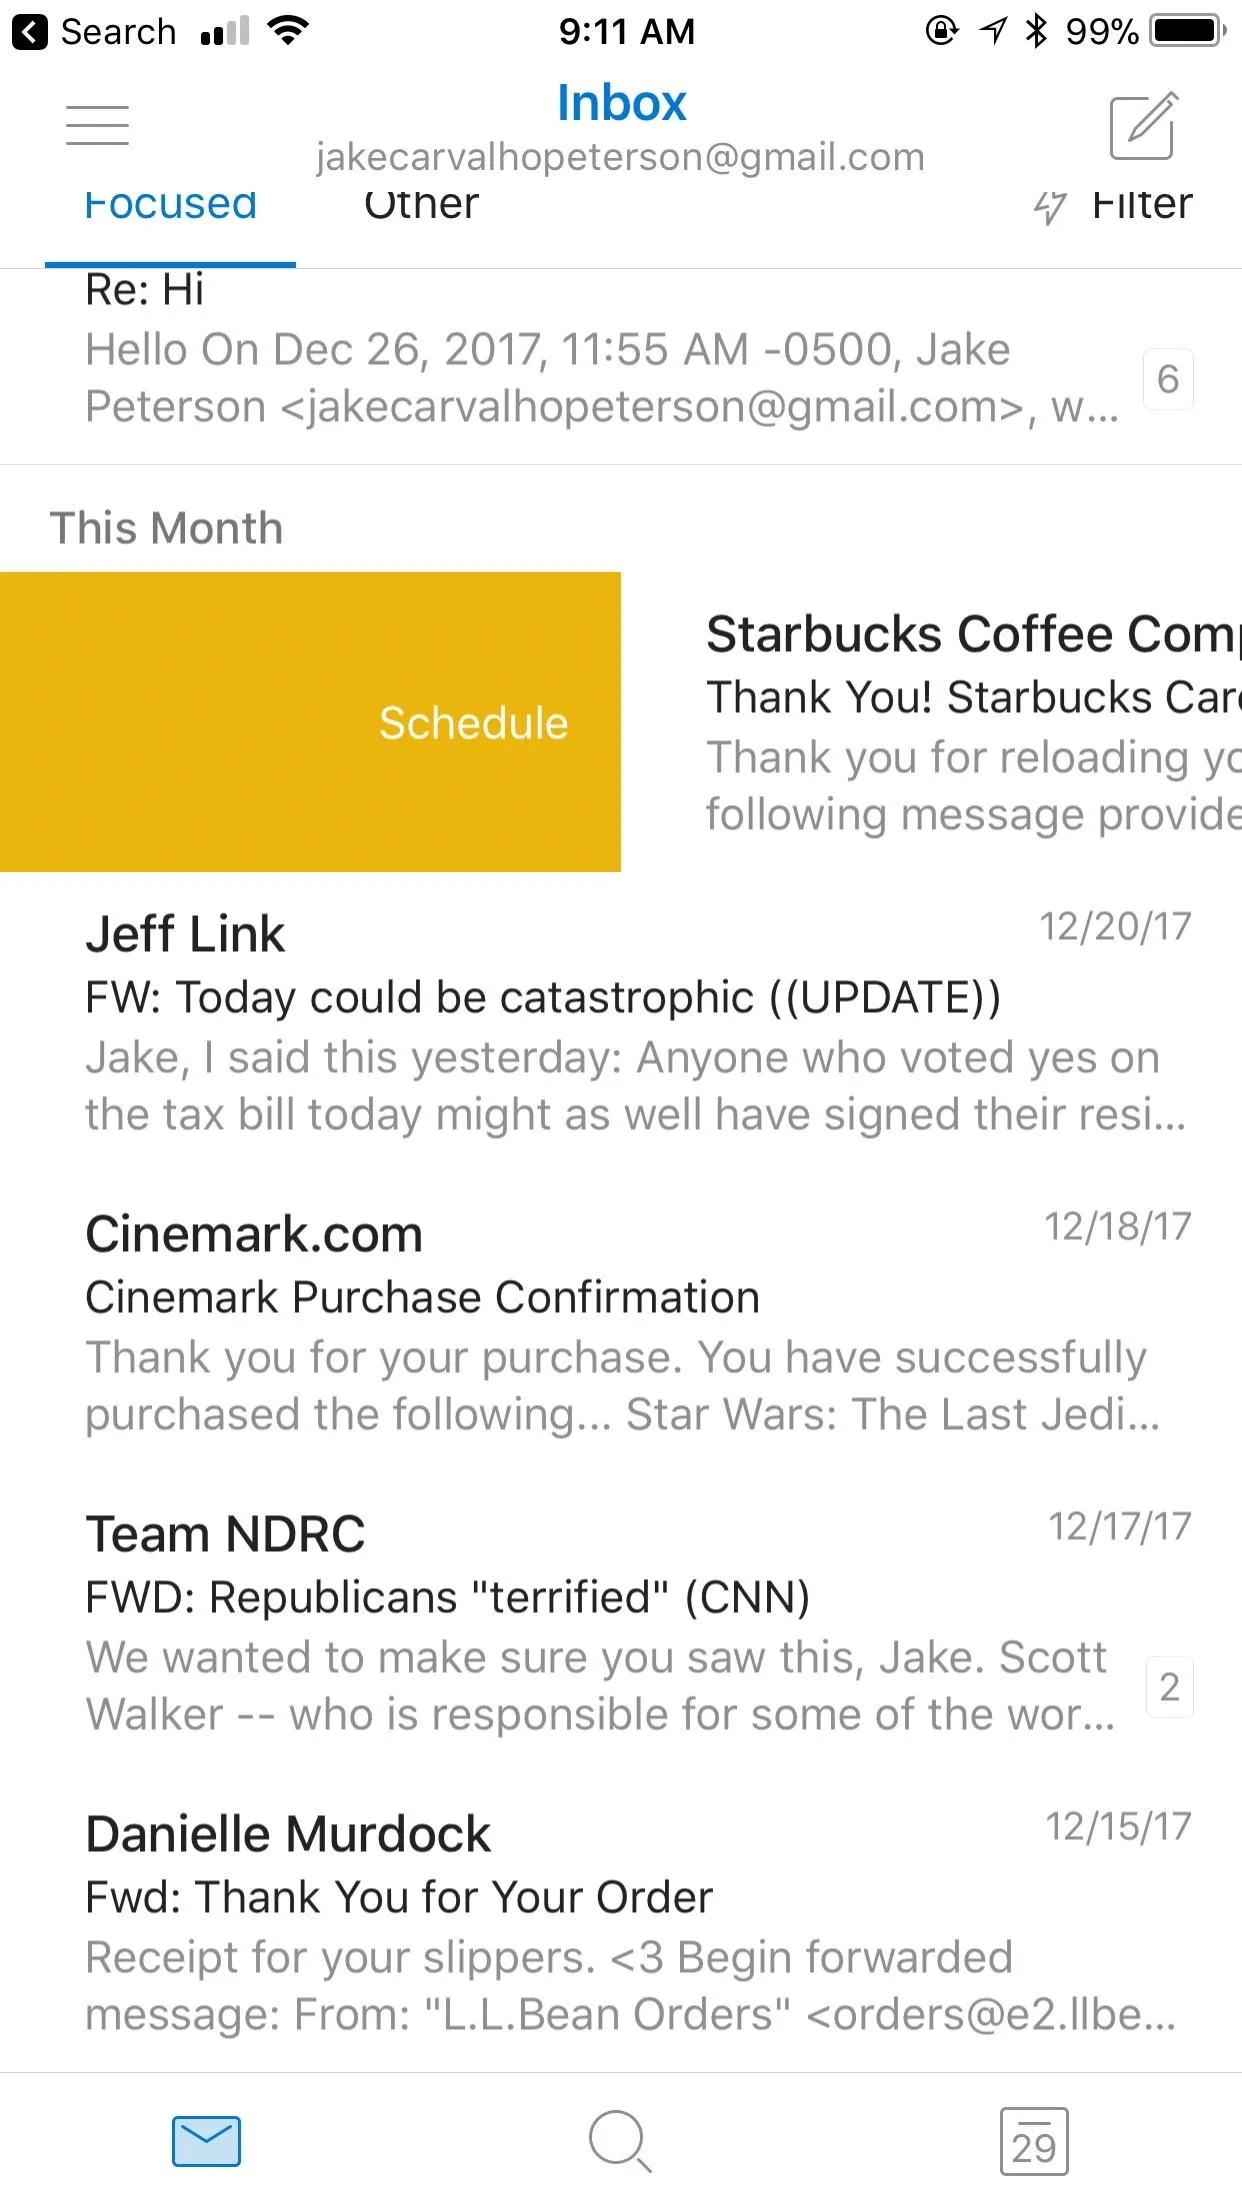
Right swipe.

Left swipe.

Right swipe.
If you aren't happy with your new choices and would prefer to return to the way things were from the start, simply head back to the "Swipe Options" settings page and tap "Reset to Default" at the bottom of the display. Which options did you go with? Let us know in the comment section below.
- Follow Gadget Hacks on Facebook, Twitter, YouTube, and Flipboard
- Follow WonderHowTo on Facebook, Twitter, Pinterest, and Flipboard
Cover image and screenshots by Jake Peterson/Gadget Hacks



Comments
No Comments Exist
Be the first, drop a comment!