The nemesis of music streamers is data caps, cell phone or otherwise. Restricting monthly data and forcing users to decide between quantity and quality of music has had audiophiles tearing their hair out since streaming toppled the iPod. While the problem regarding music quality seems difficult to tackle, it's far from impossible.
Google Play Music has a number of features integrated that can help preserve your precious monthly data cap. It does so by using your phone's spare storage as a resource, automatically creating a cache of songs you frequently listen to — even letting you download albums, playlists, and radio stations.
Step 1: Go to the Music Quality Settings
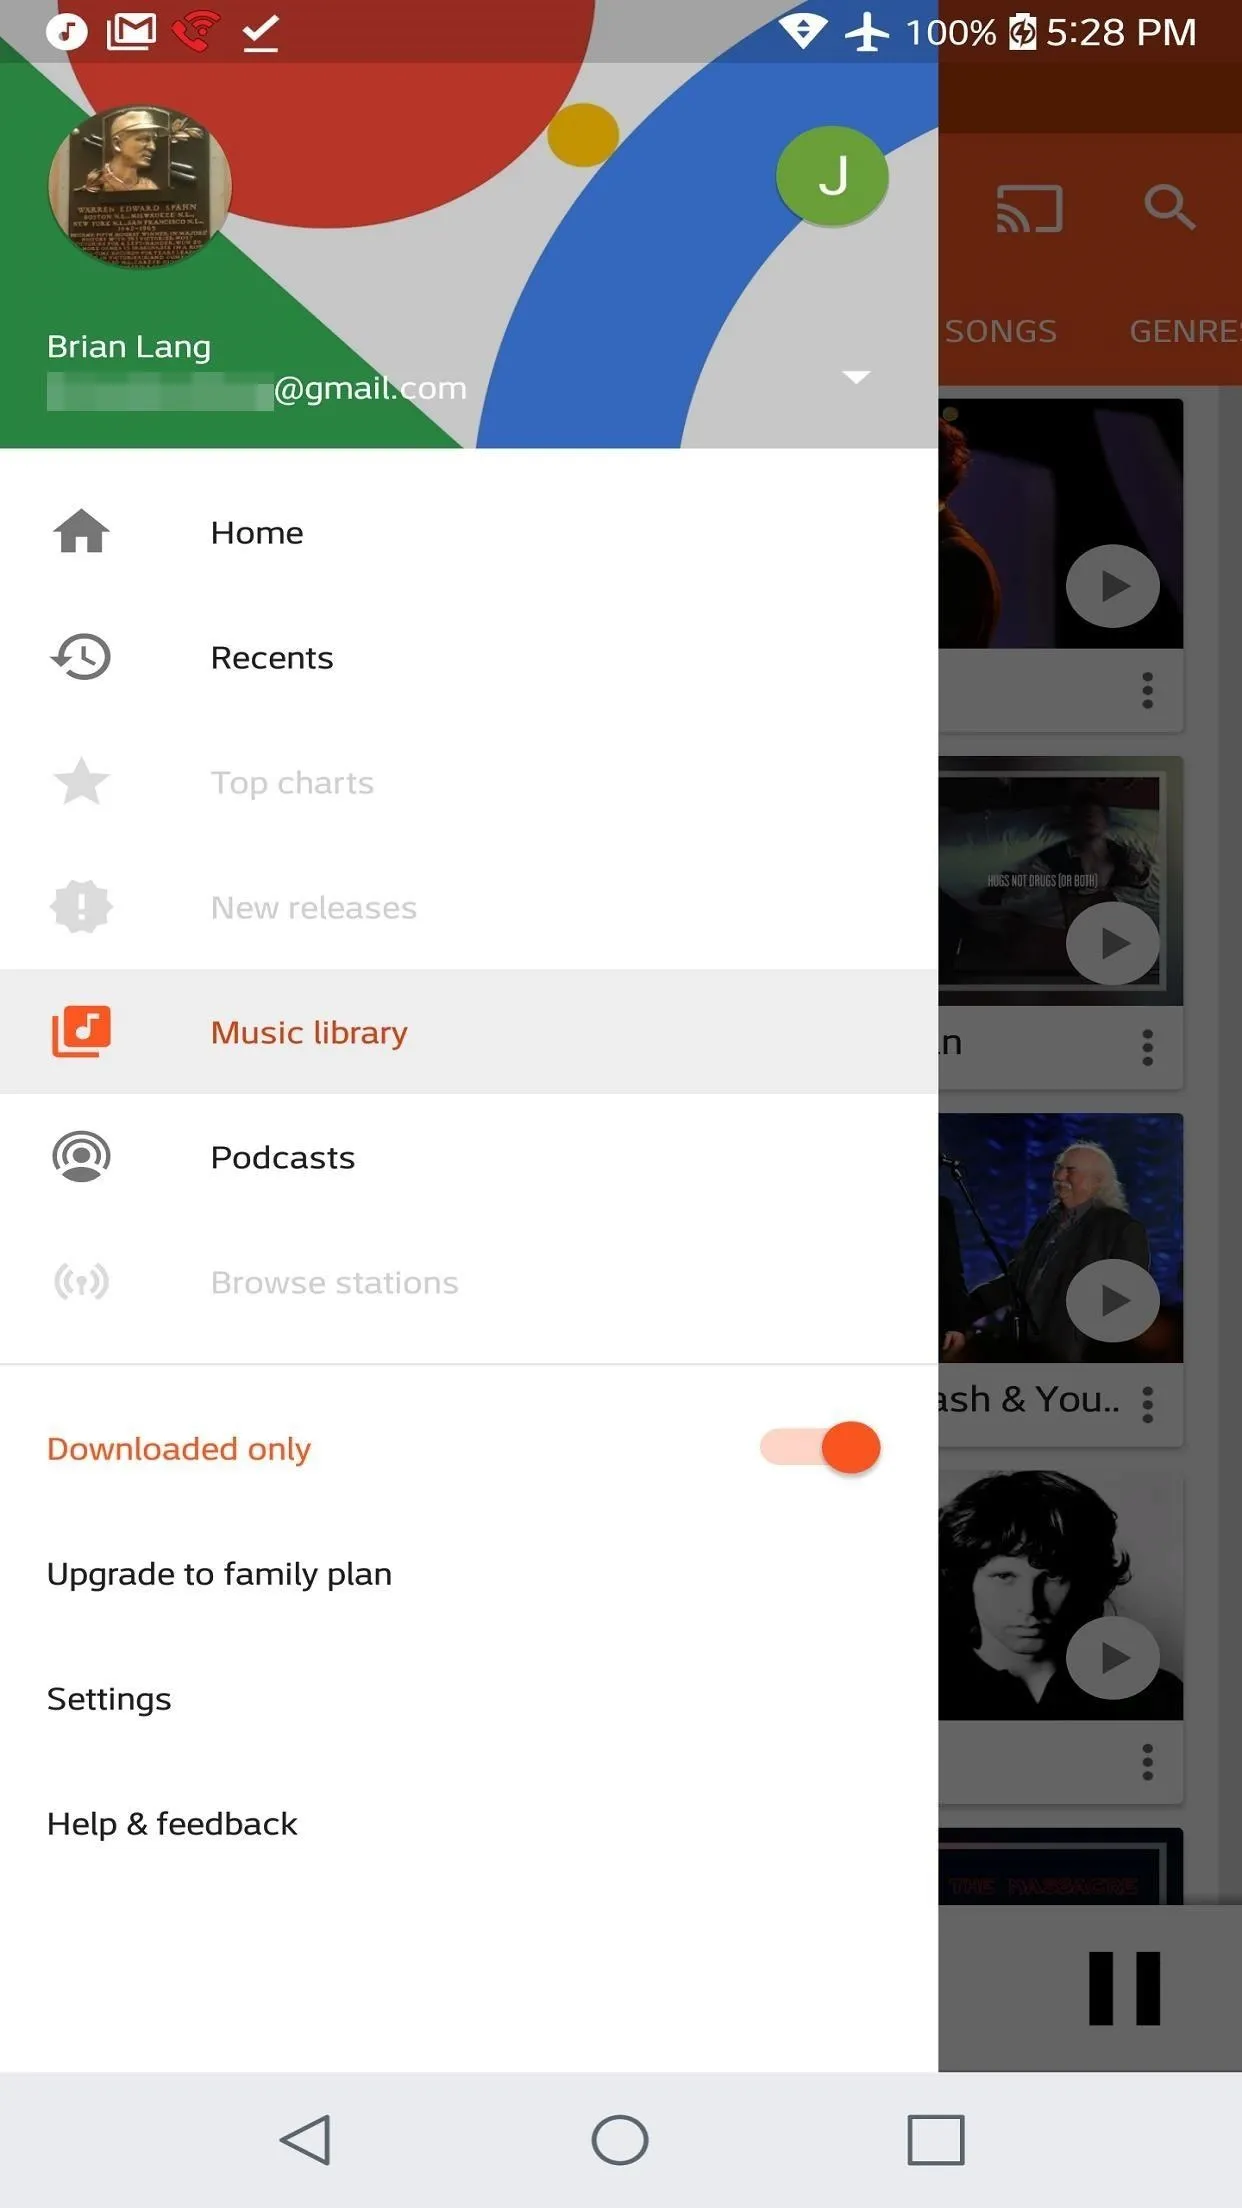
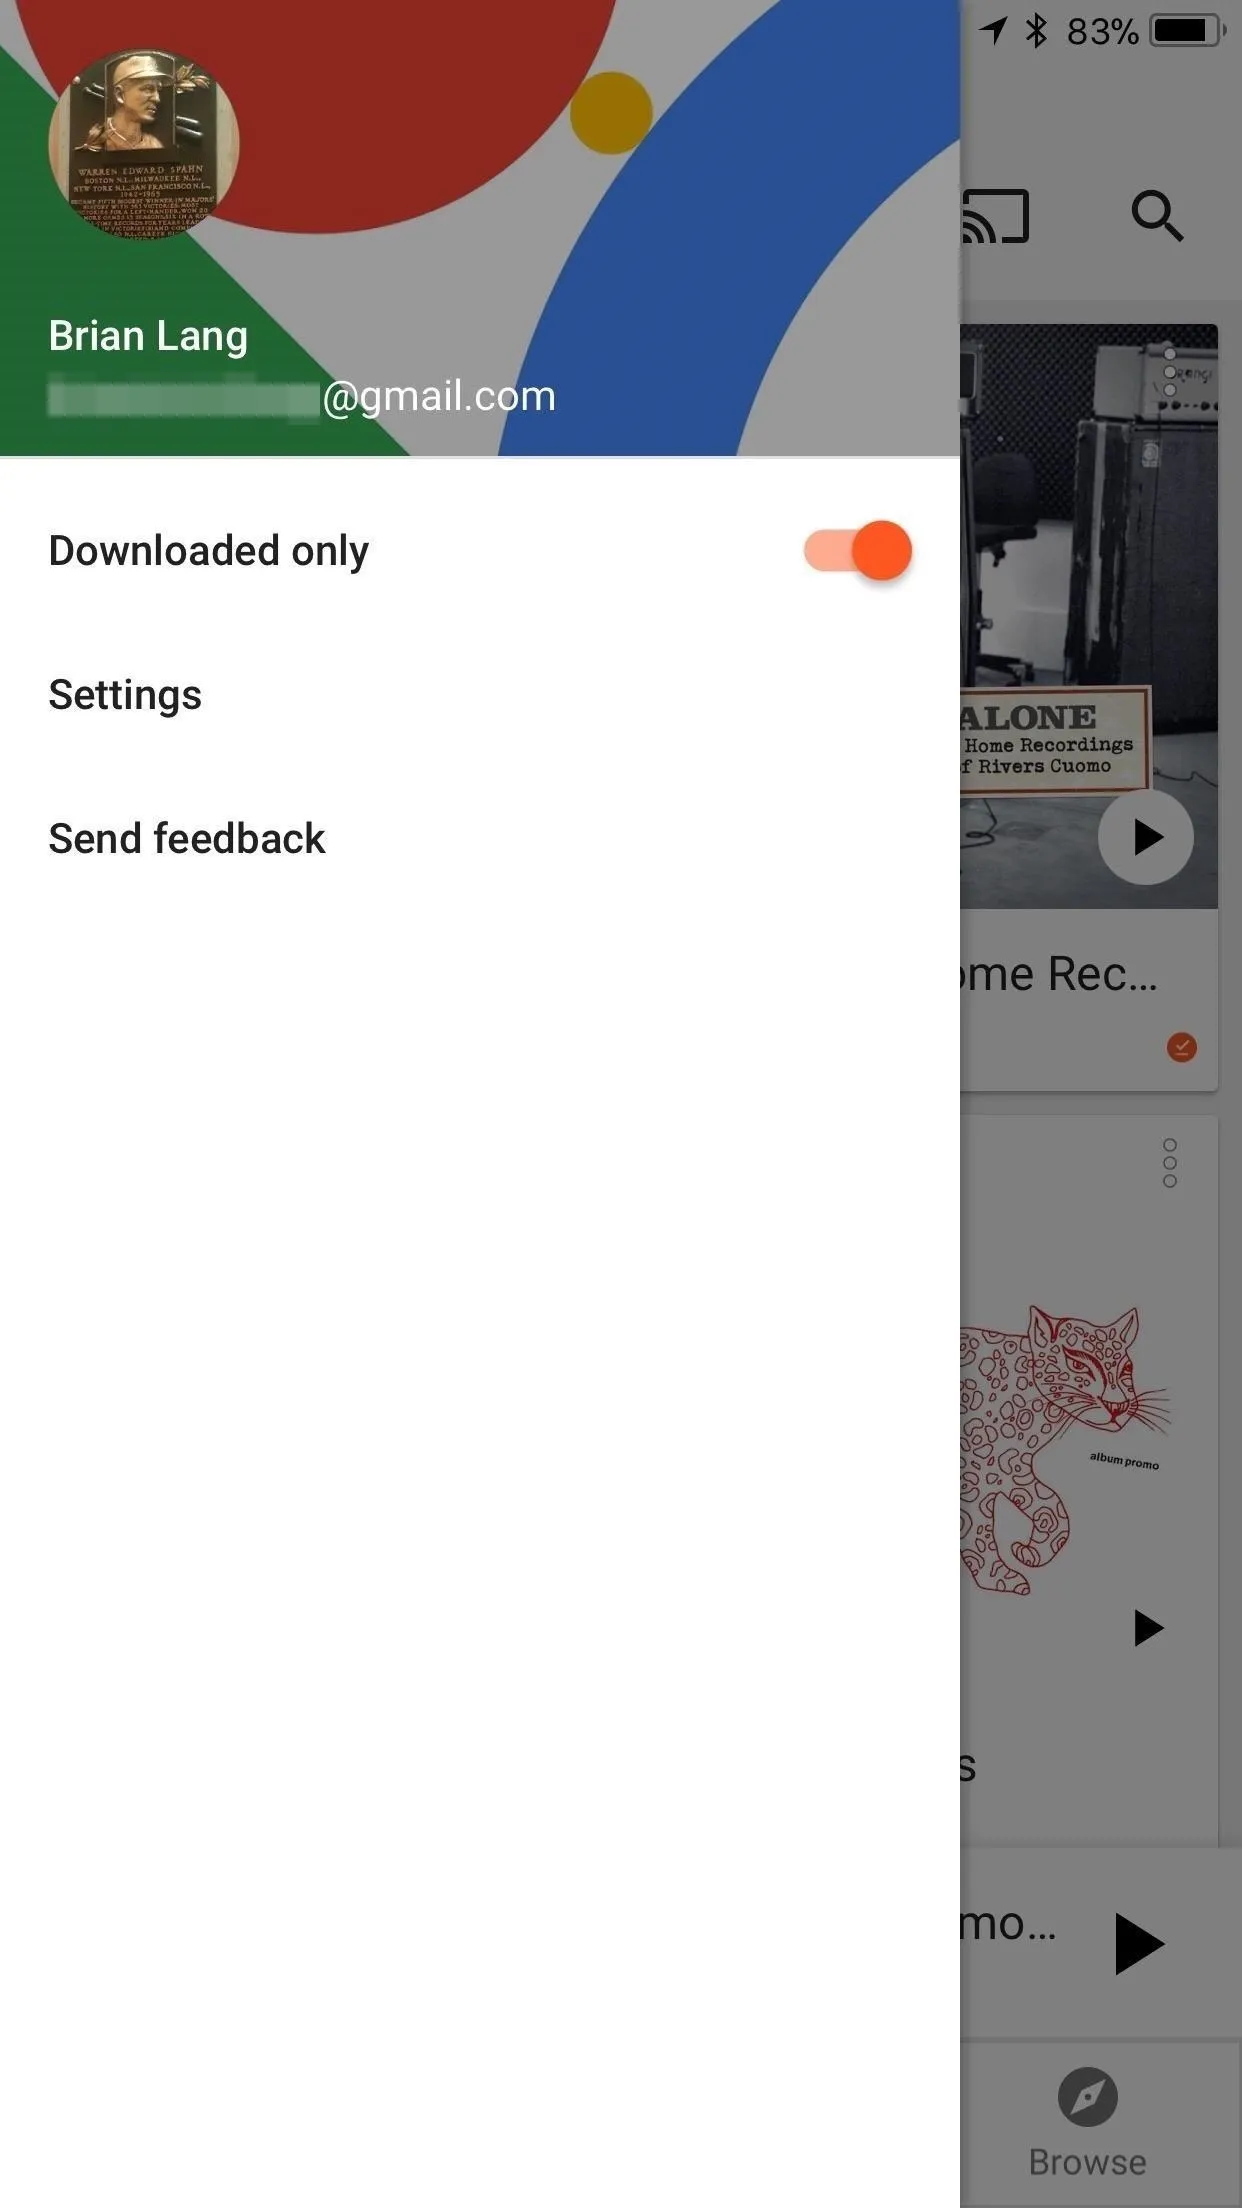
On both iOS and Android, tap the hamburger menu in the top-left corner. Then, tap "Settings" to get started.
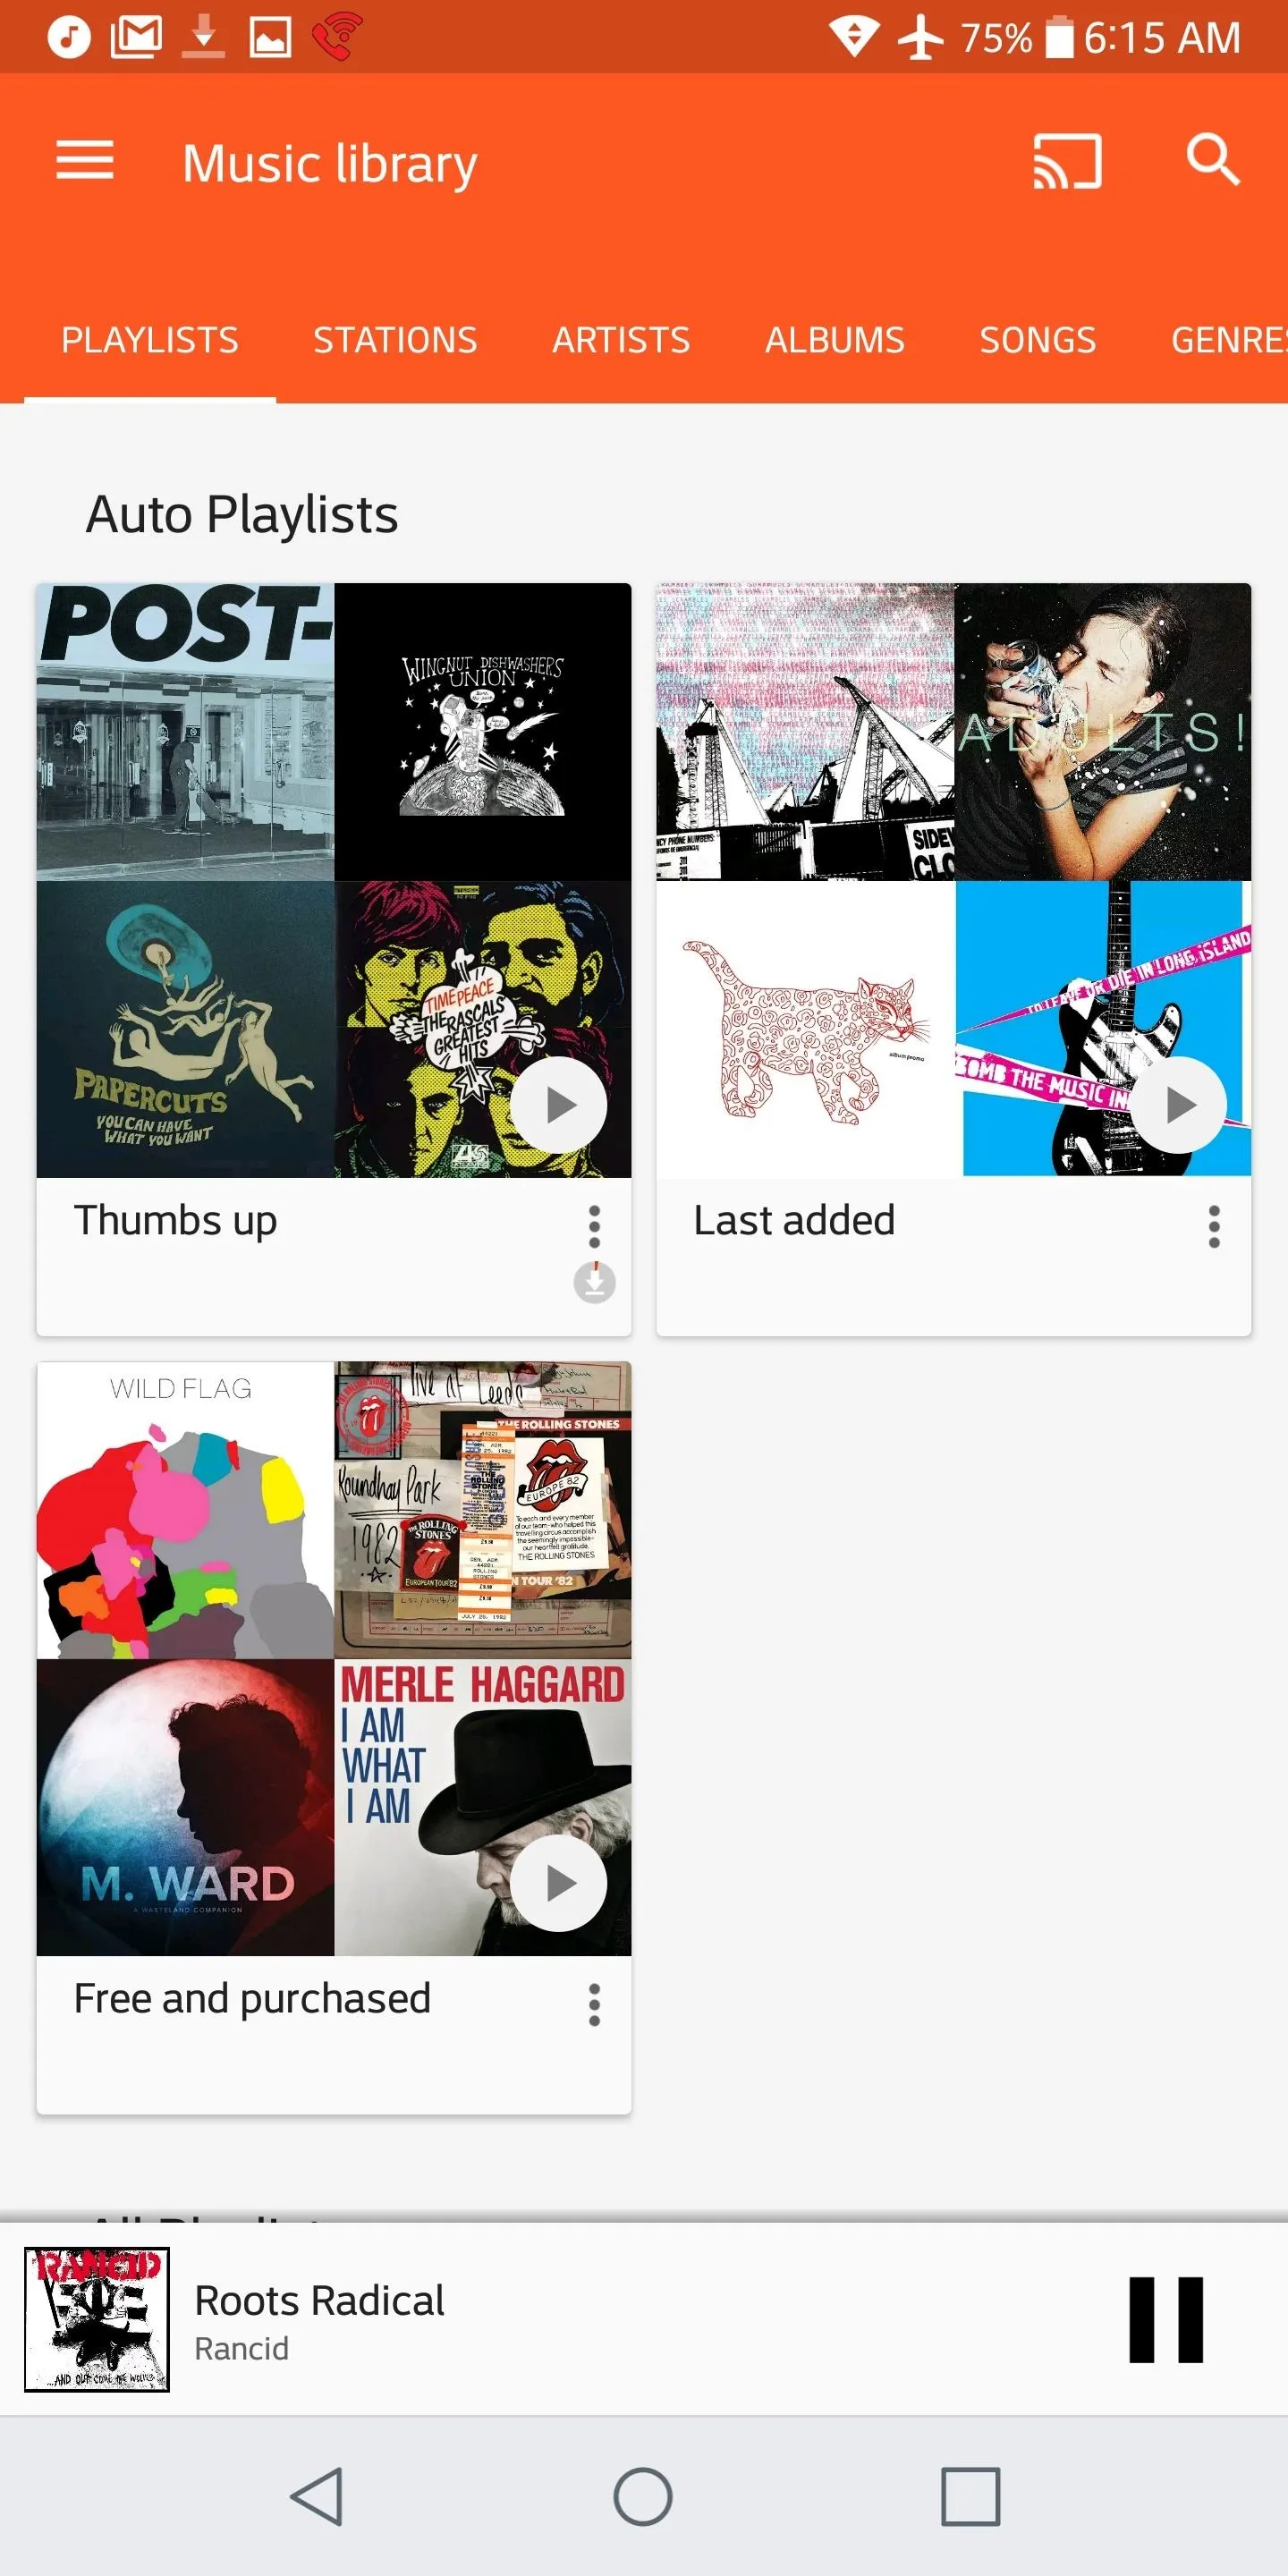
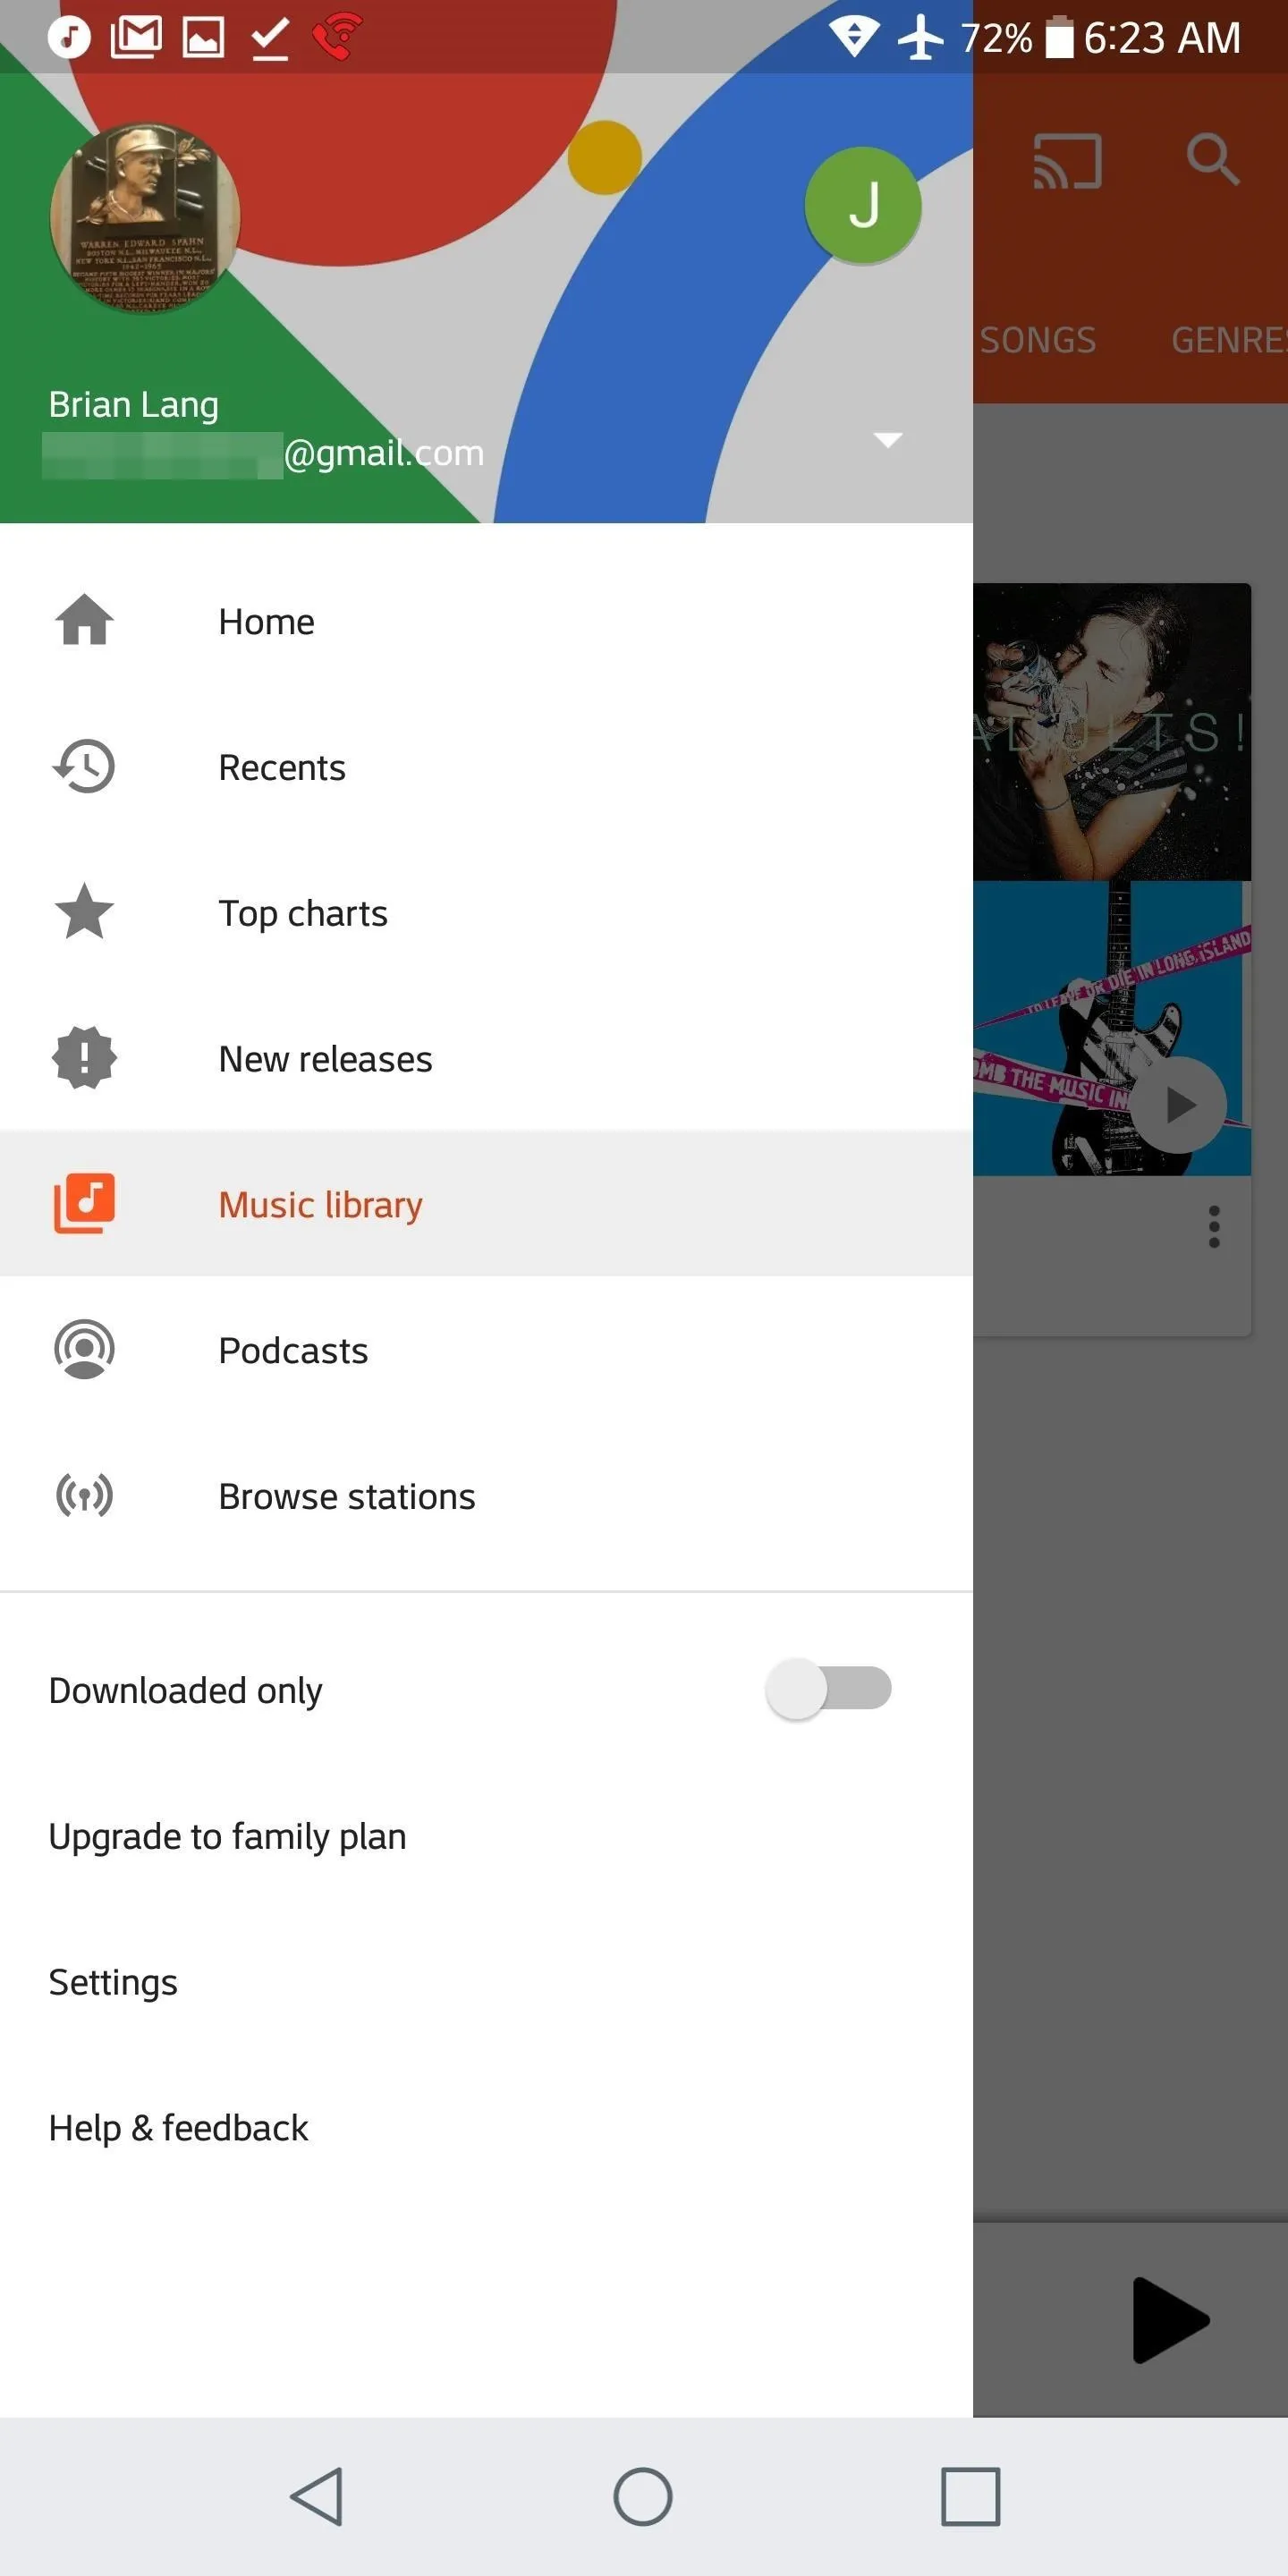


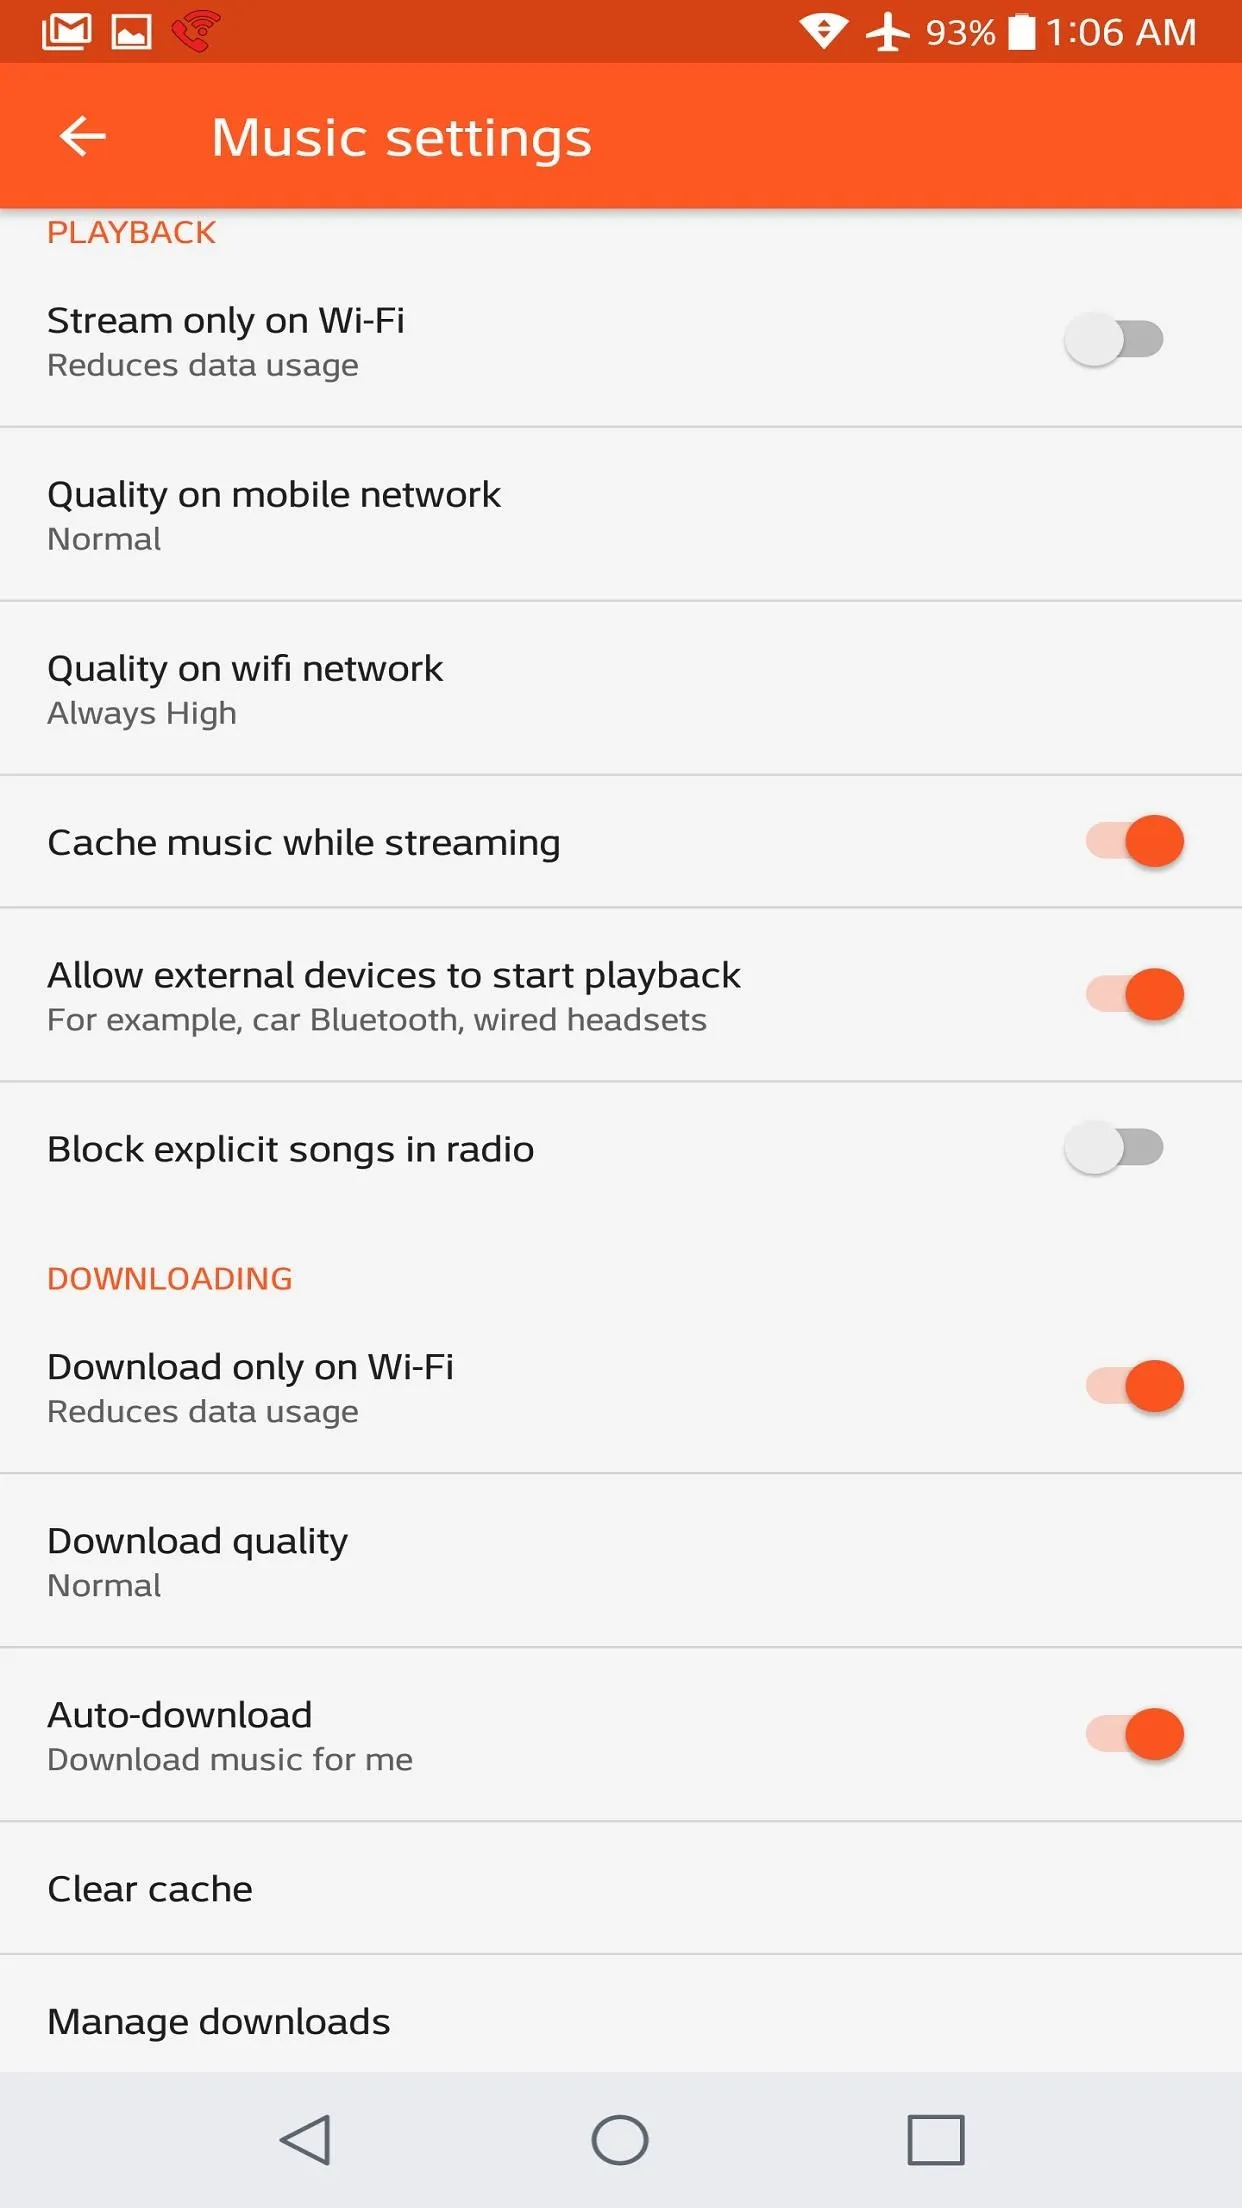
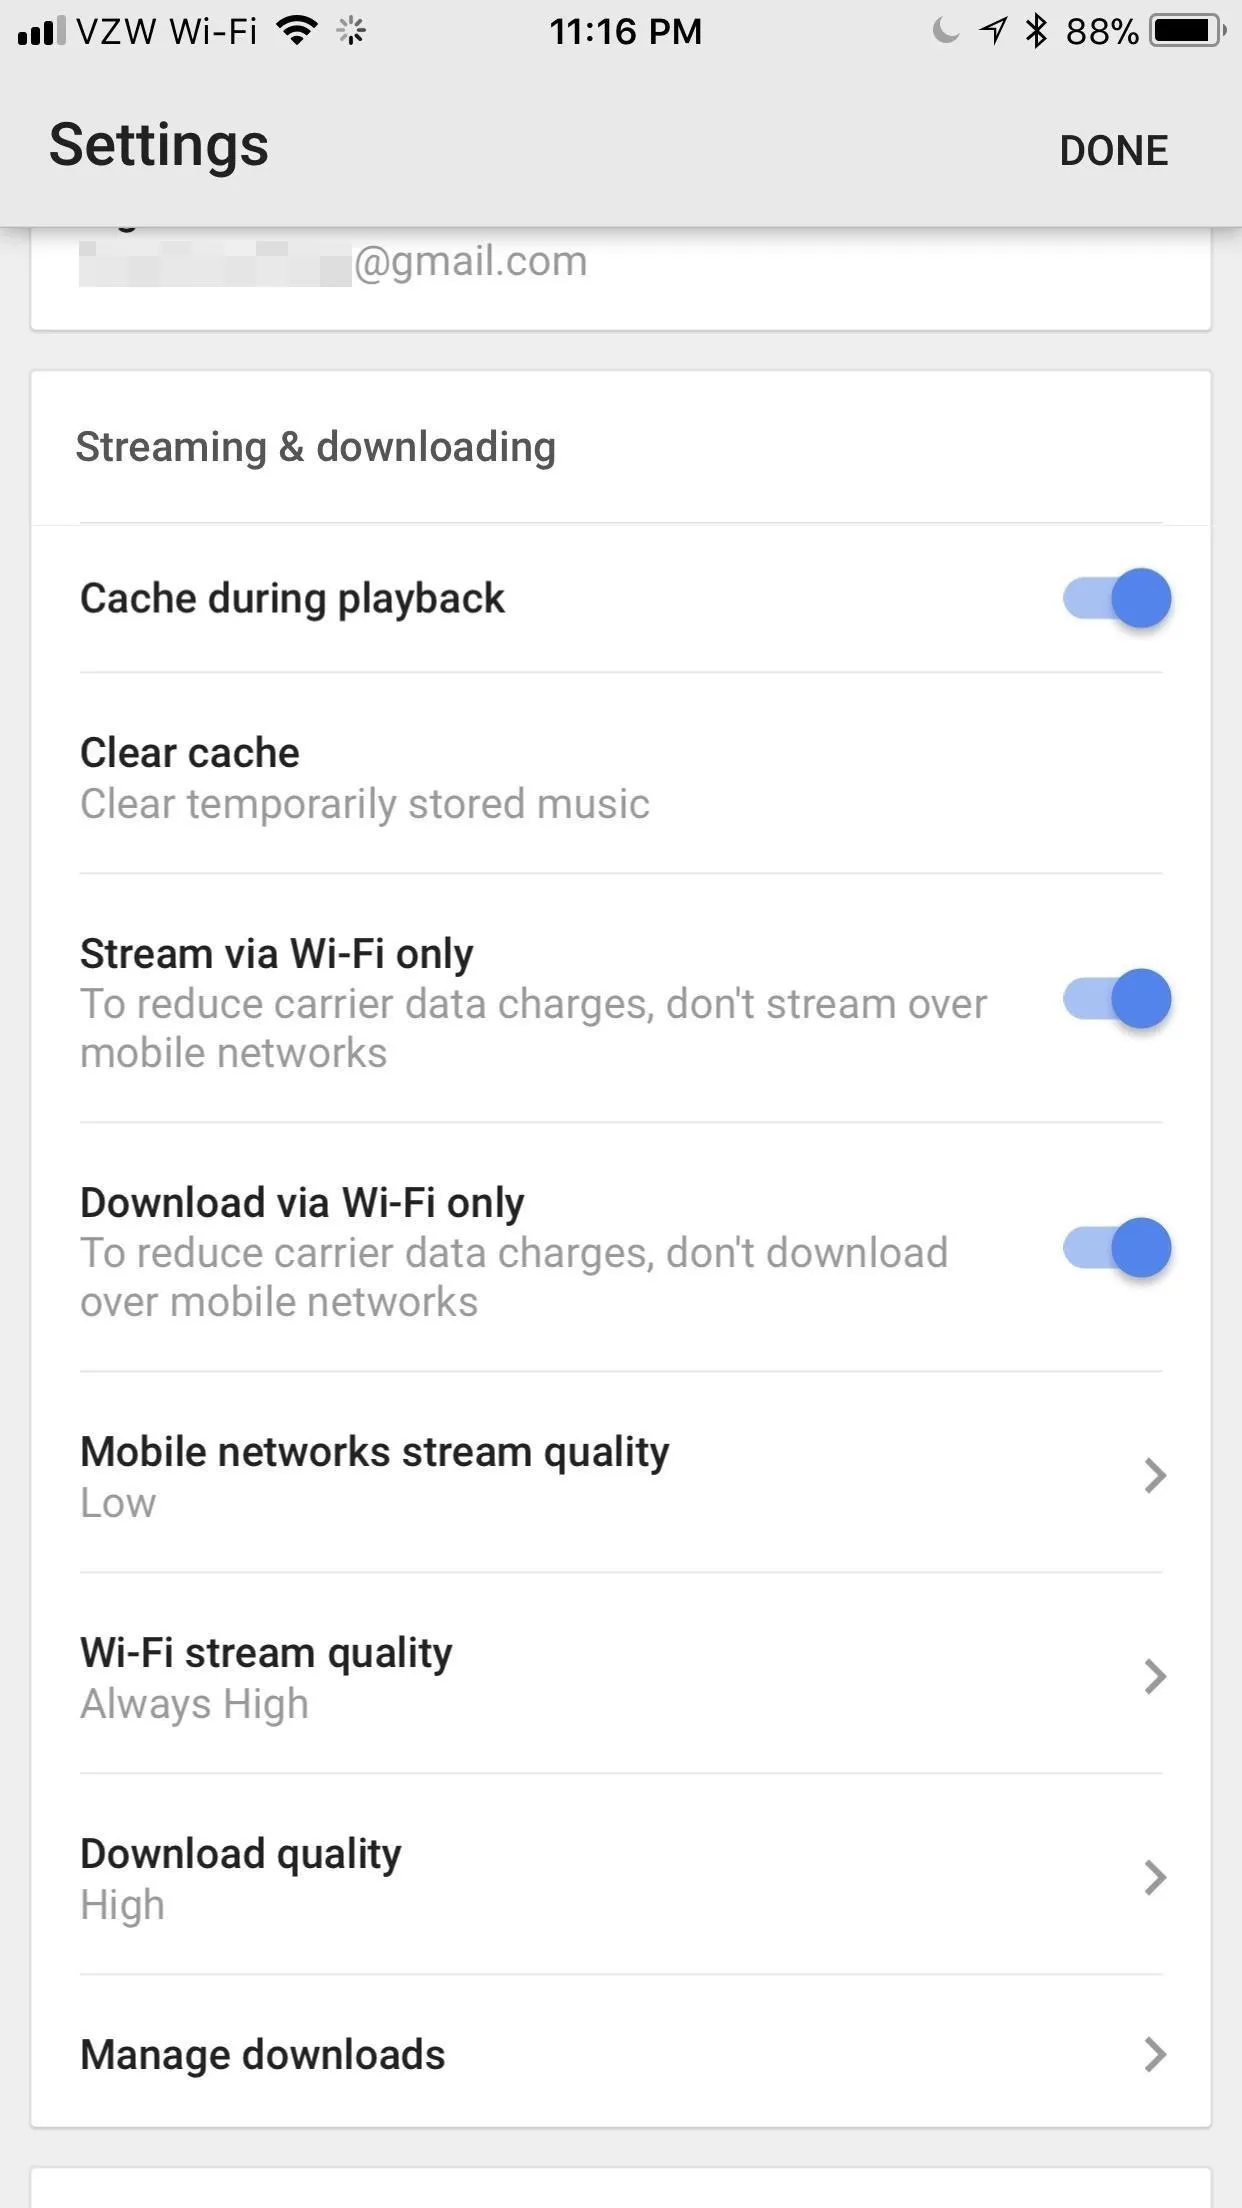
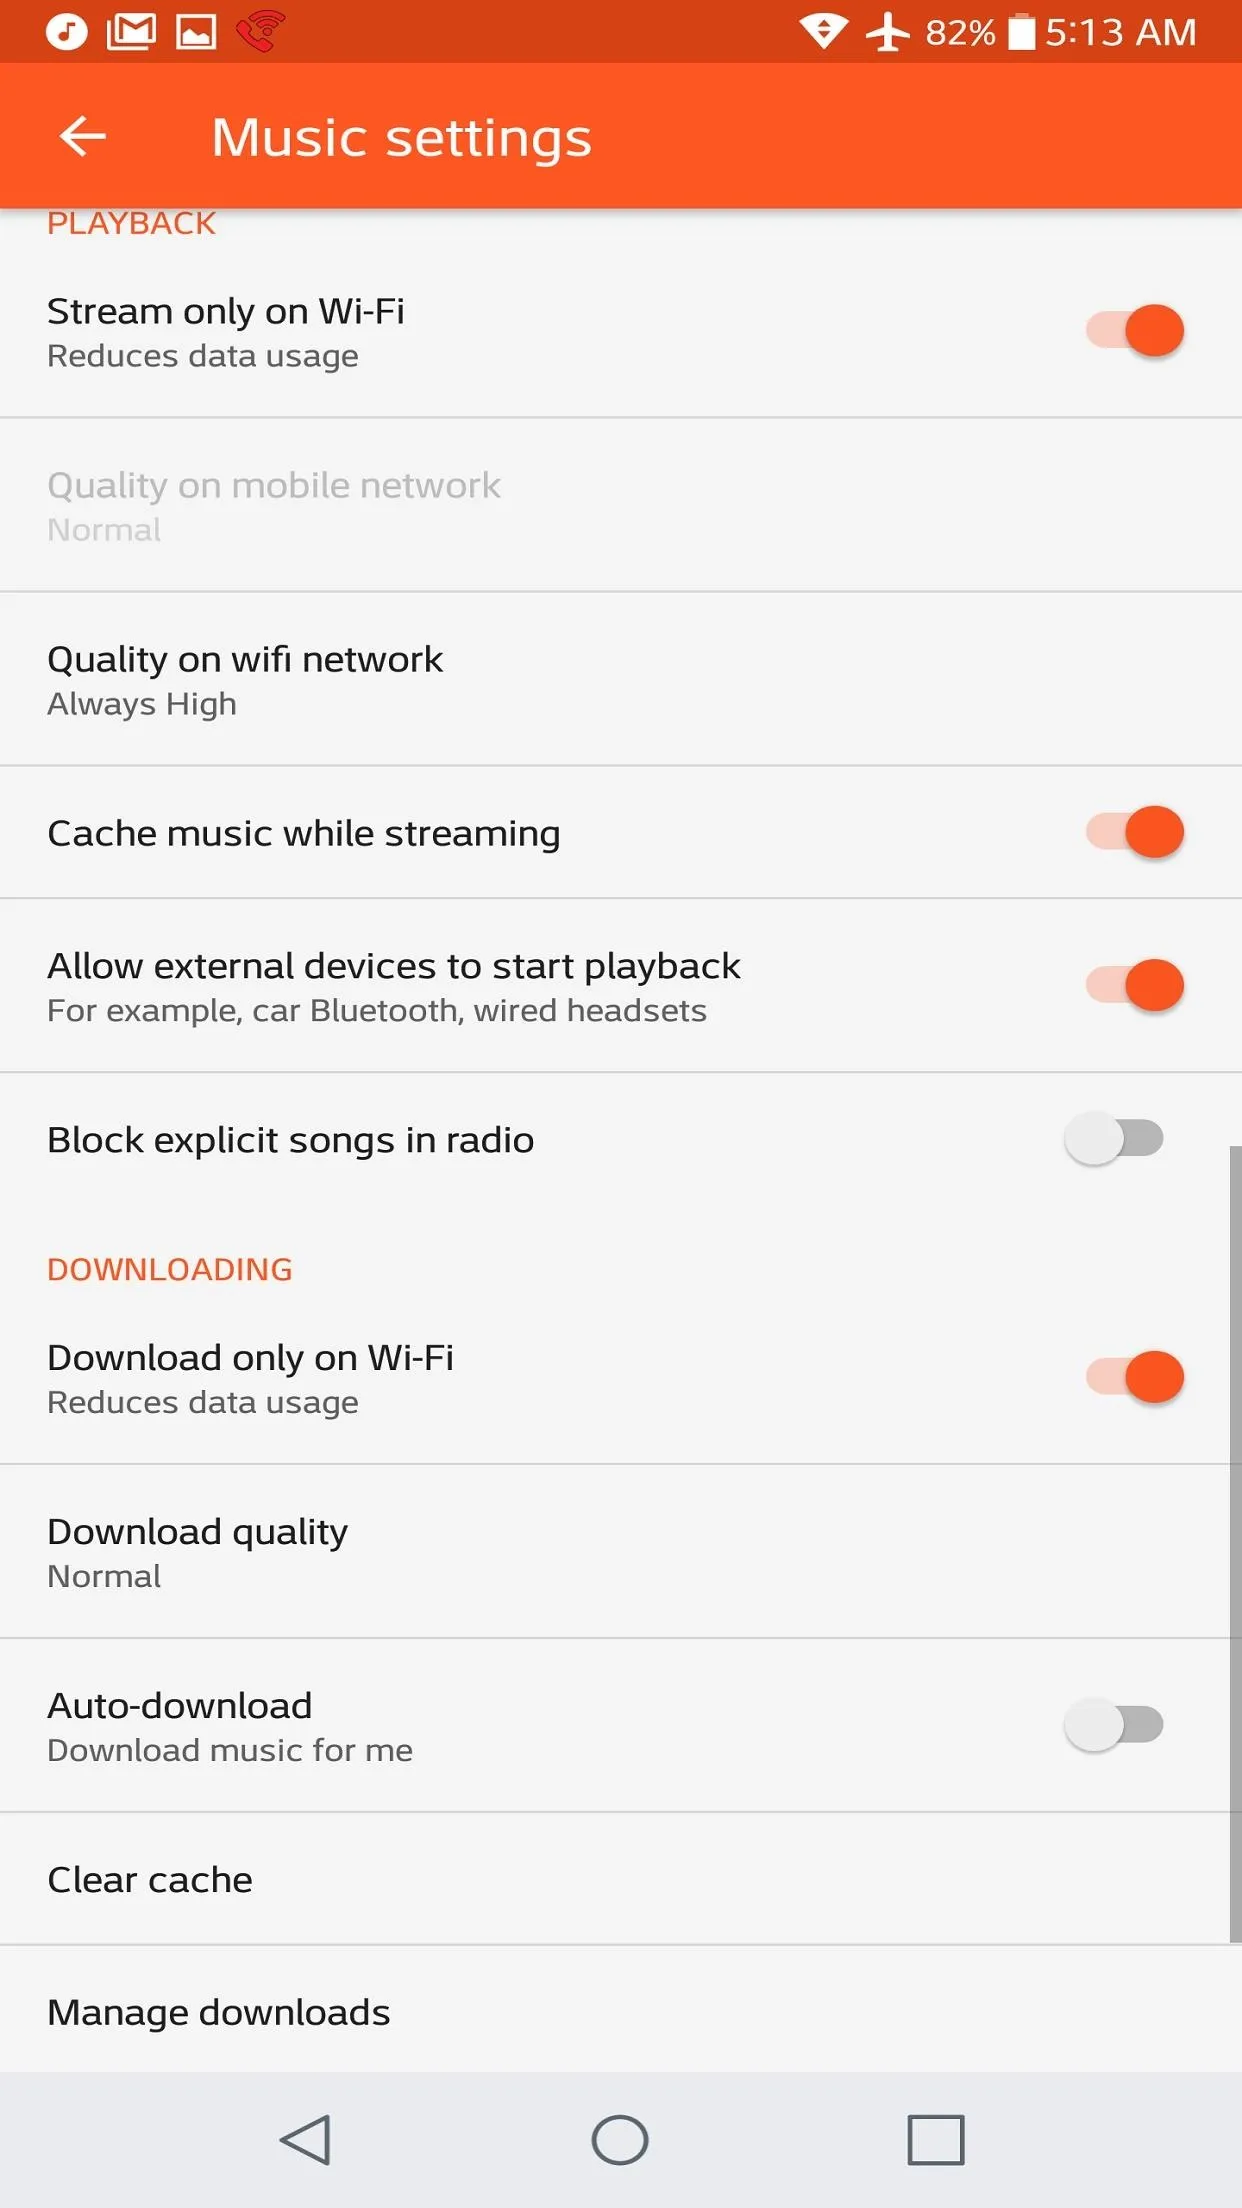
The relevant settings on Android are under the Playback and Downloading headers. On iOS, they're housed in Streaming & Downloading. For the most part, these settings are synonymous across the two platforms. There are a couple exceptions, but I won't talk about them until they come up. For the purpose of this guide, I'm going to follow the lead of Android's settings, as they already break everything up nicely.


Step 2: Adjust Wi-Fi Streaming Settings
As previously, mentioned, the settings that I'm going to bring up here can be found in Playback on Android, and Streaming & Downloading on iOS. The first item, "Stream only on Wi-Fi," ("Stream via Wi-Fi only" on iOS) should only be checked if you're really tight on data, as it prevents any streaming on mobile data. If you're on an especially stingy mobile plan, this is a perfectly reasonable way to make sure you stay within your limit.
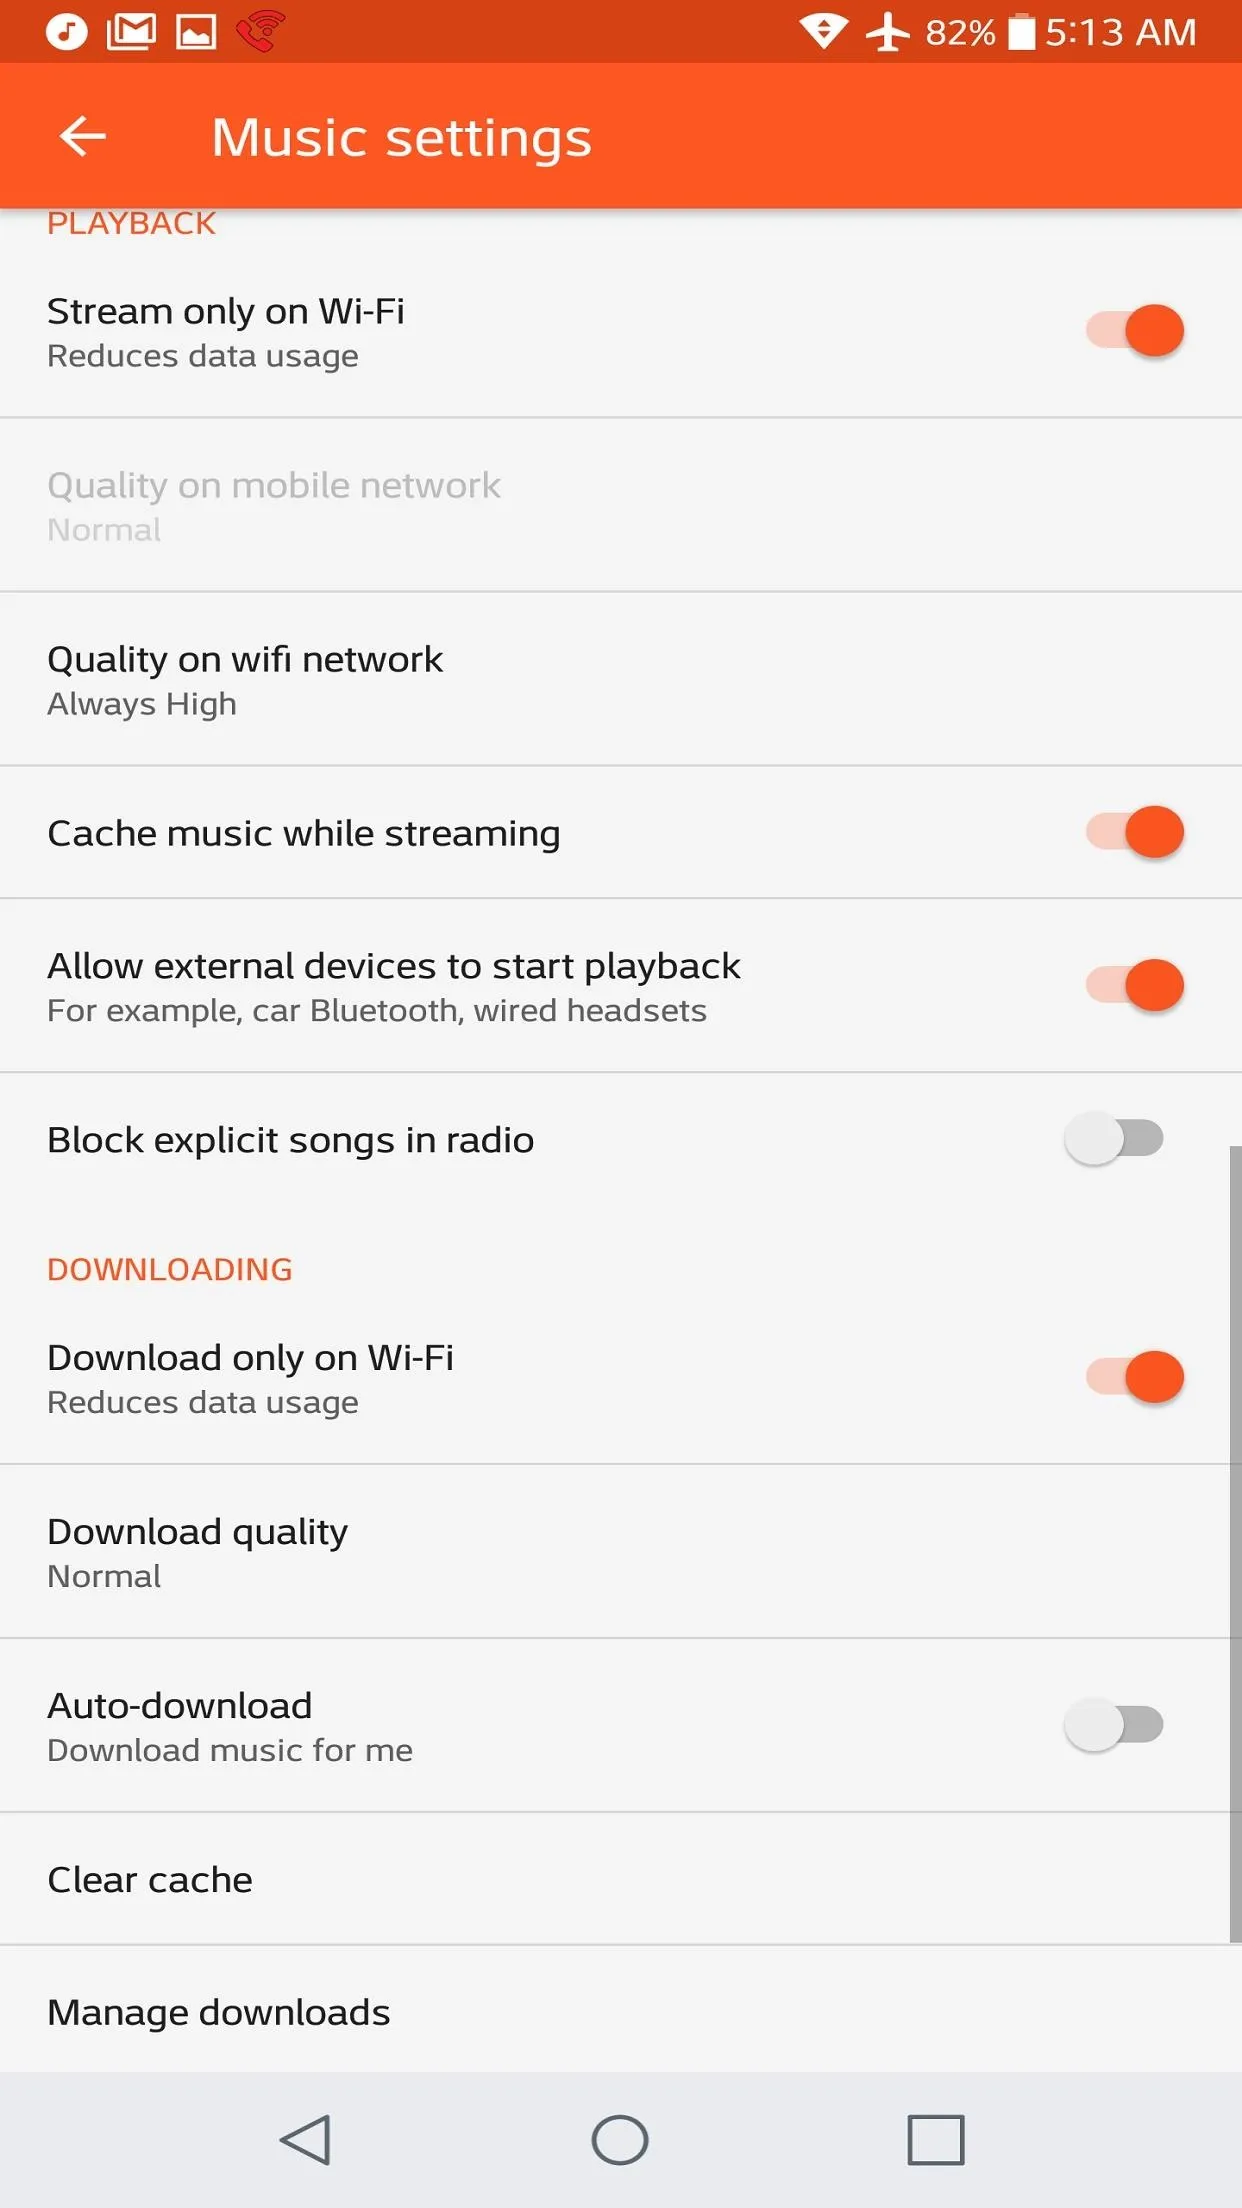
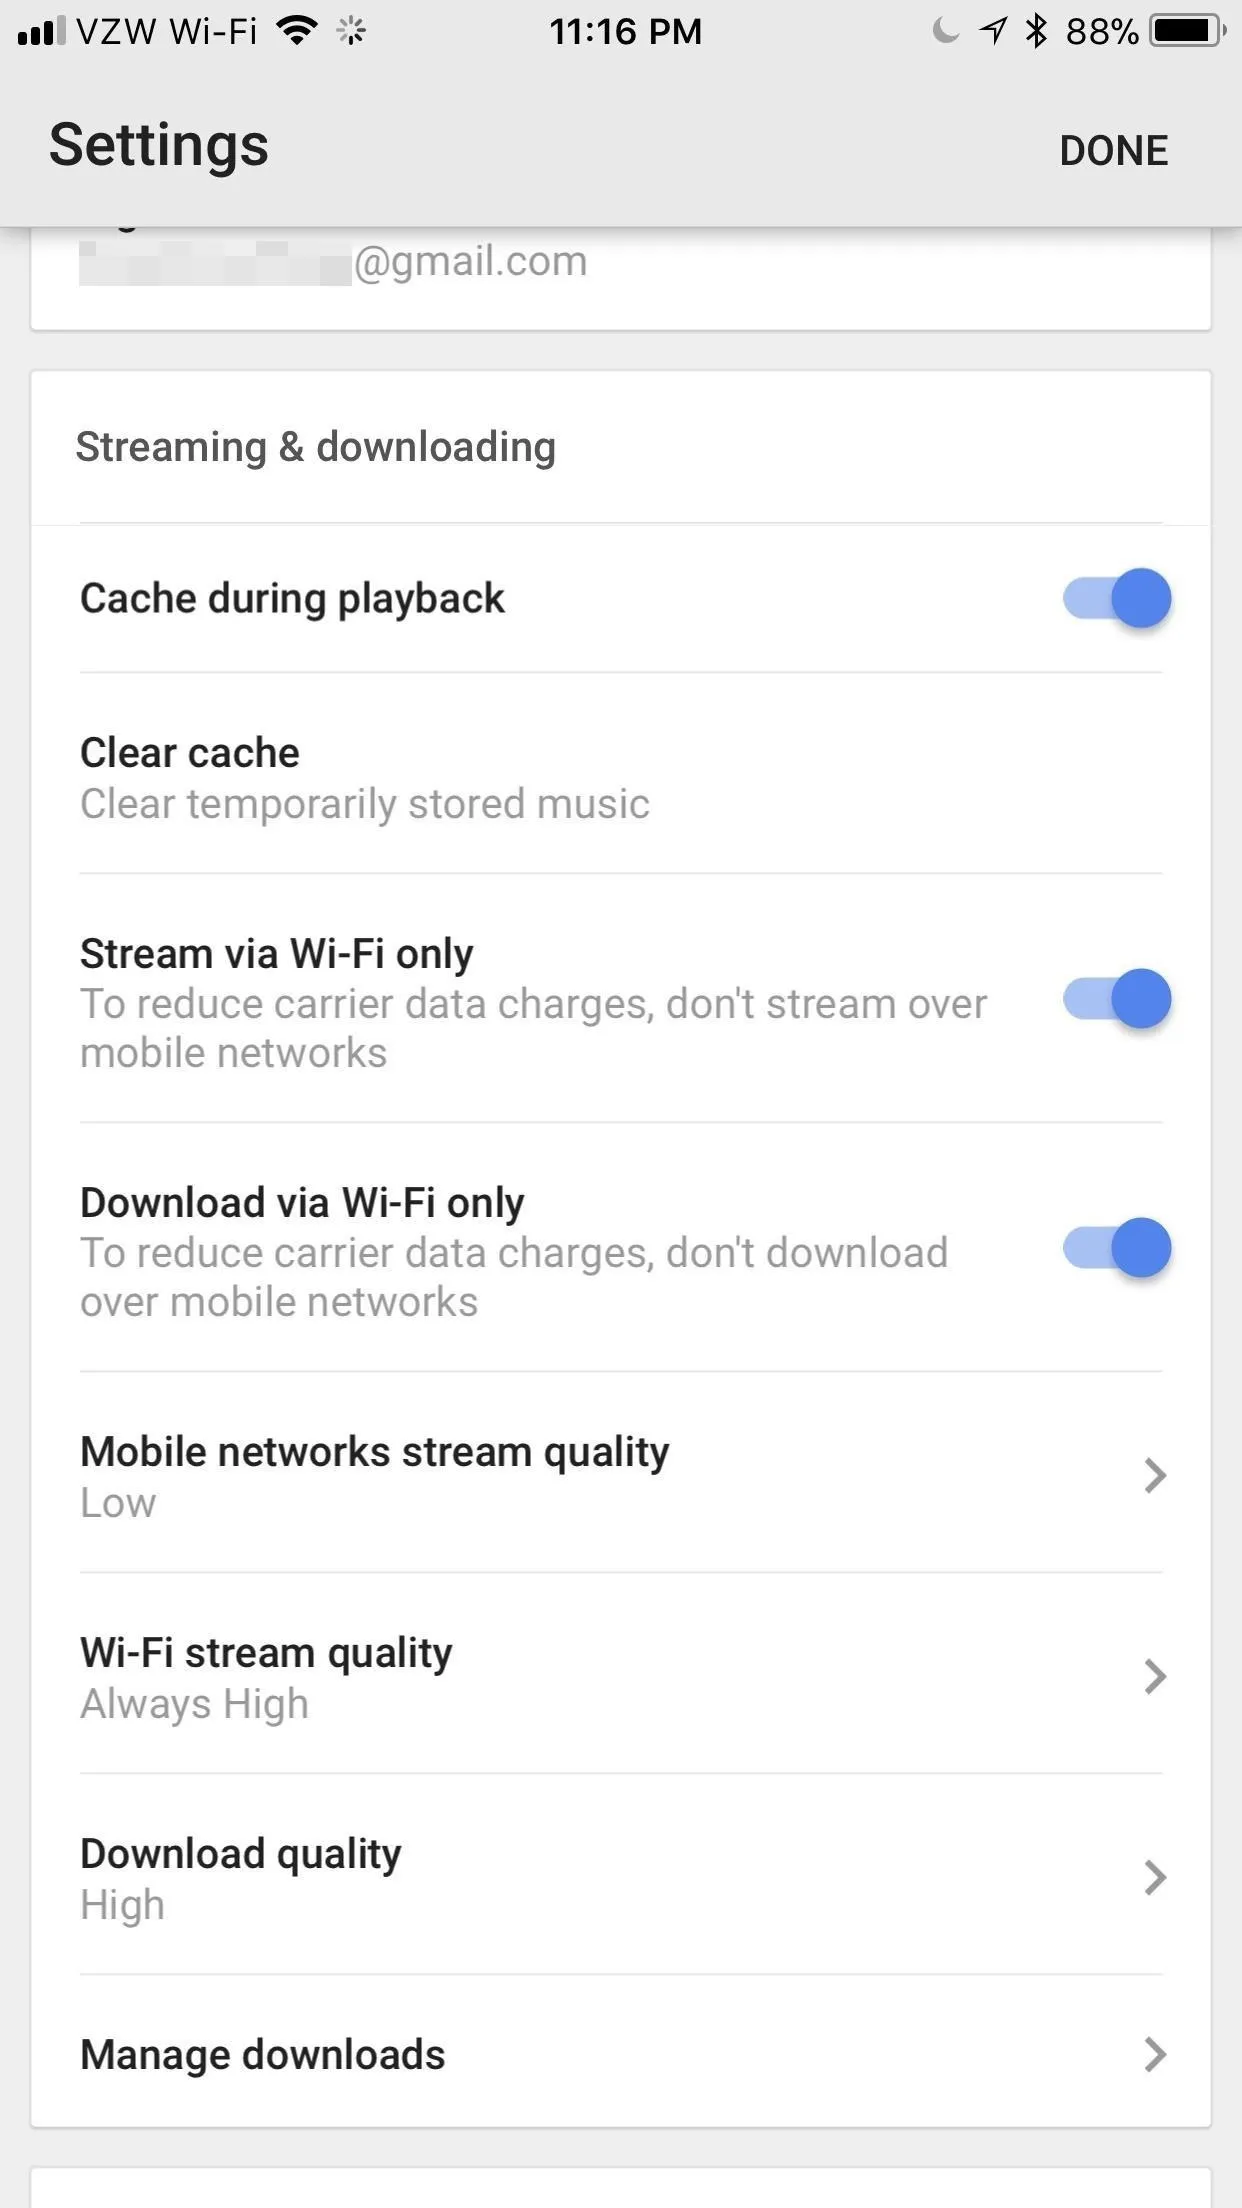


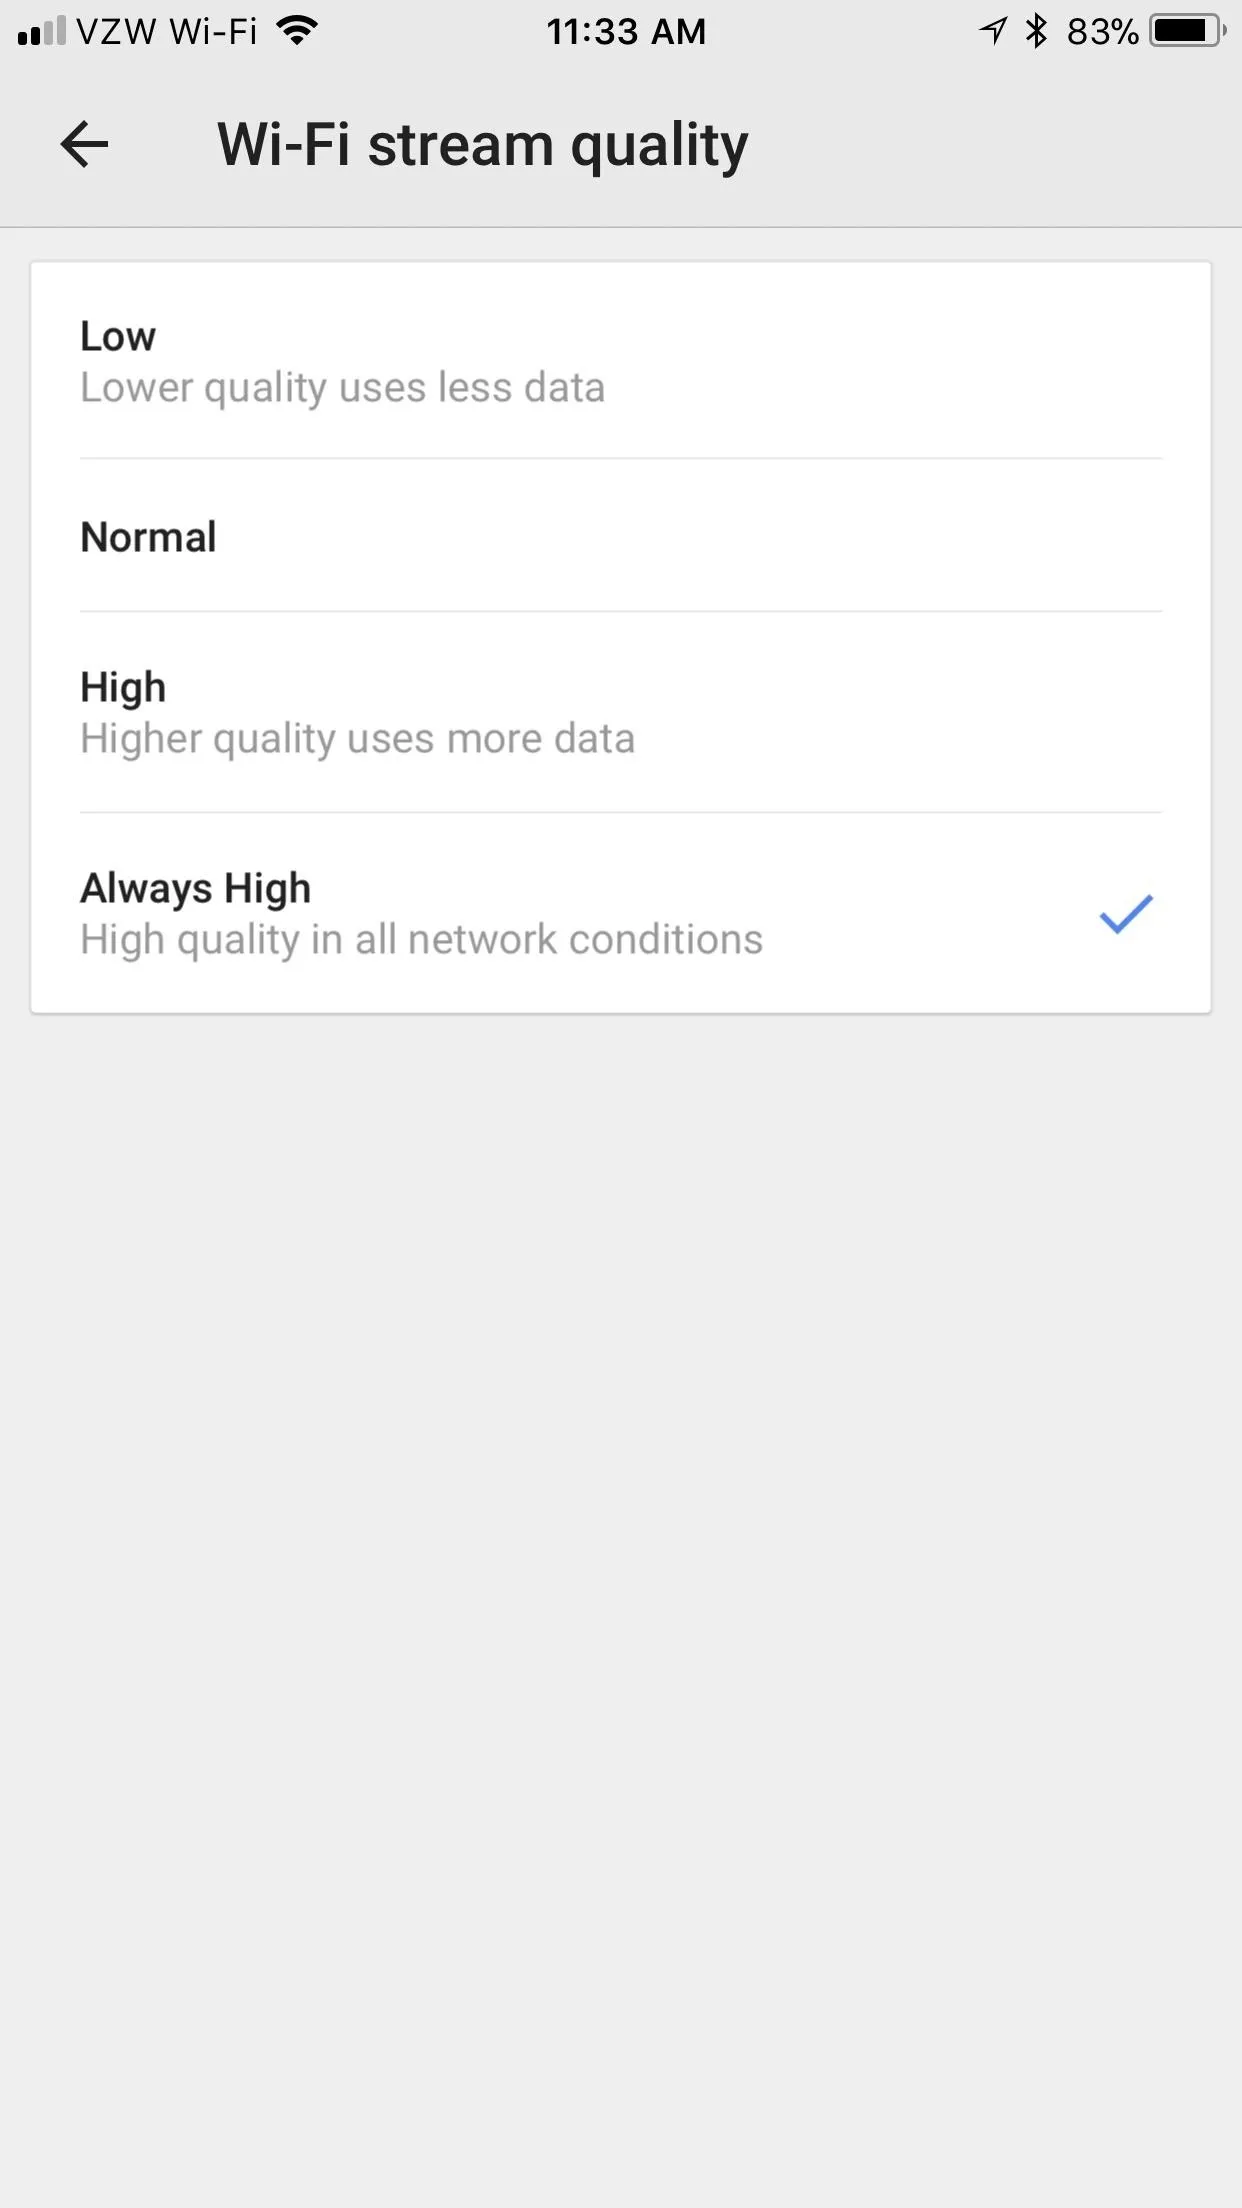
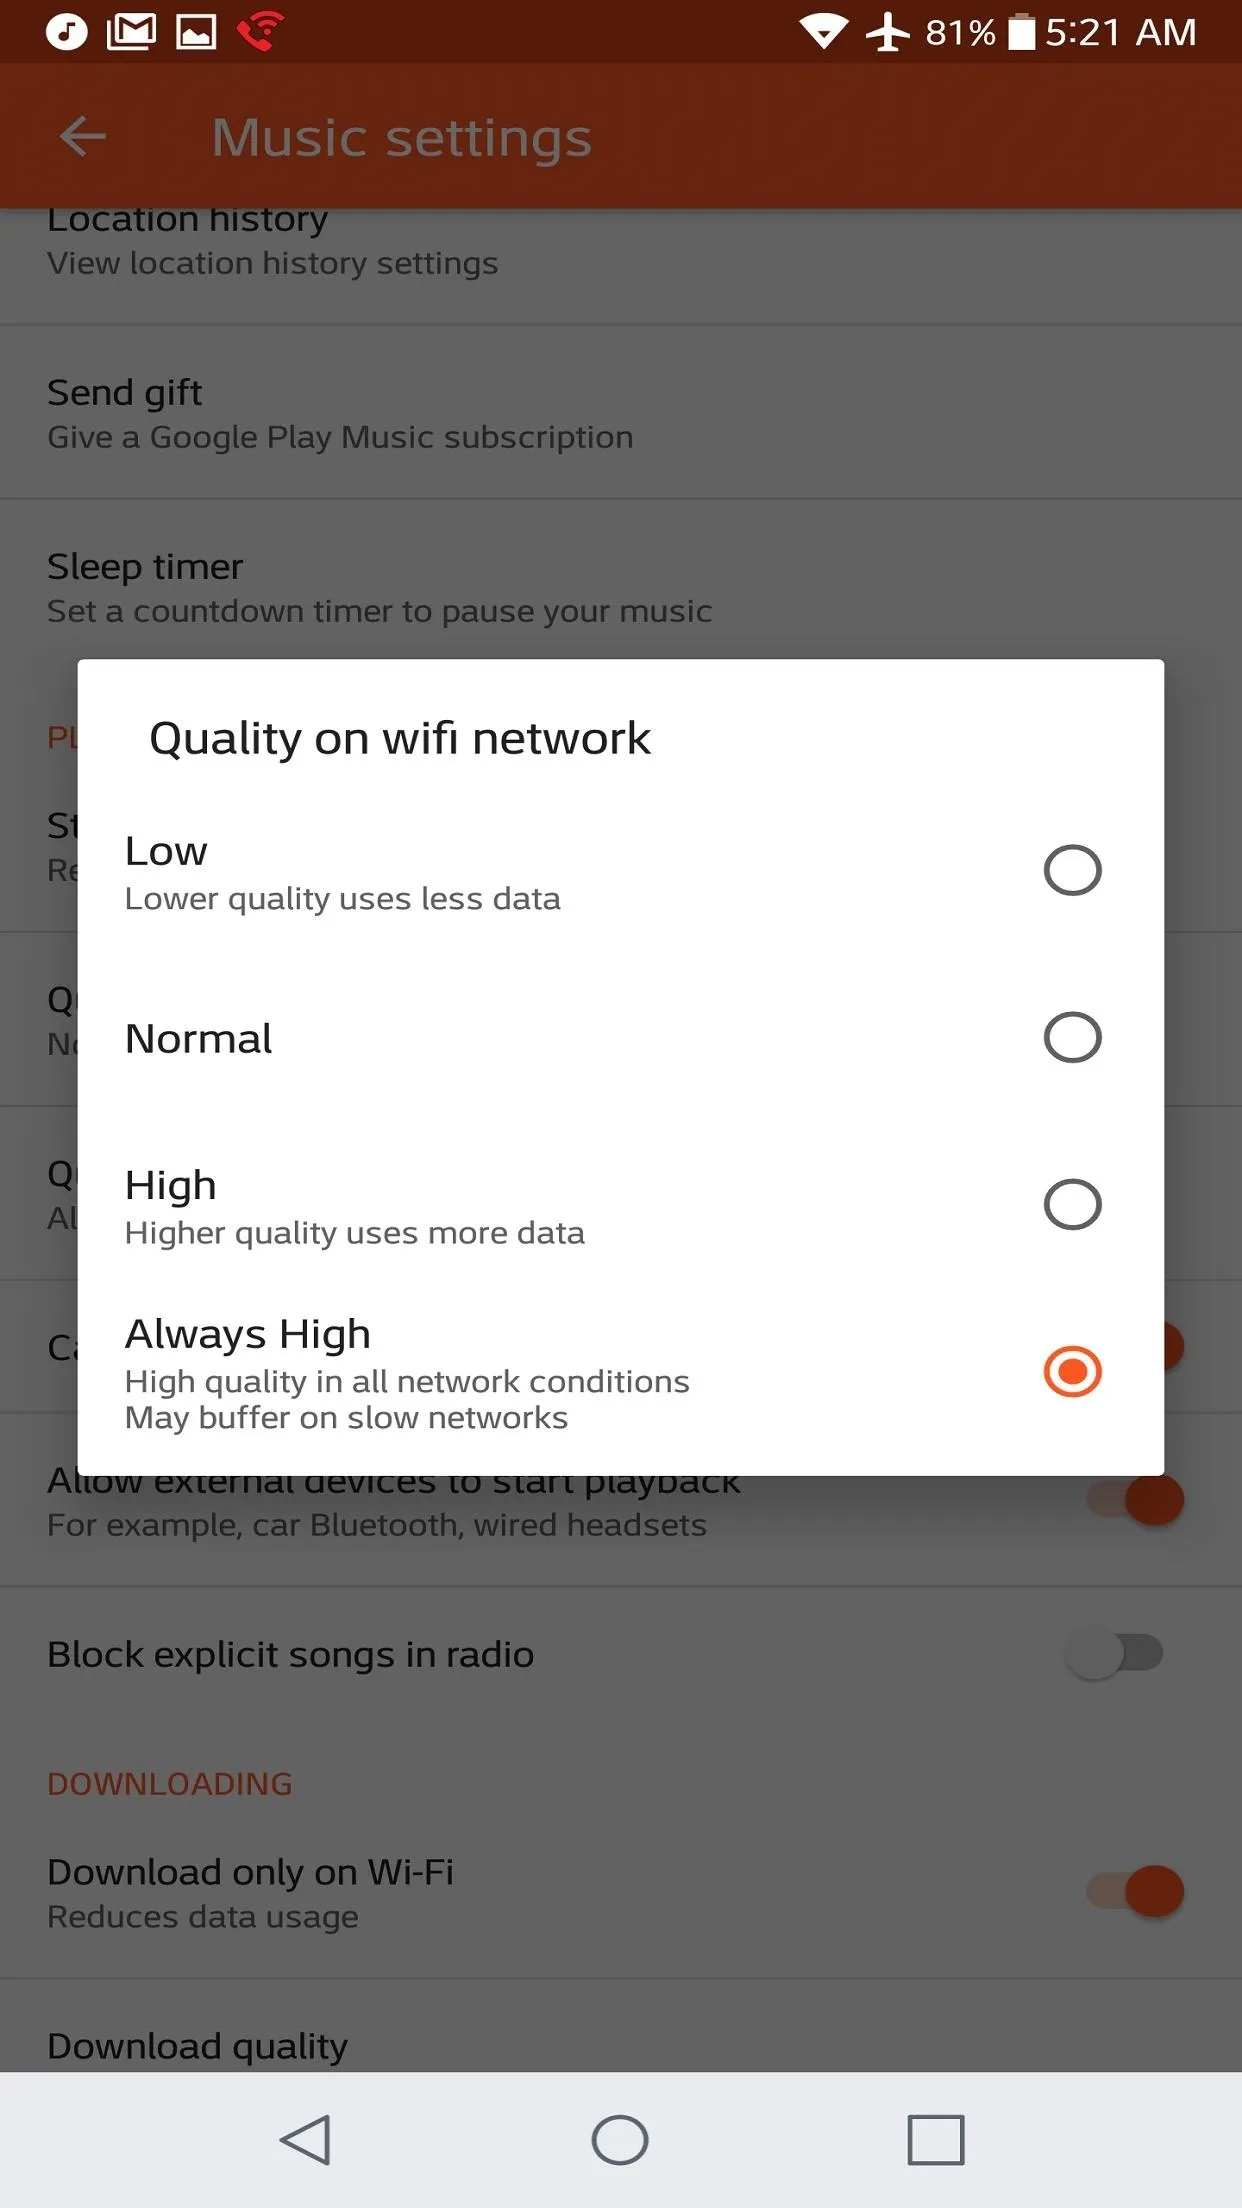
Most Americans don't have to deal with monthly data caps from their home internet service provider, so don't be afraid of setting the "Quality on wifi network" ("Wi-Fi stream quality" on iOS) to "Always High." If you do live under a data cap on your Wi-Fi network, feel free to turn down the quality to "Low." You may also need to lower the quality if your home network is on the slower side and tends to need extra time to buffer.


Step 3: Adjust Mobile Network Streaming Settings
This is where things get a little dicey. Mobile carriers own the data-consuming souls of the vast majority of Americans, forcing them under a ruthless data cap. Even for those with "unlimited" plans, there's a good chance that your provider will throttle your speeds after you hit a certain threshold.
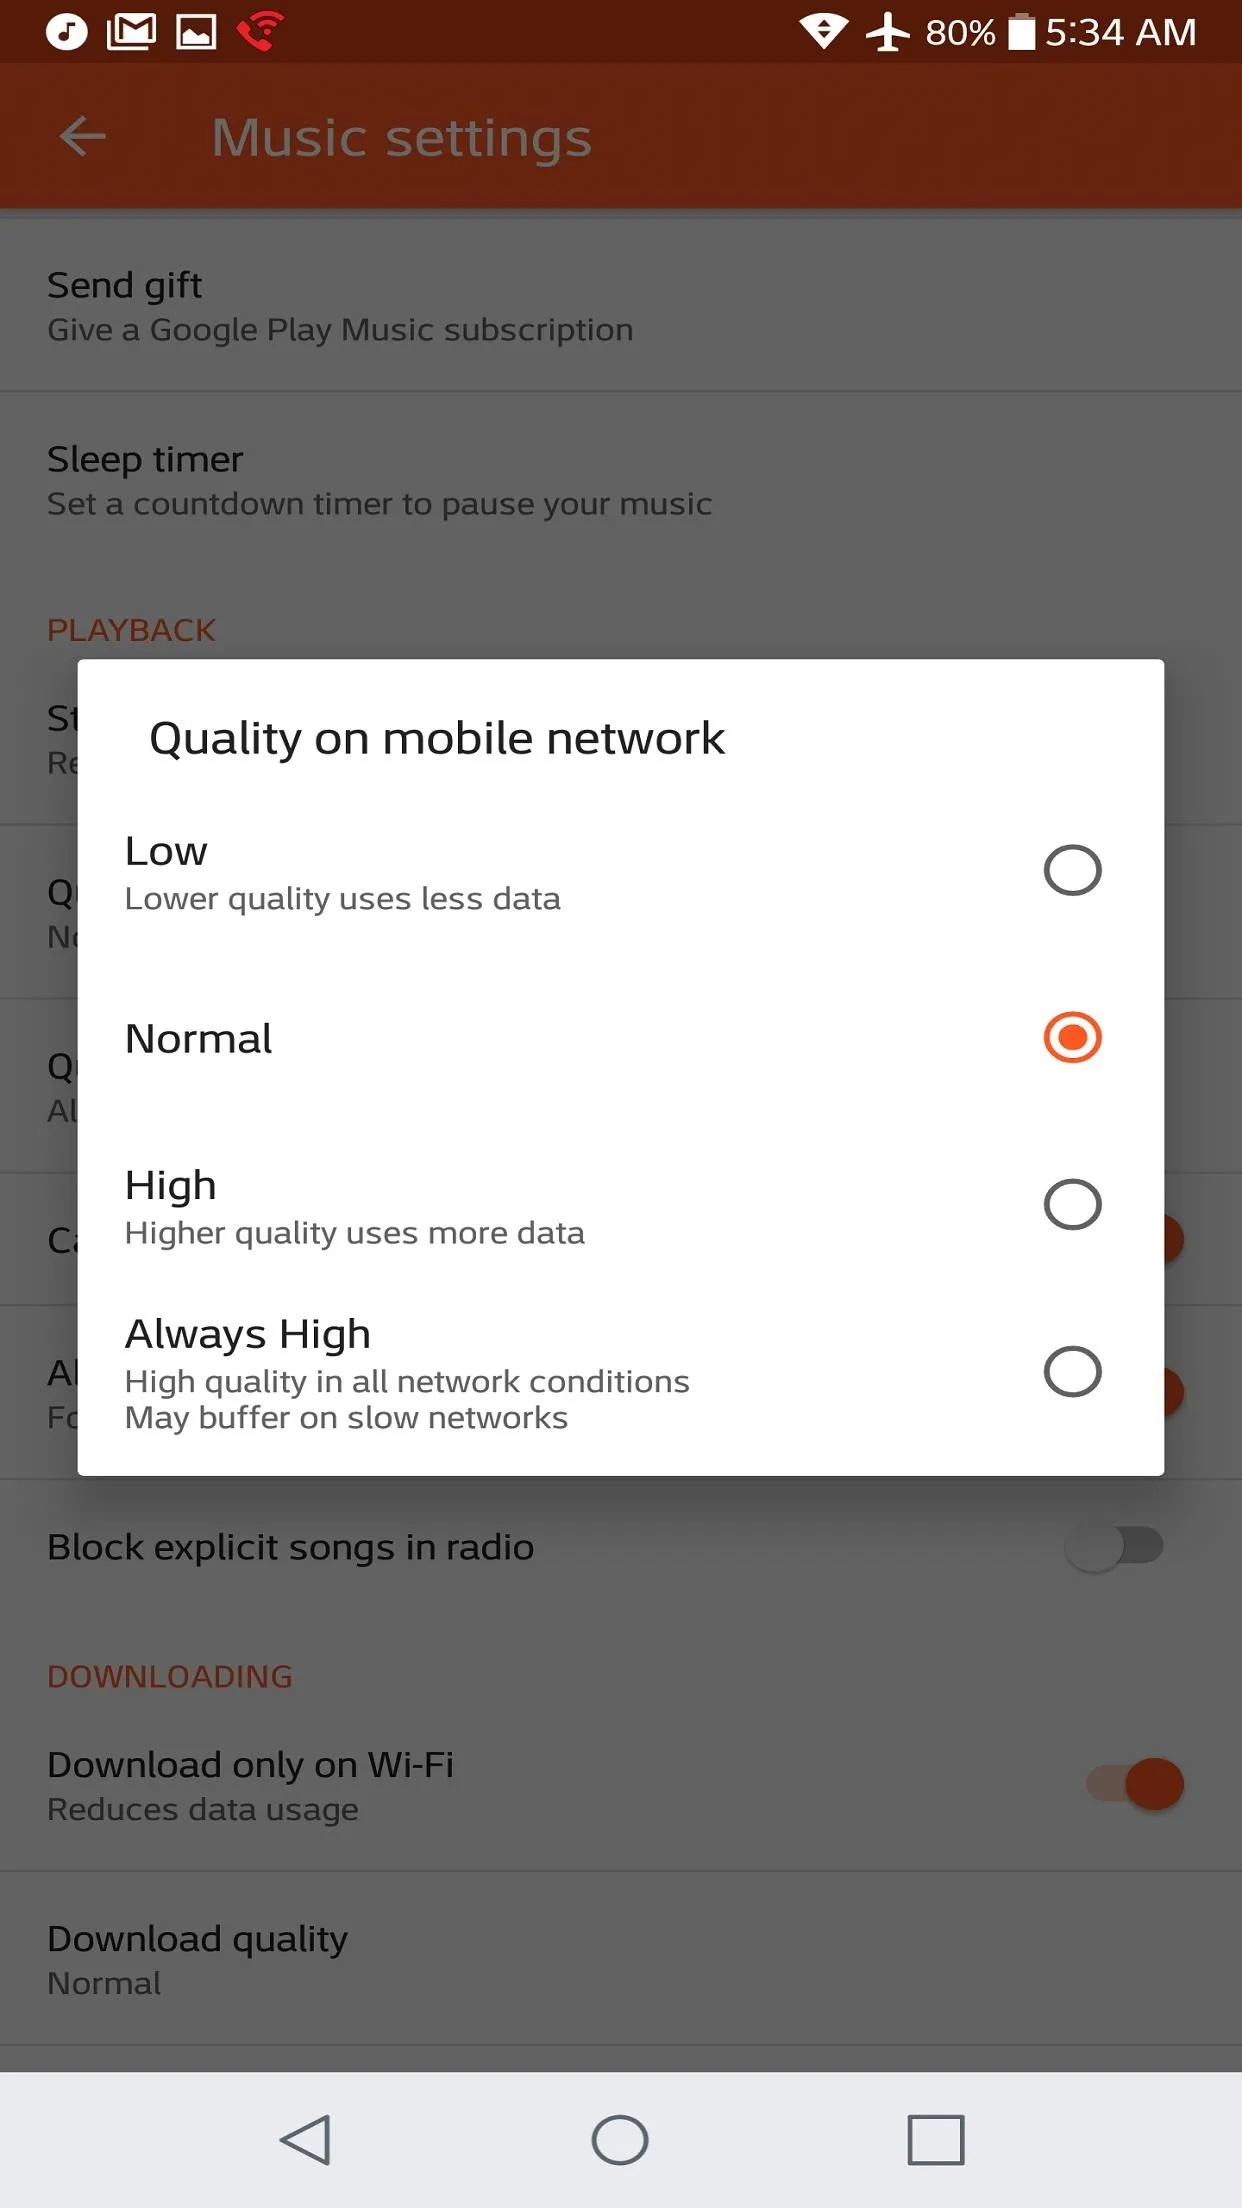
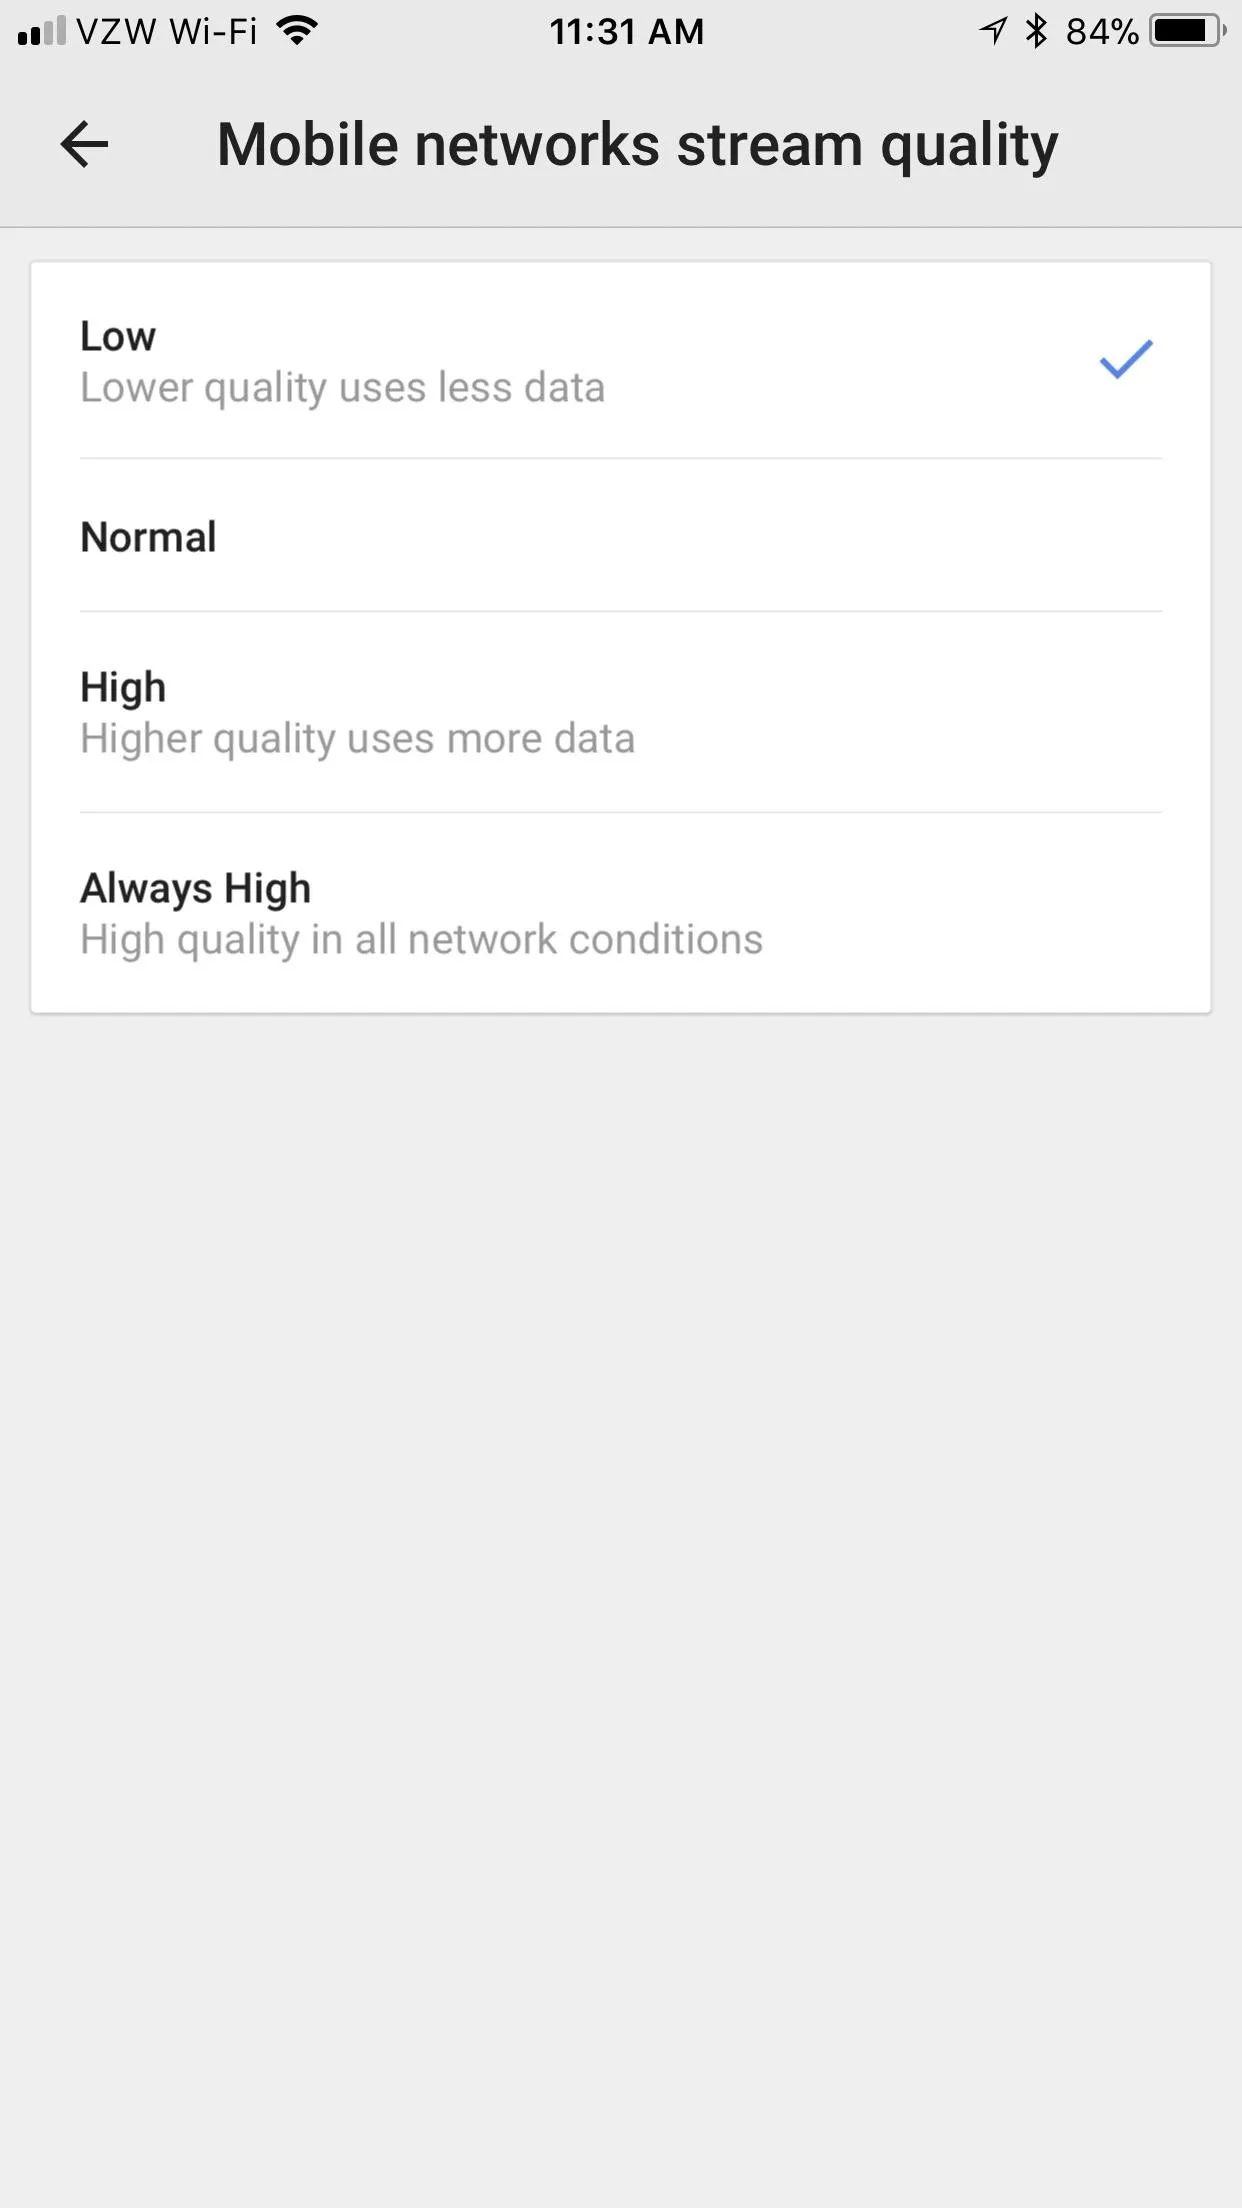
One way to combat going over your cap is to be frugal when streaming via mobile data. Unless you have a truly unlimited data plan, I highly recommend choosing "Low" under "Quality on mobile network" ("Mobile networks stream quality" on iOS).


Step 4: Use the Cache
By now, you've probably heard of cache in reference to data that programs accumulate to help them run faster. After a while, this data grows, and clearing out your cache is a good way to free up some space. This is not unlike Google Play Music's cache.
If enabled (under "Playback" on Android and "Streaming & downloading" on iOS), Google Play Music will automatically store songs as you listen to them, effectively downloading them for offline playback. The app appears to show some discretion, caching songs that you listen to more frequently than others. Once a song is cached, it won't count against your data cap when you play it, as it's not being streamed from Google's servers — it's stored locally on your phone.
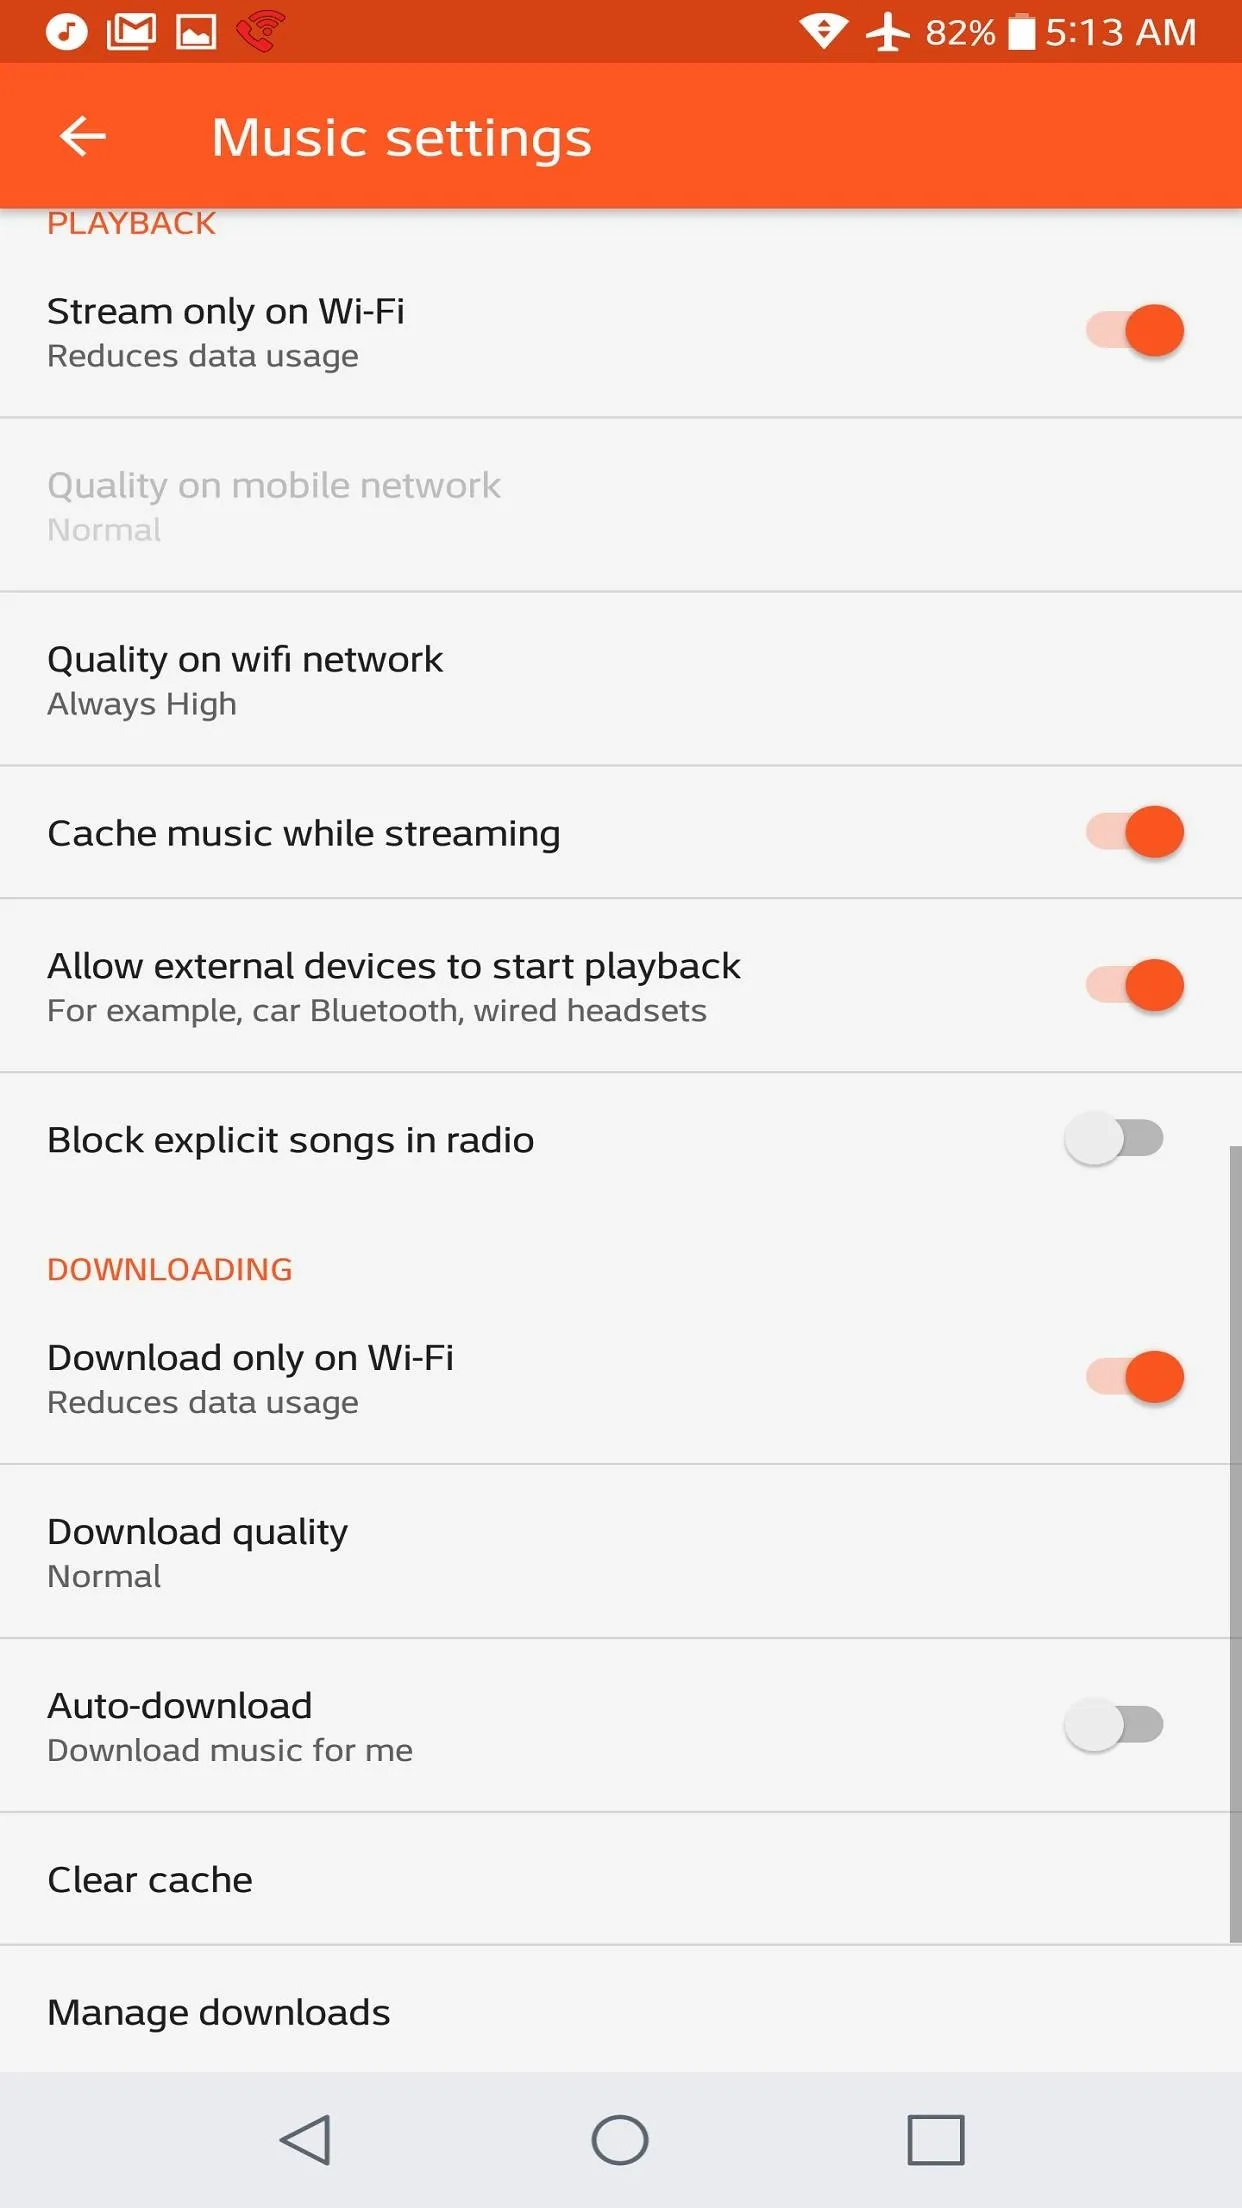
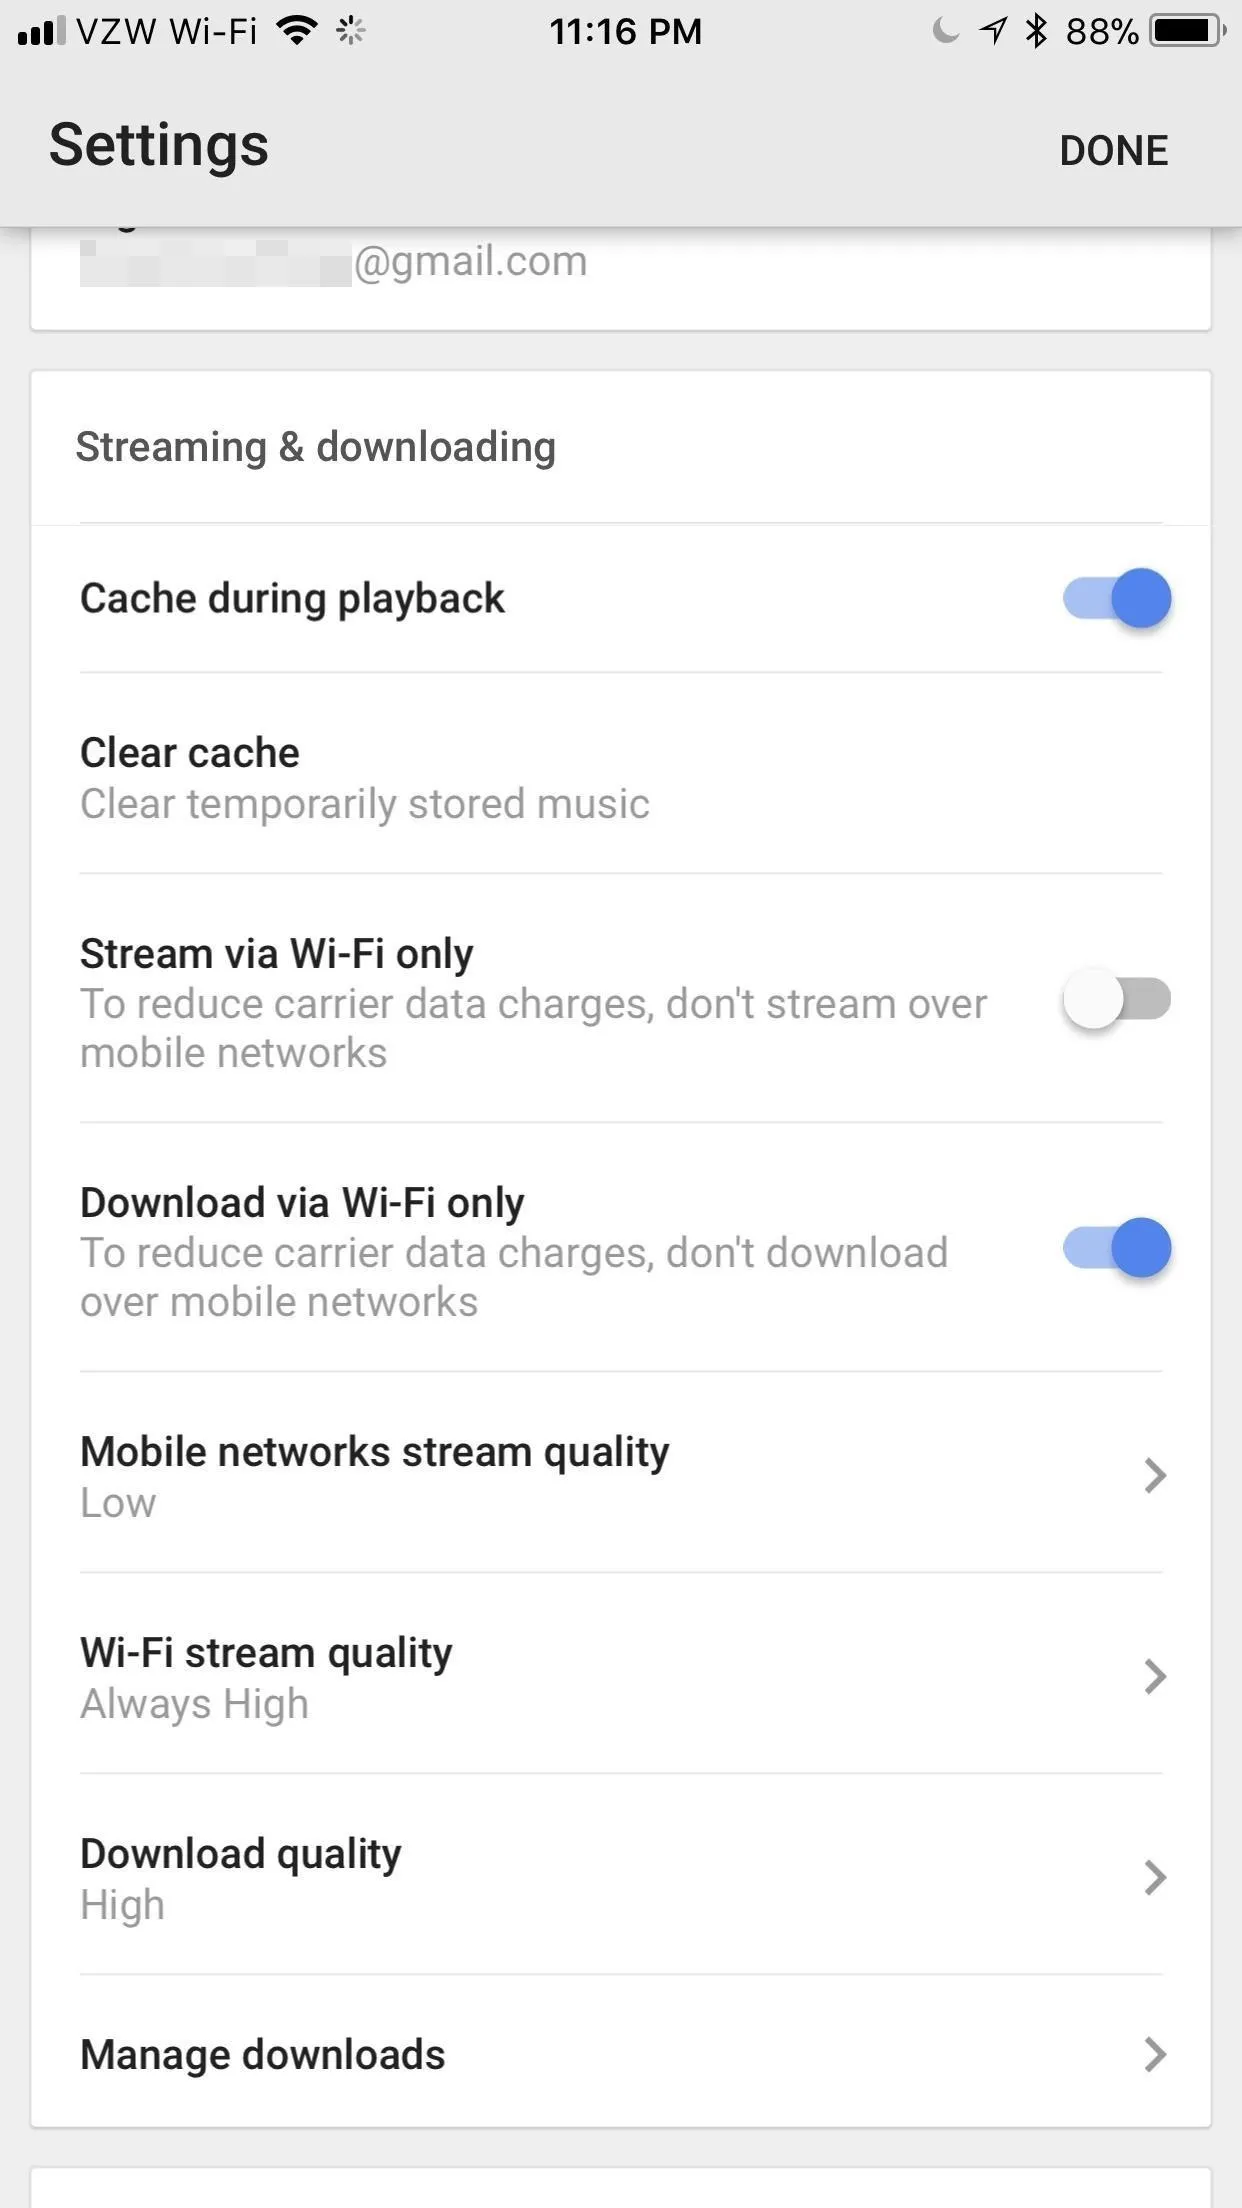


As with any other cache, your Google Play Music cache can become large and unweidly at times. When you run out of storage on your phone, you can clear your cache by navigating to "Clear cache" under the Downloading header on Android. On iOS, "Clear cache" is under Streaming & downloading.
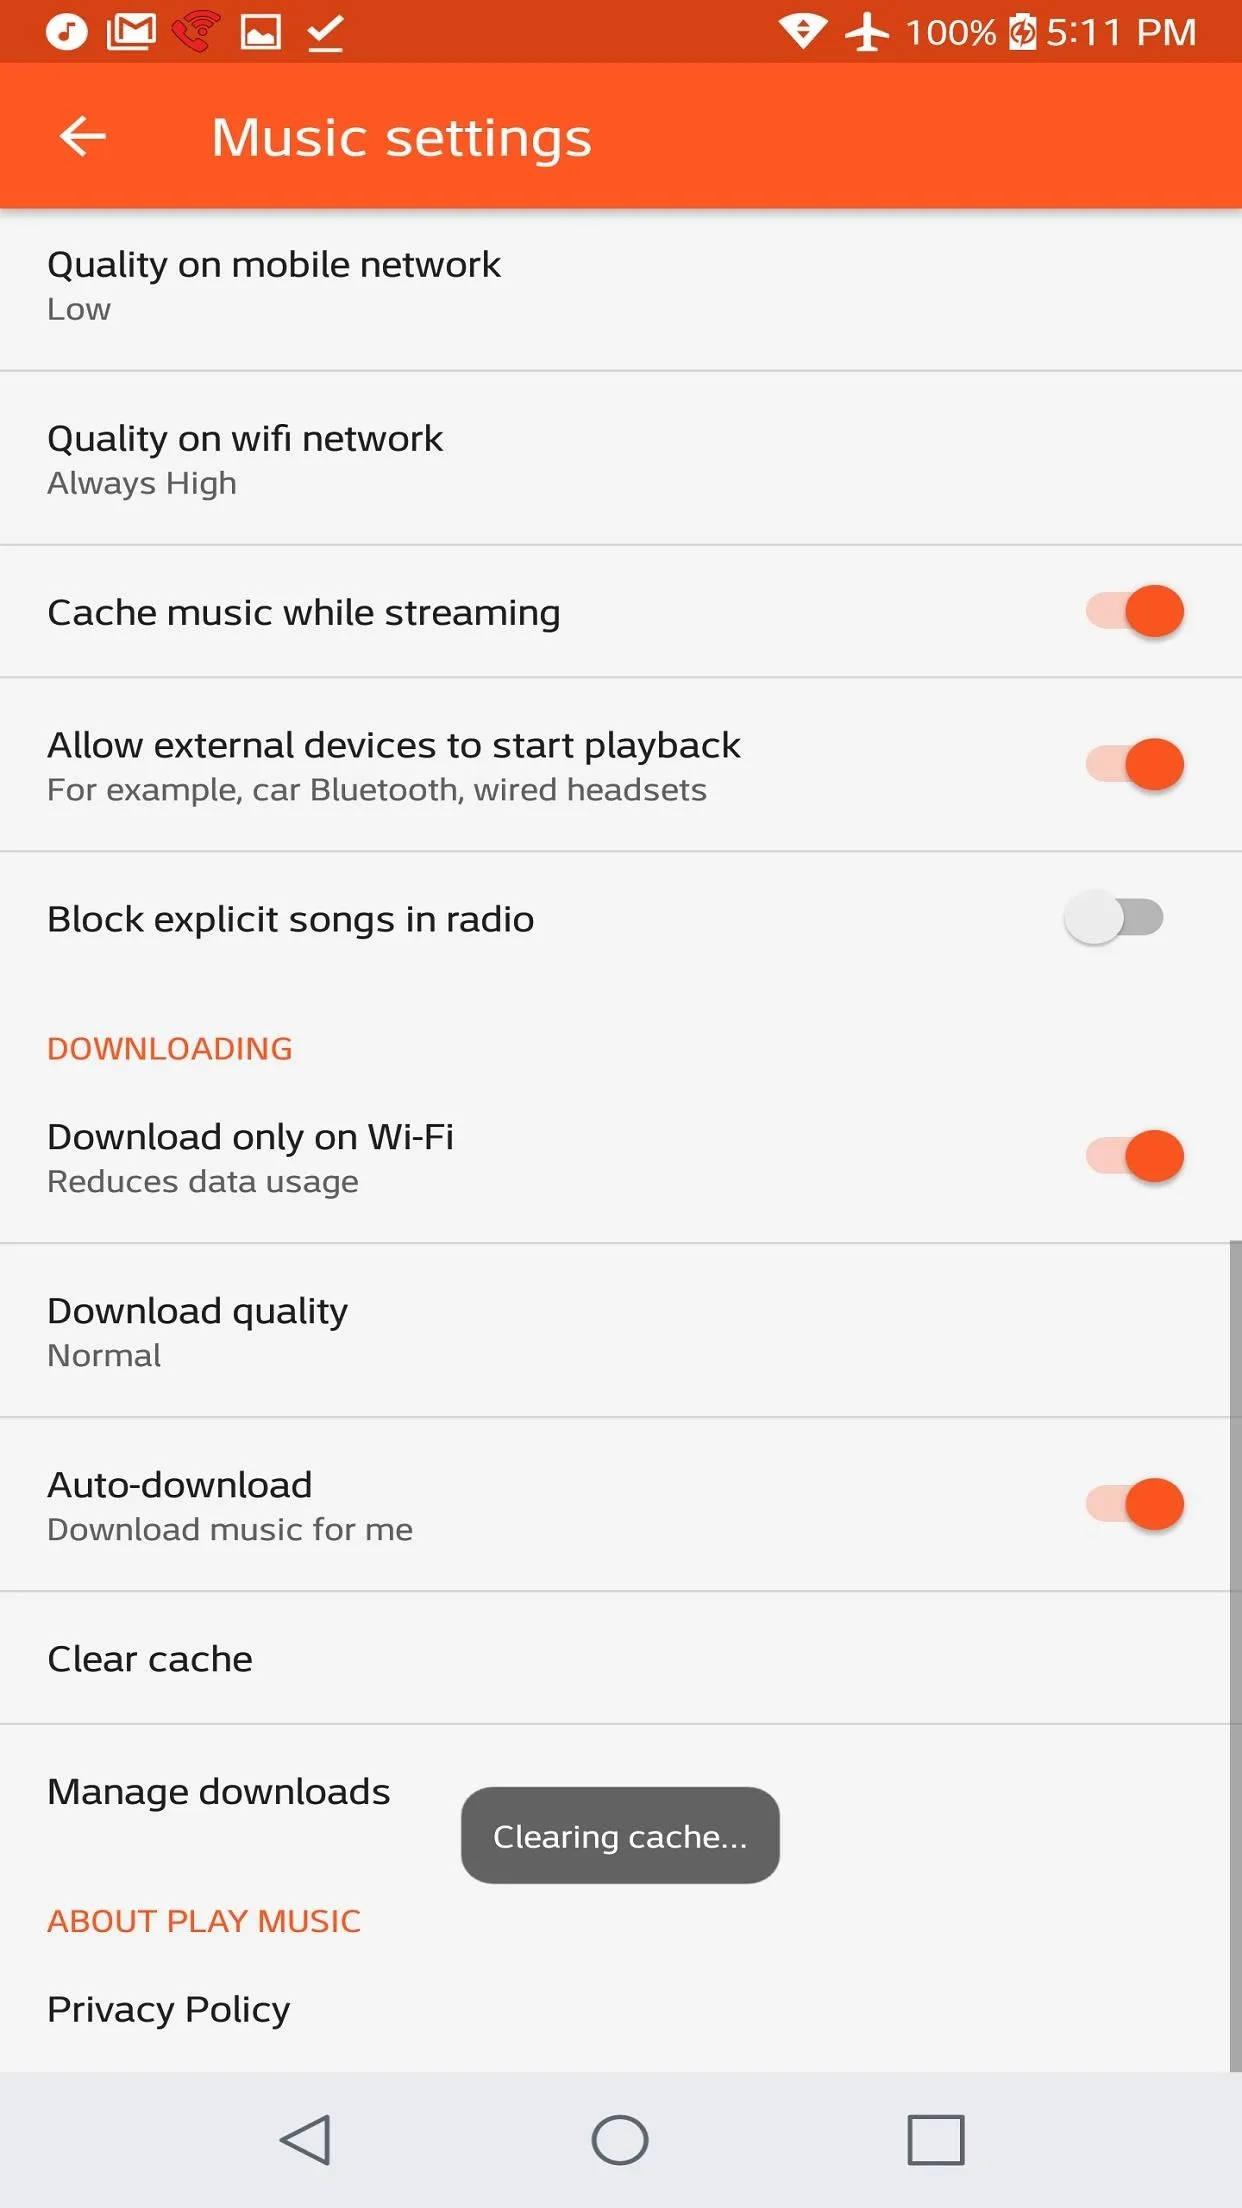
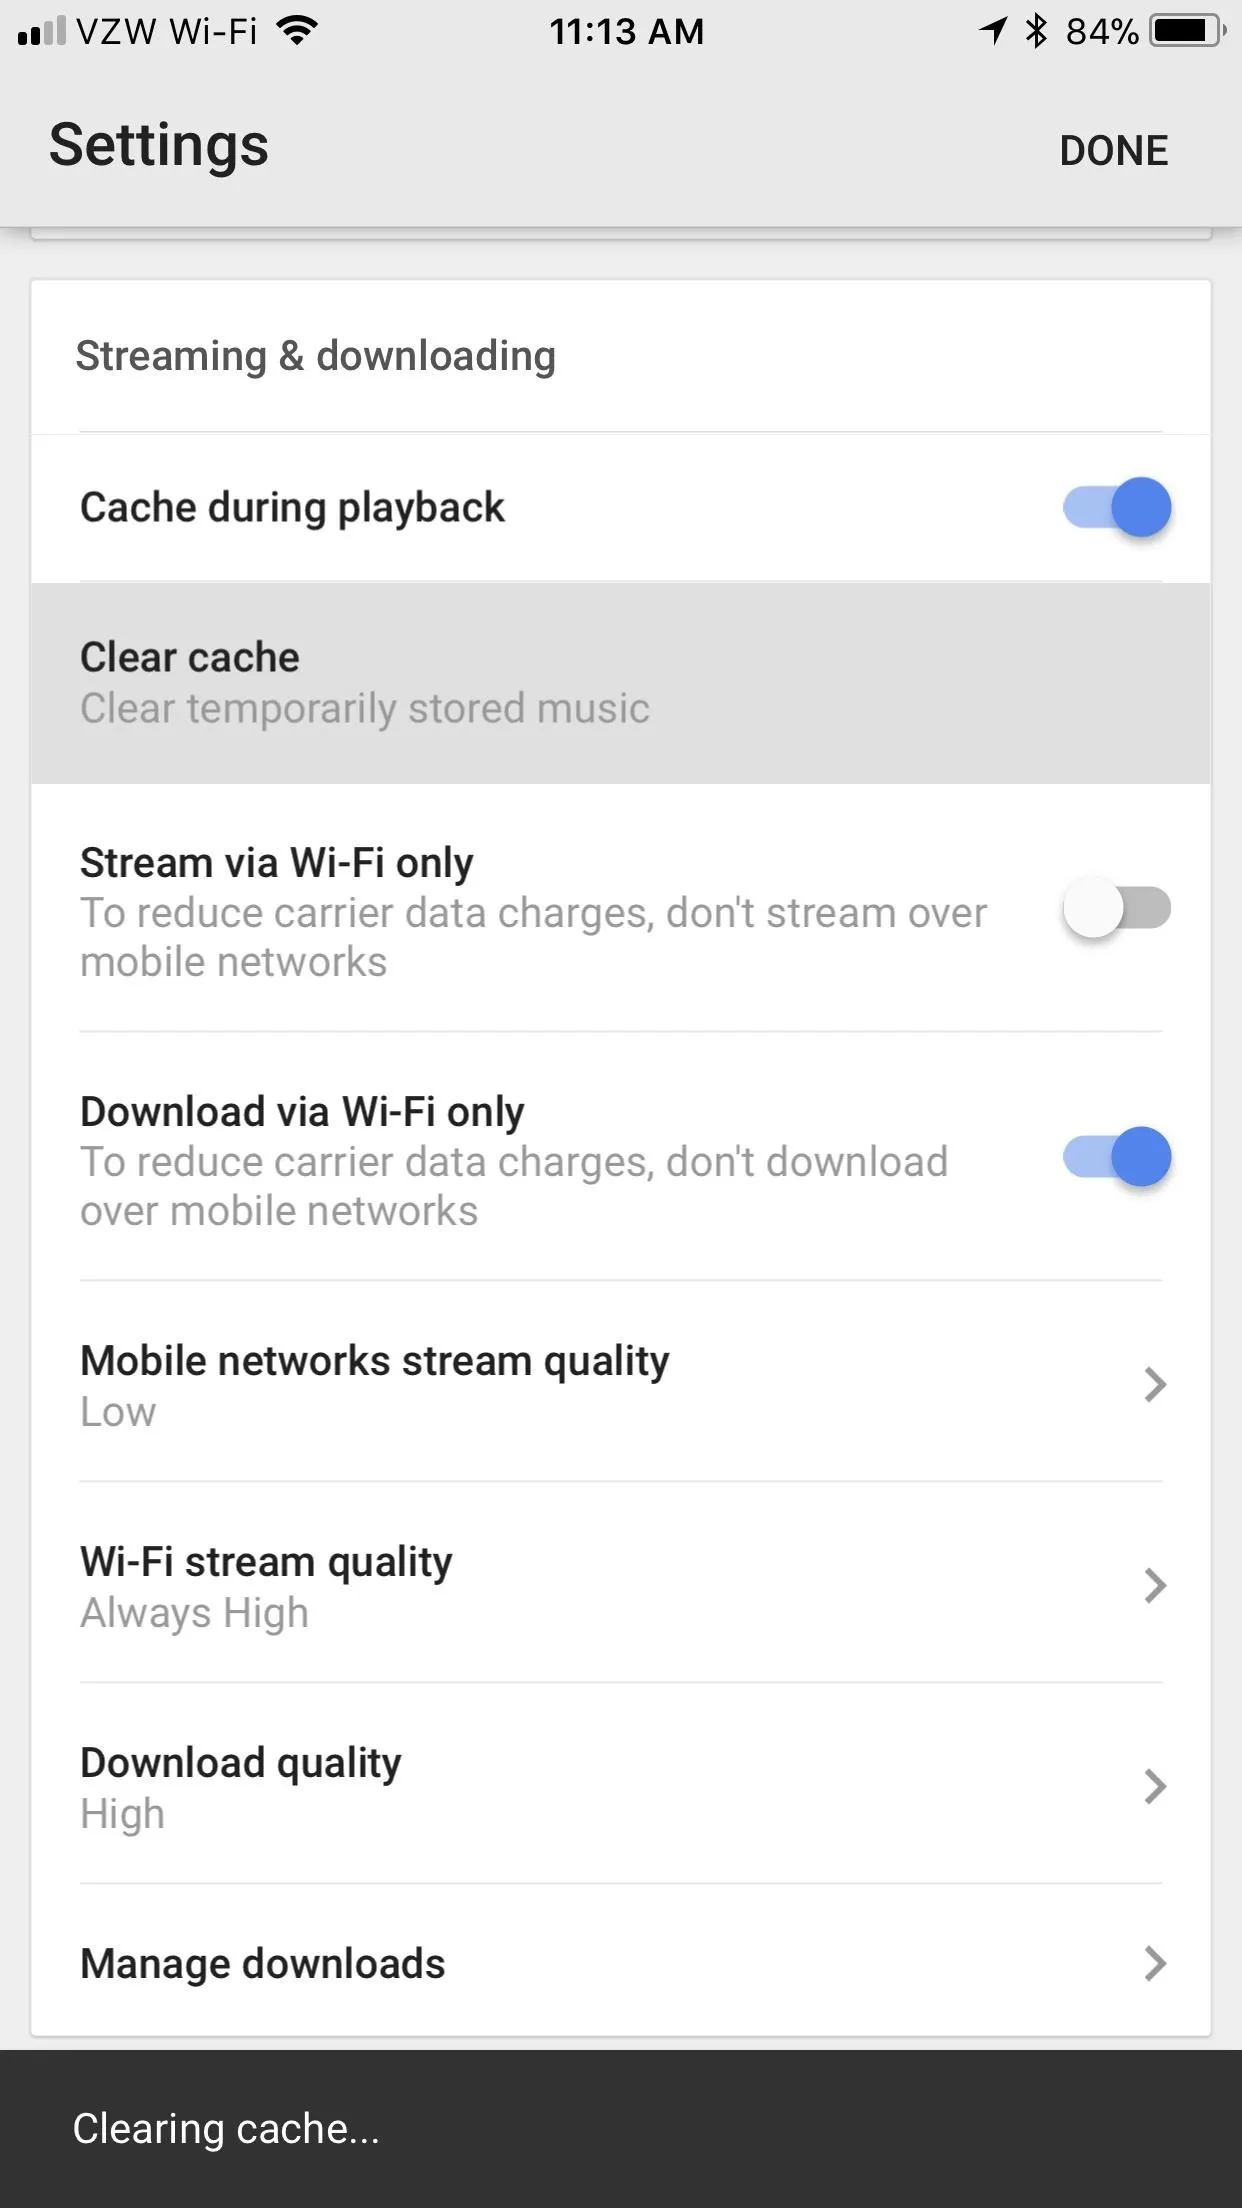


Step 5: Download Your Music
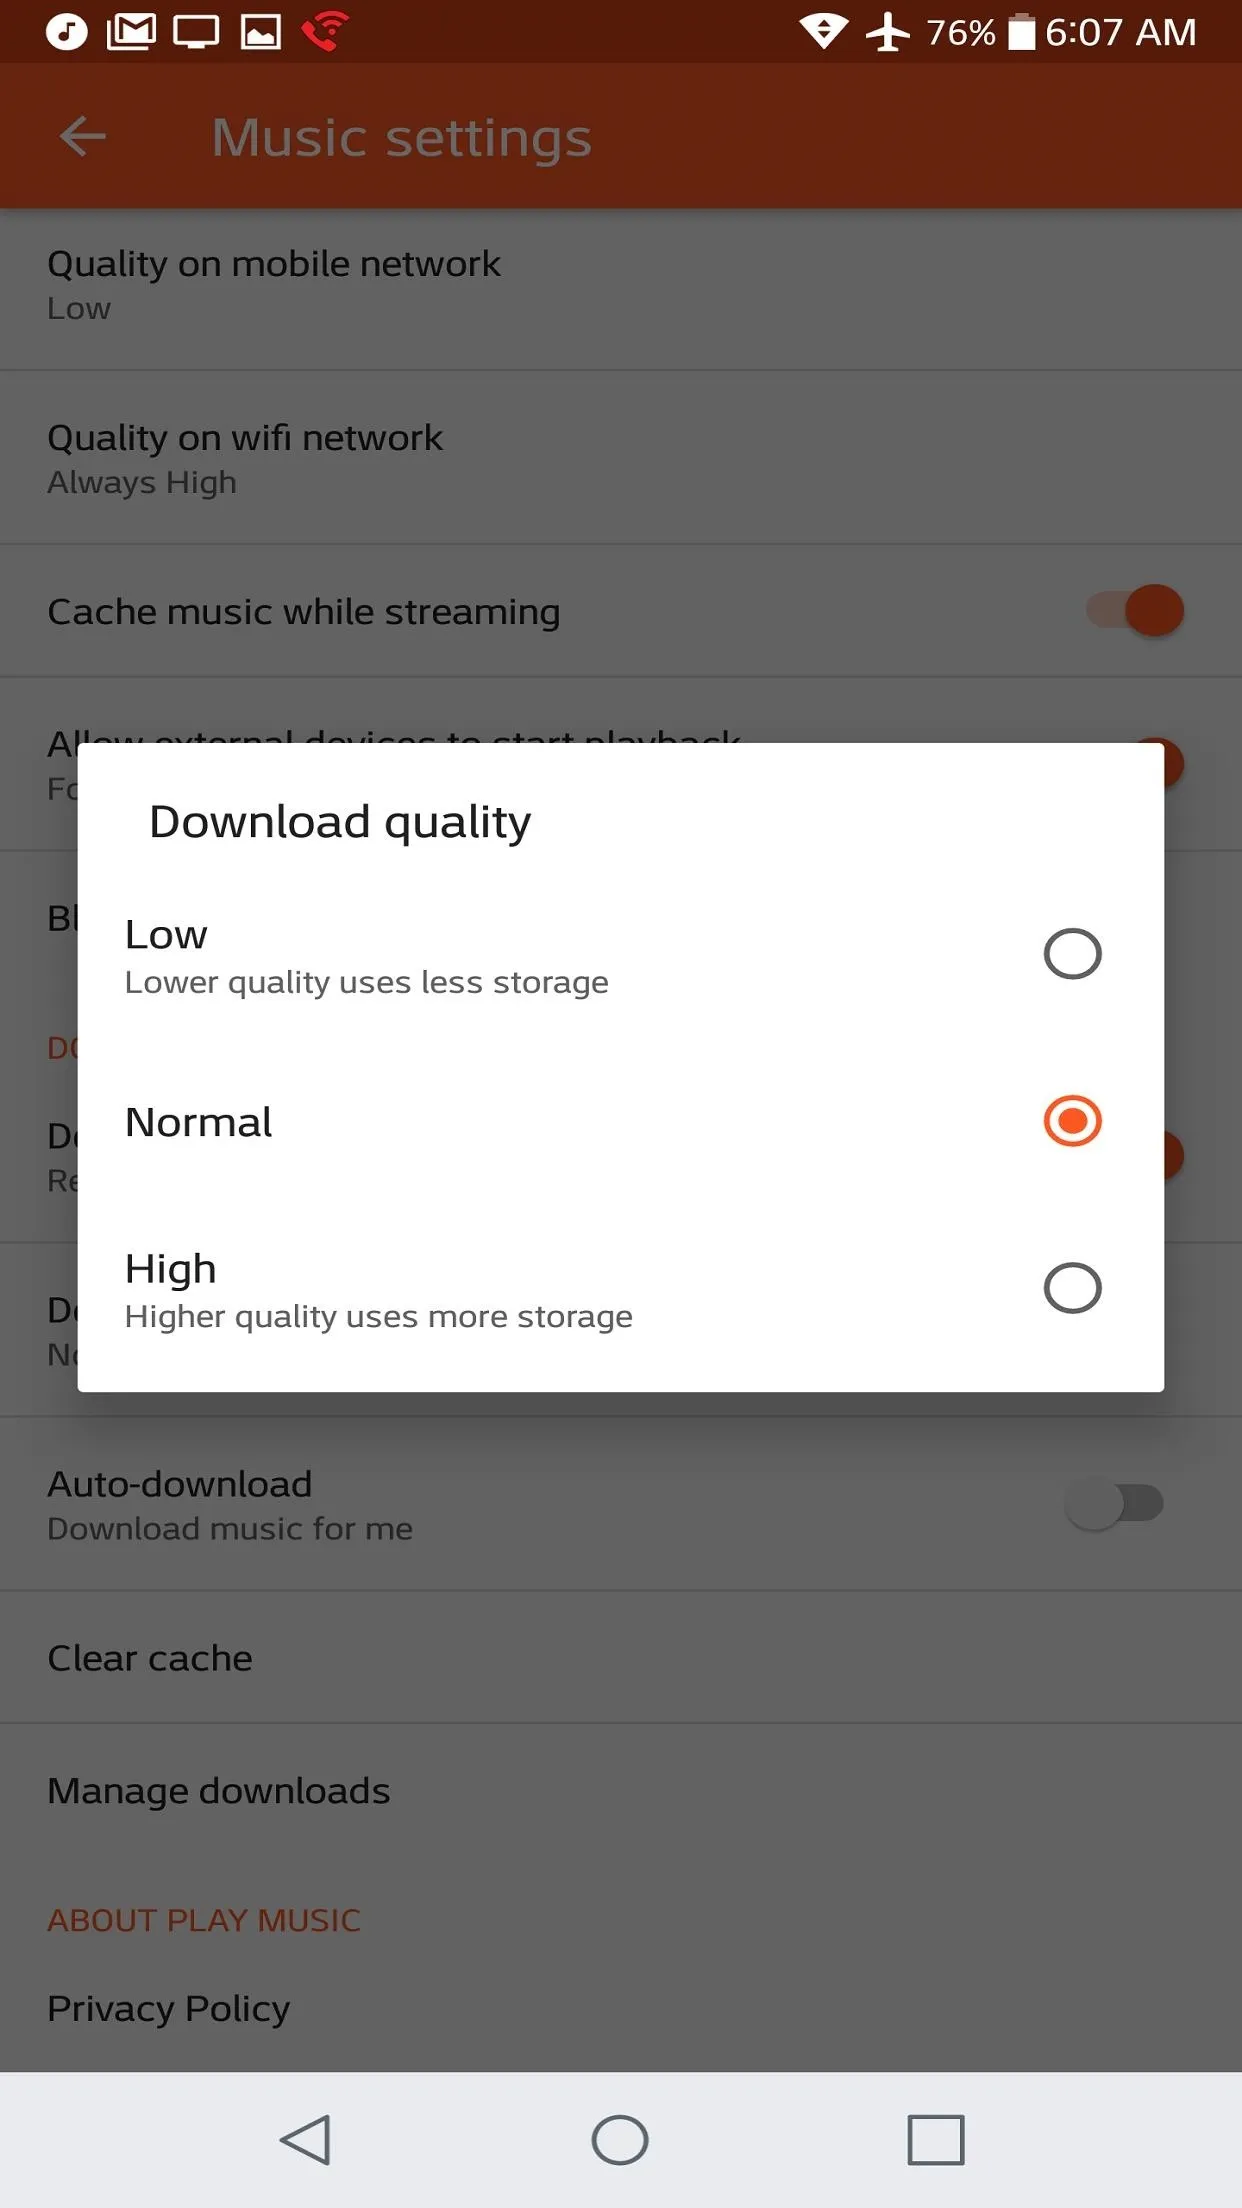
As I alluded to in Step 4, you can download your music. While the cache is a passive form of downloading, you can actively download music as well. This step will take part in the Downloading header on Android, and the Streaming & downloading header on iOS. To show respect for your data cap, I suggest switching on "Download only on Wi-Fi" (or "Download via Wi-Fi only" on iOS).
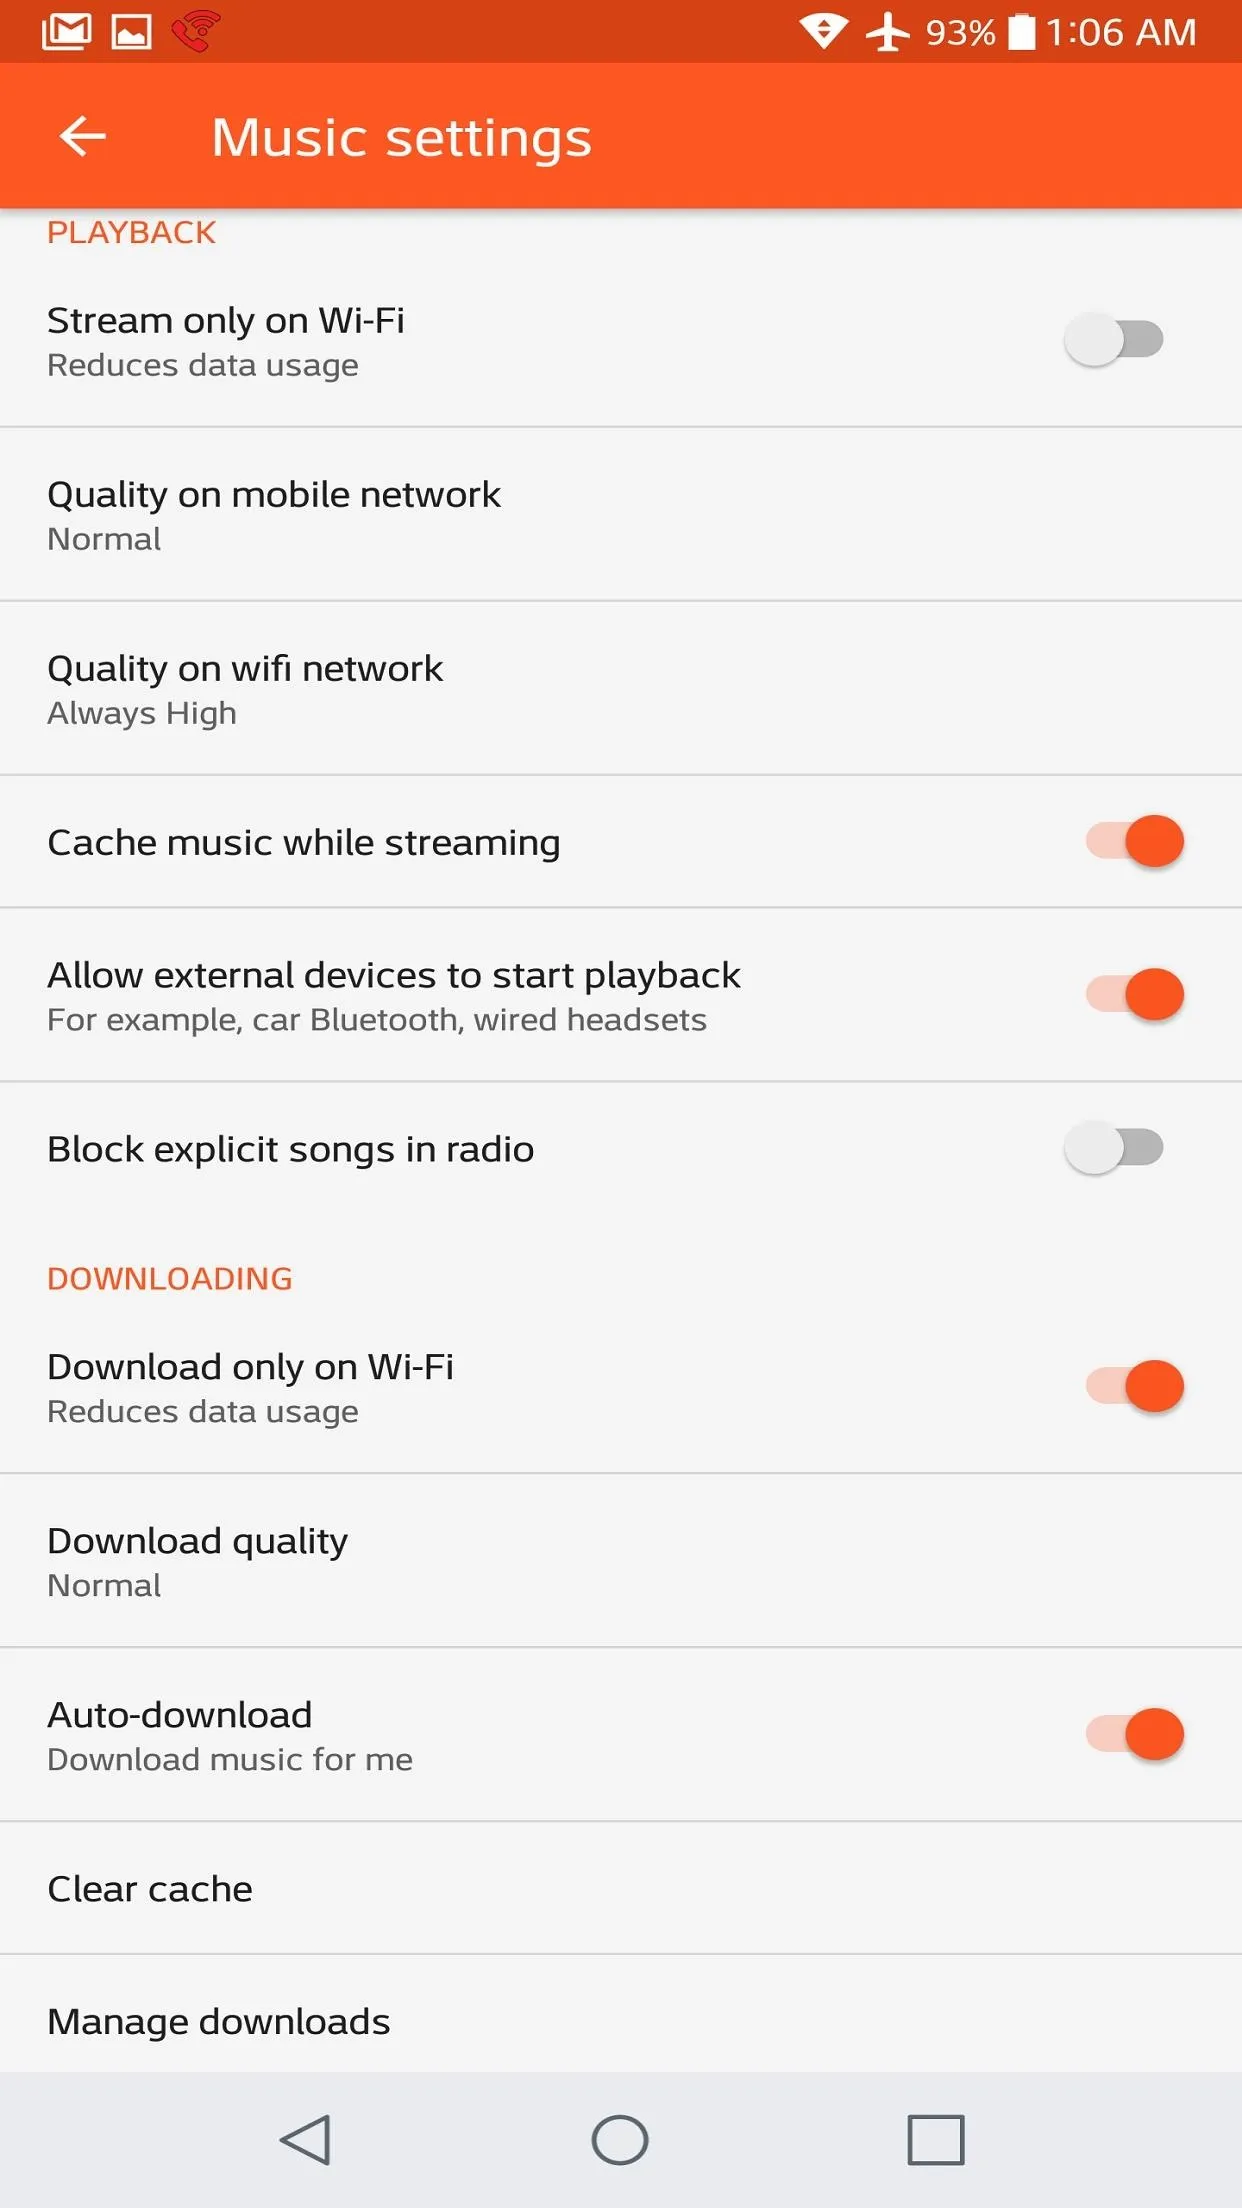
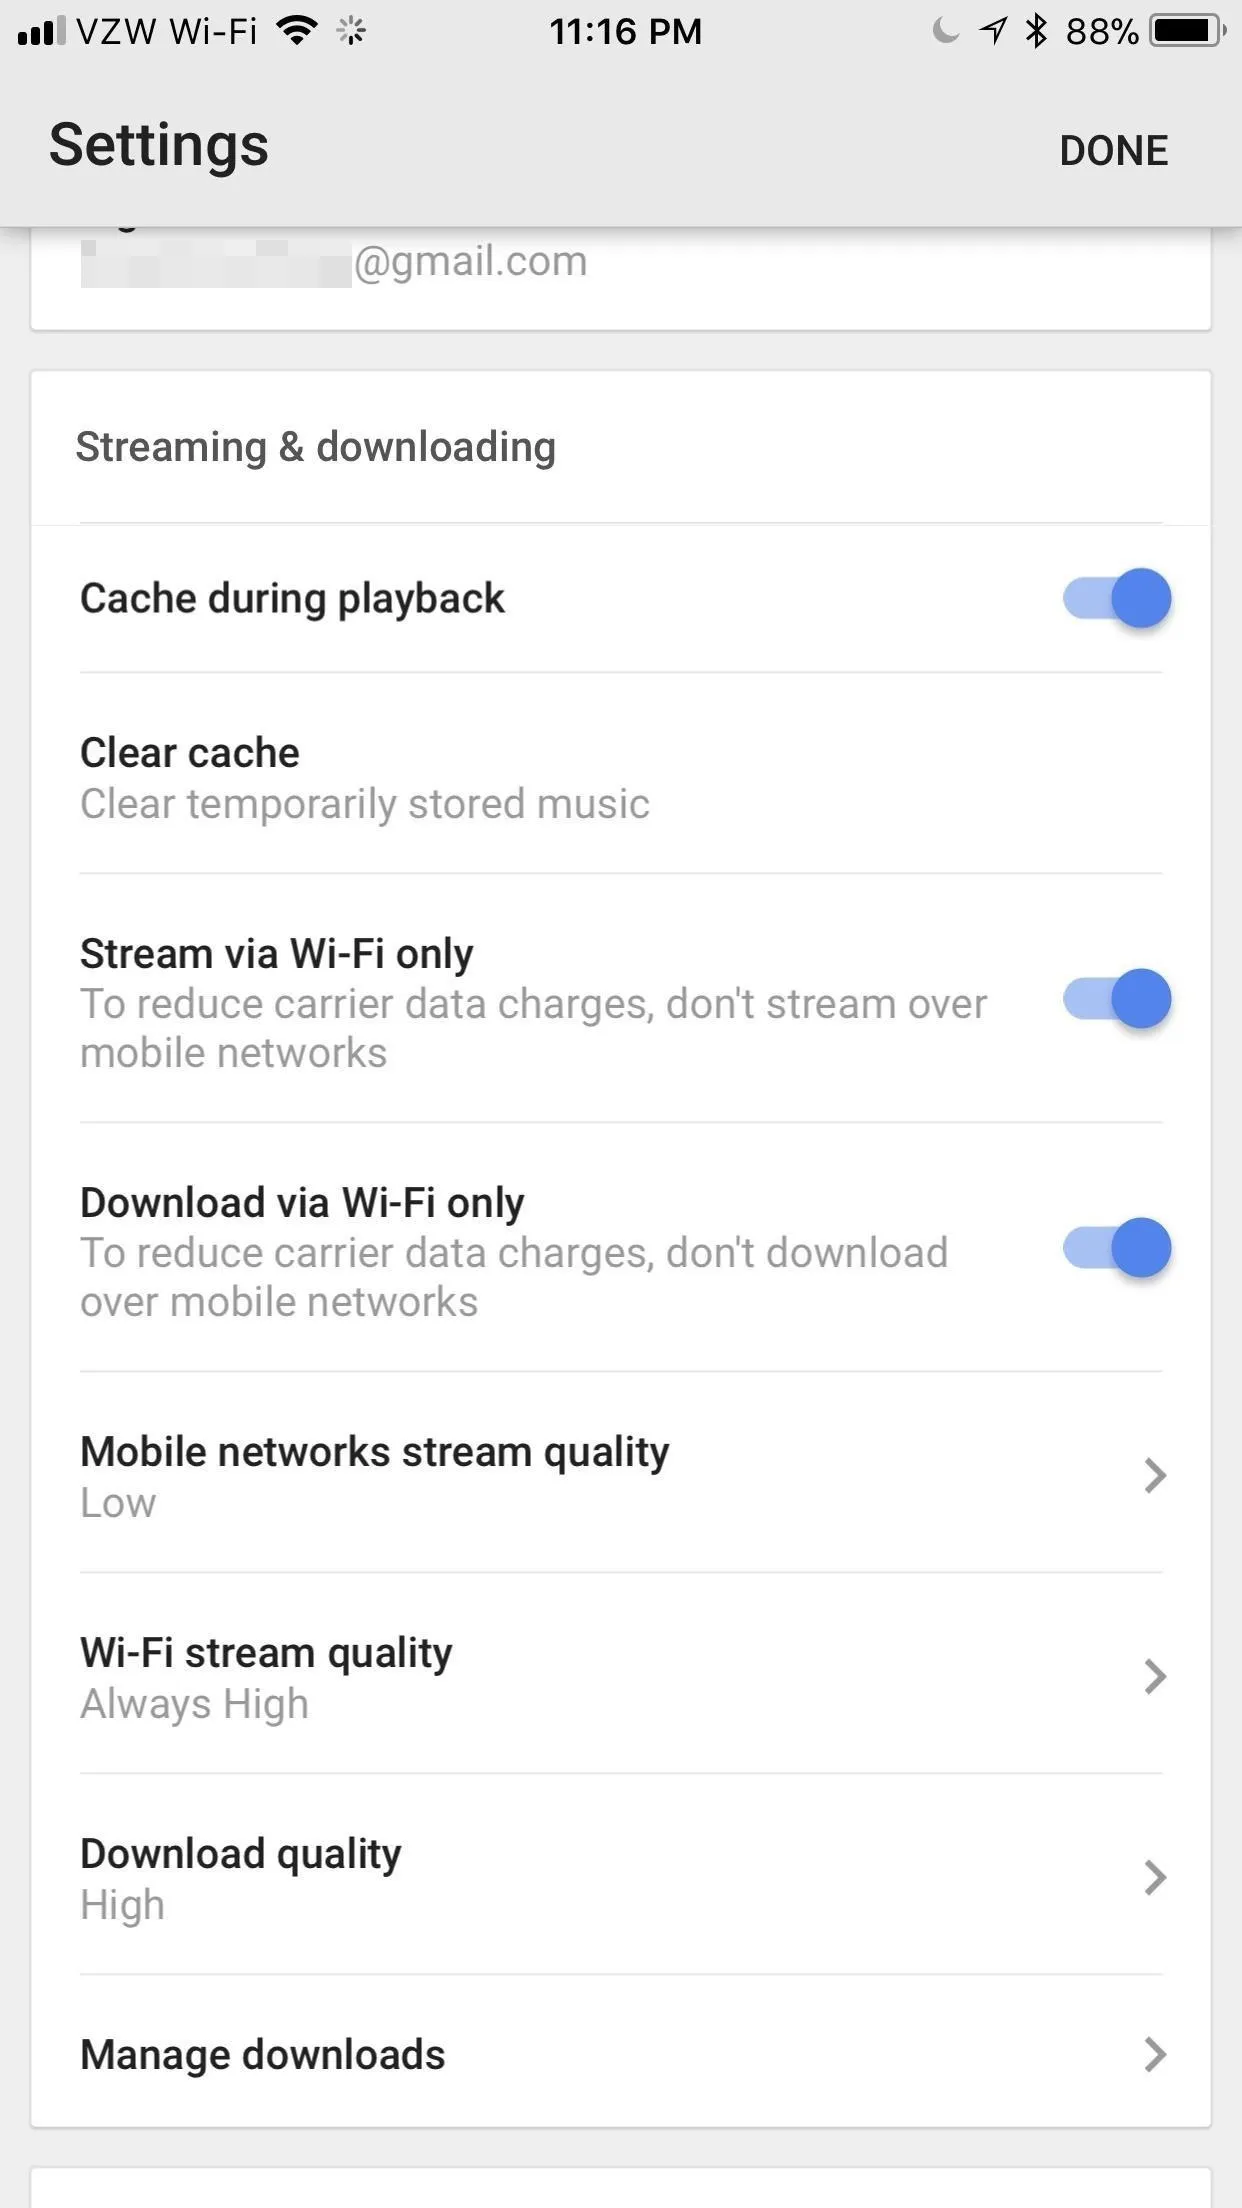


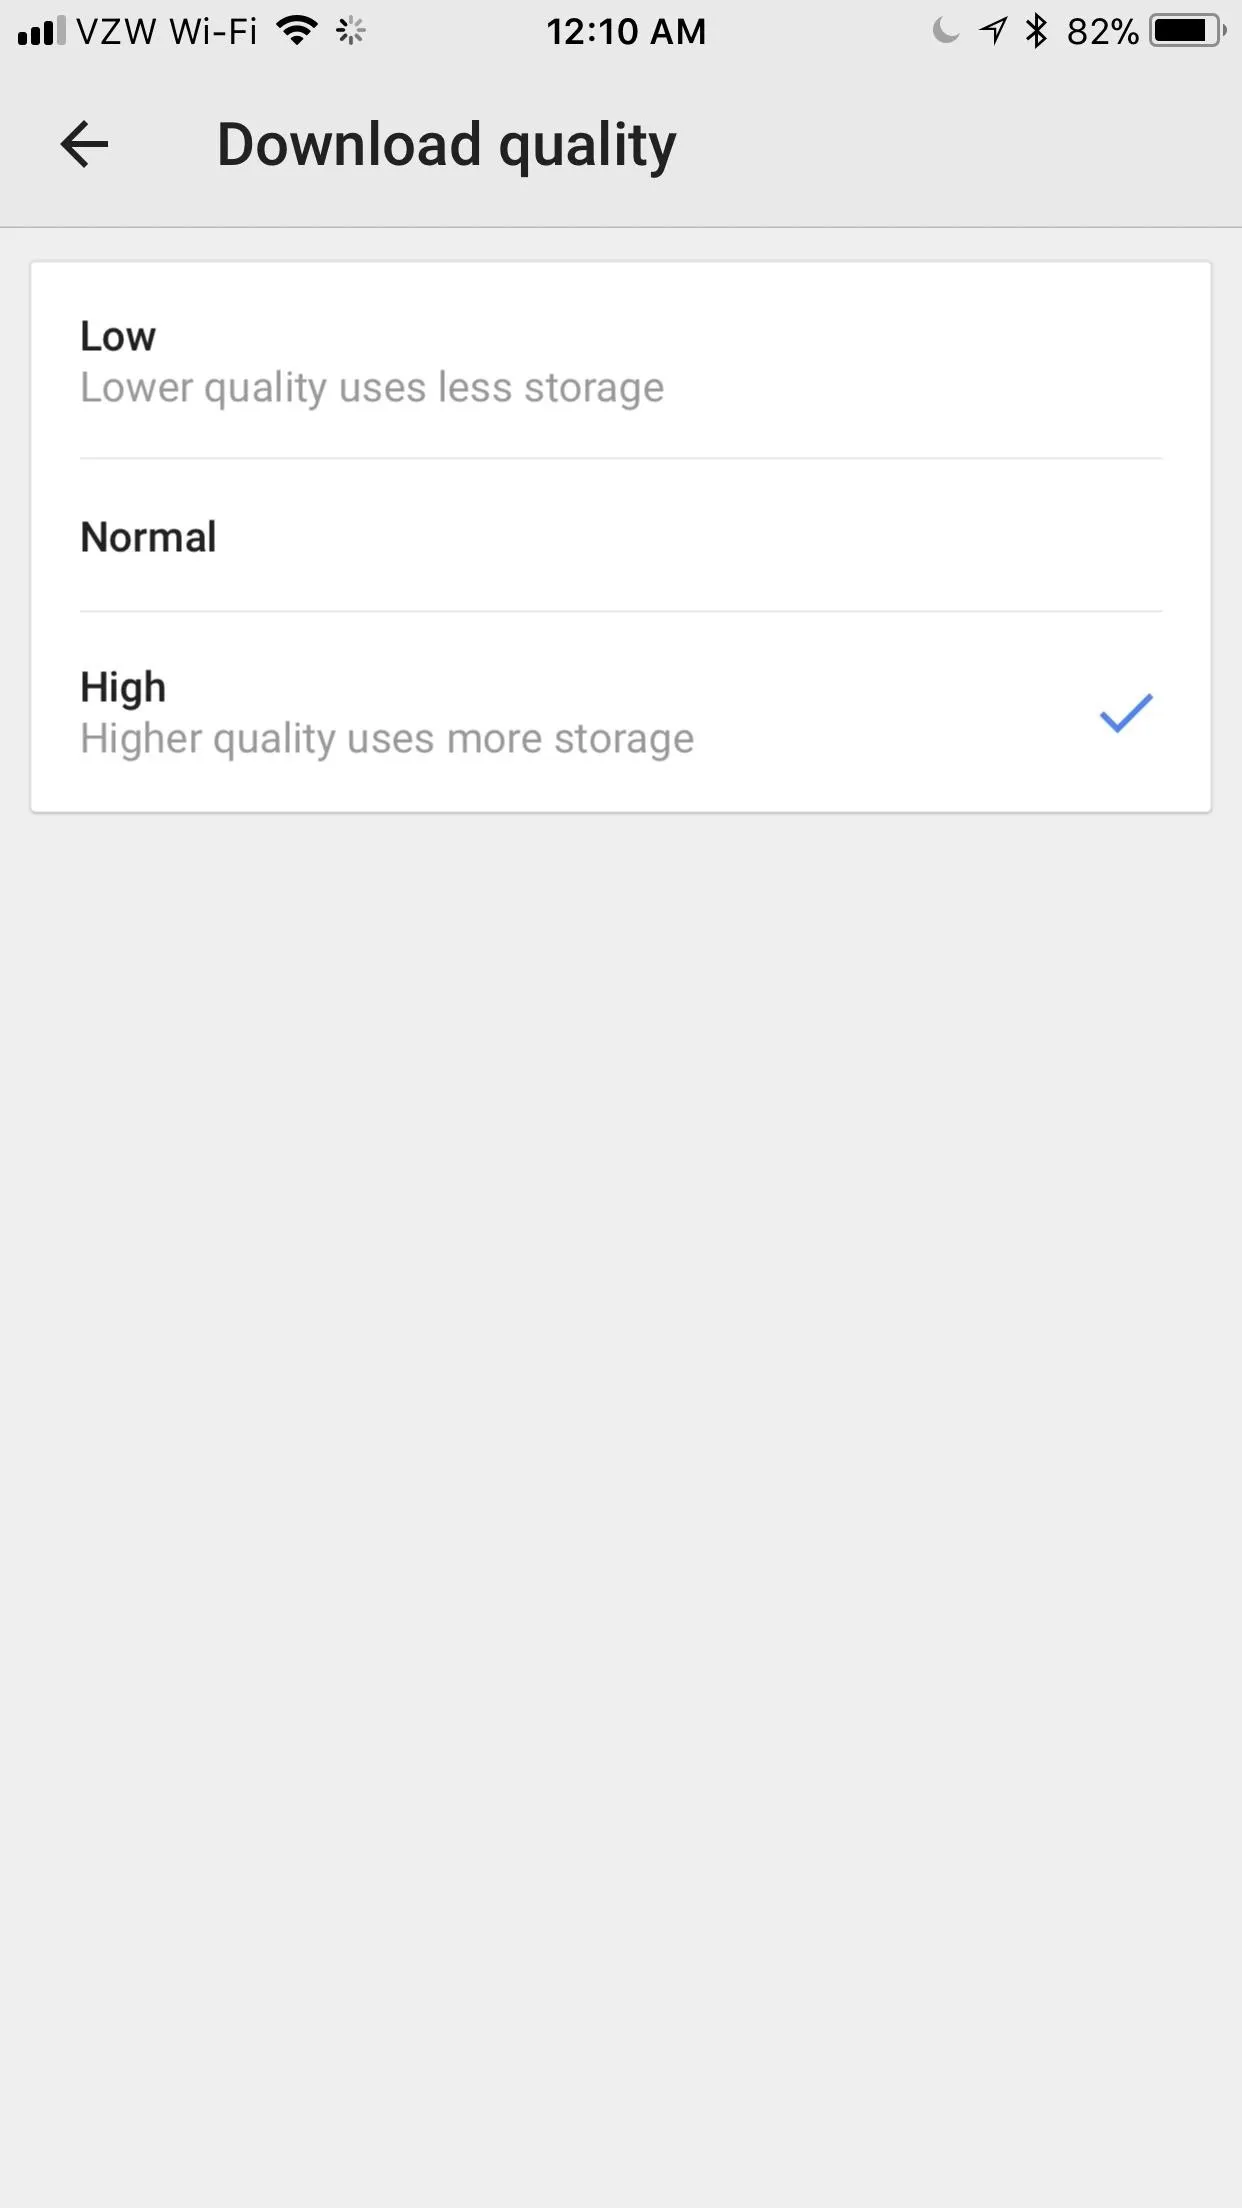
You are also able to choose the "Download quality" on the pair of platforms. If you're a stickler for audio quality and have plenty of extra space on your phone, then feel free to choose "High." If you want to eek out every last megabyte on your phone, then "Medium" or "Low" is just fine. Remember, either way, this won't count against your data plan as long as you download via Wi-Fi.


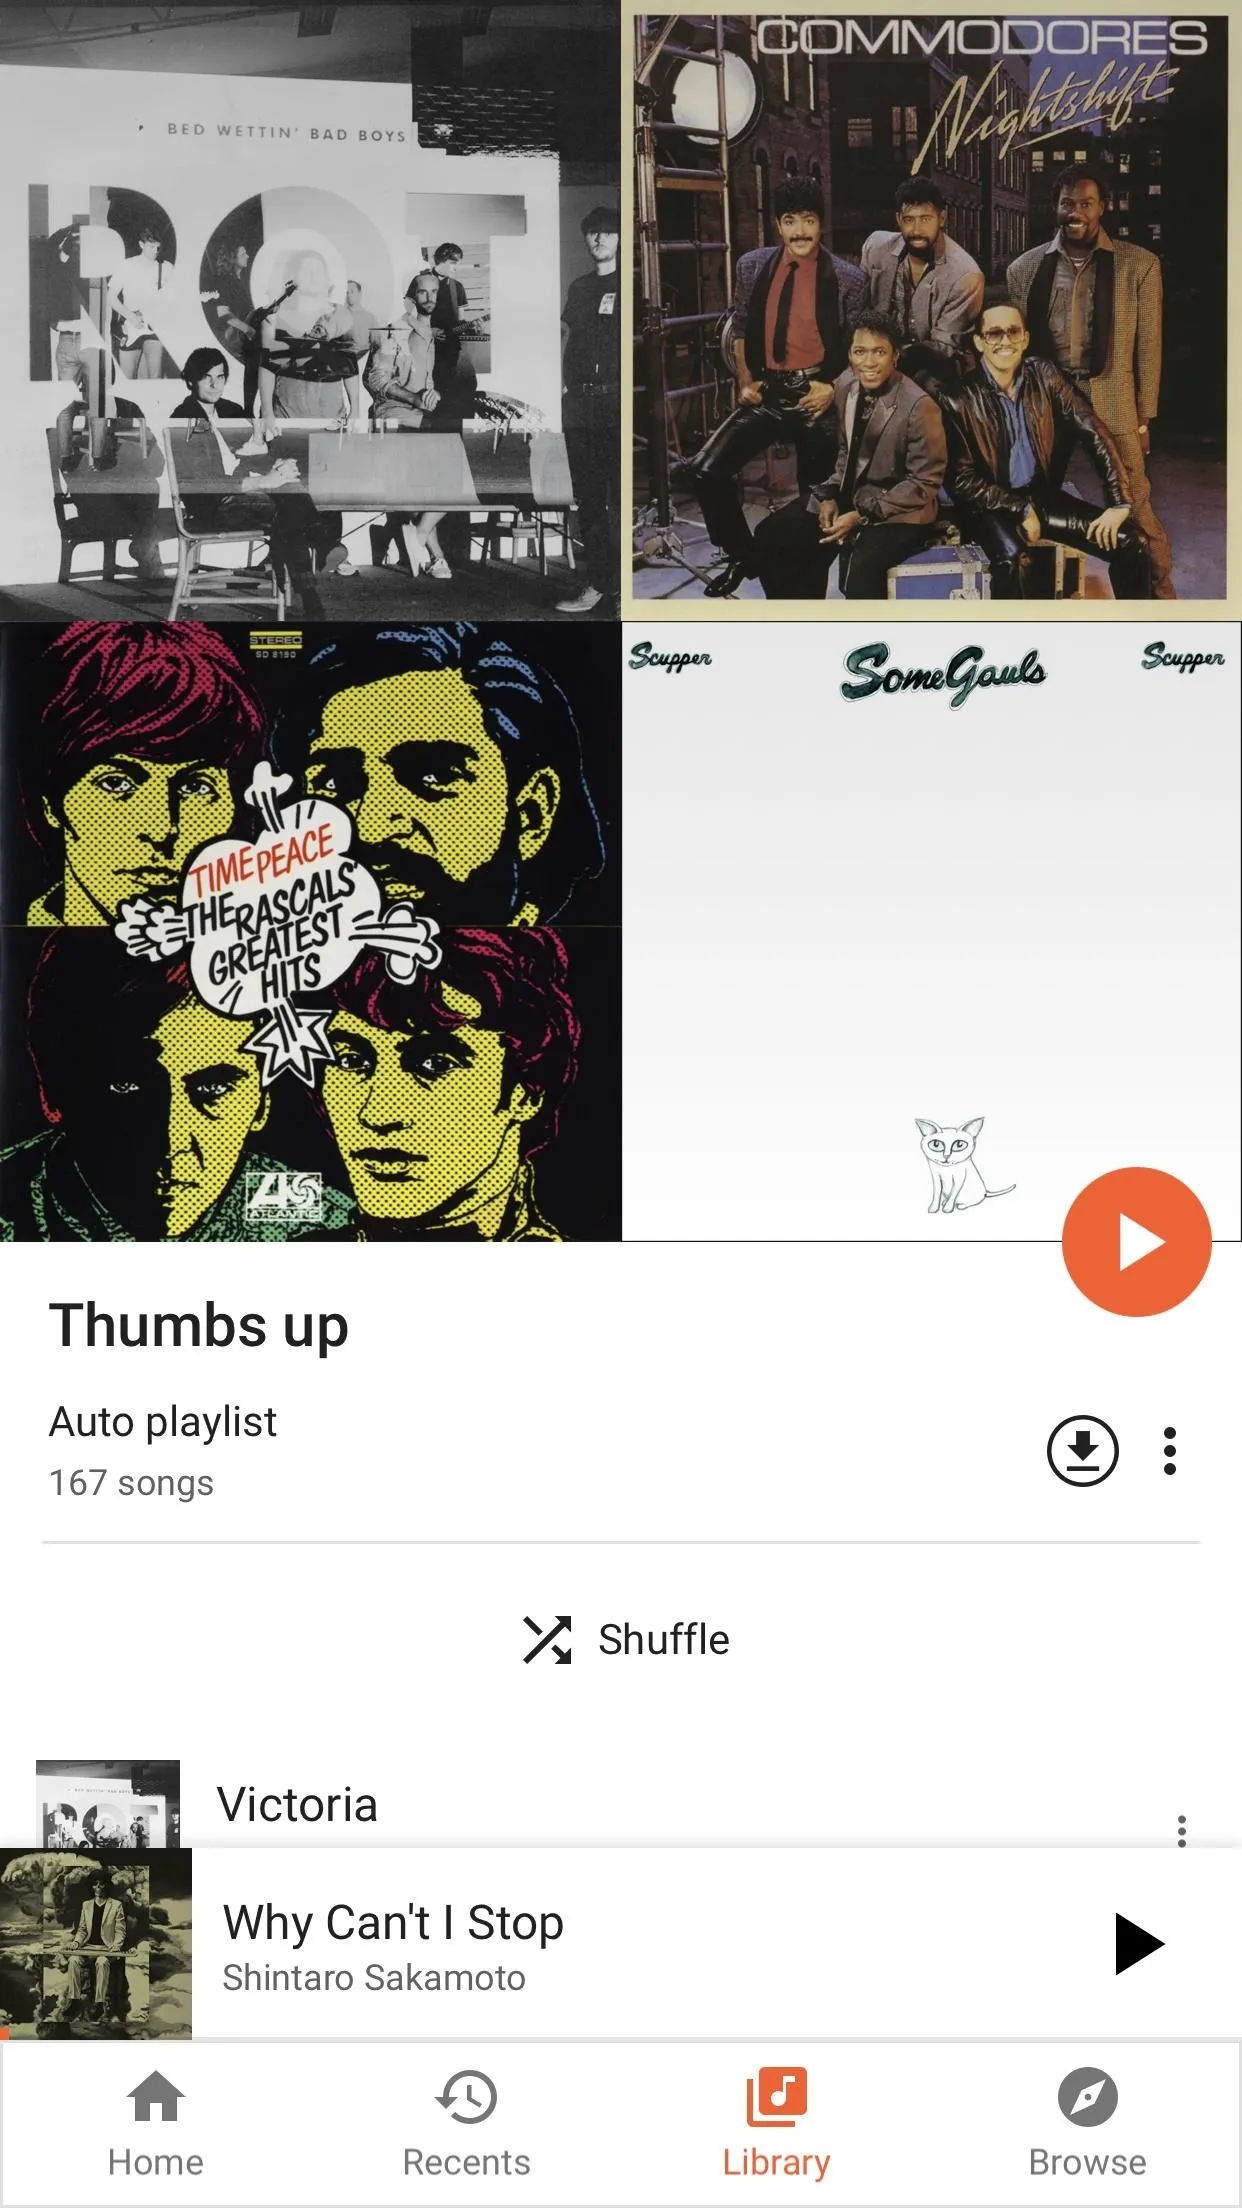
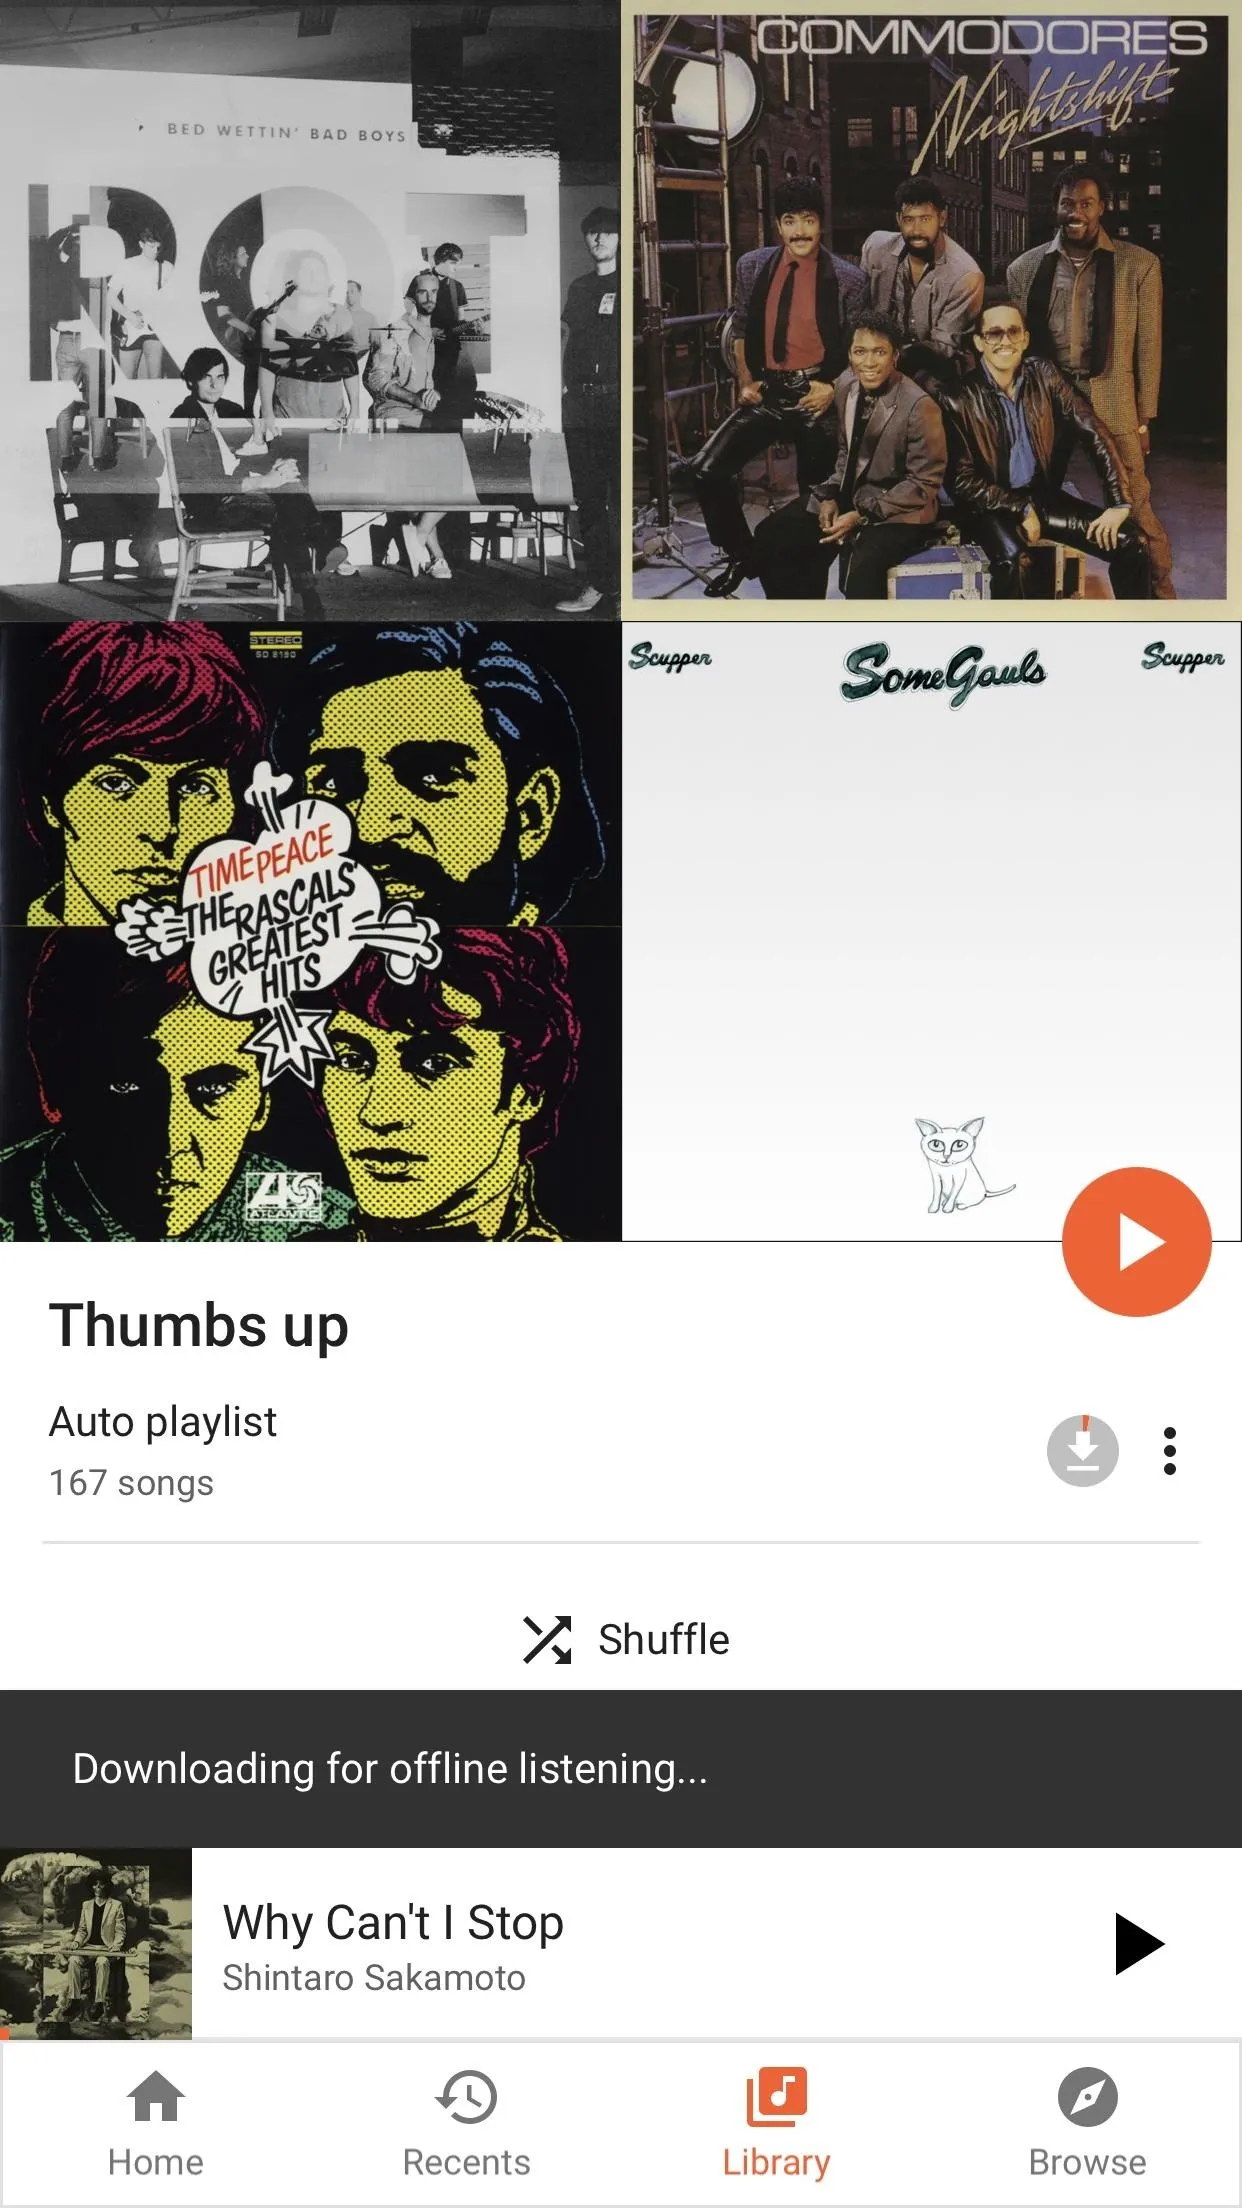
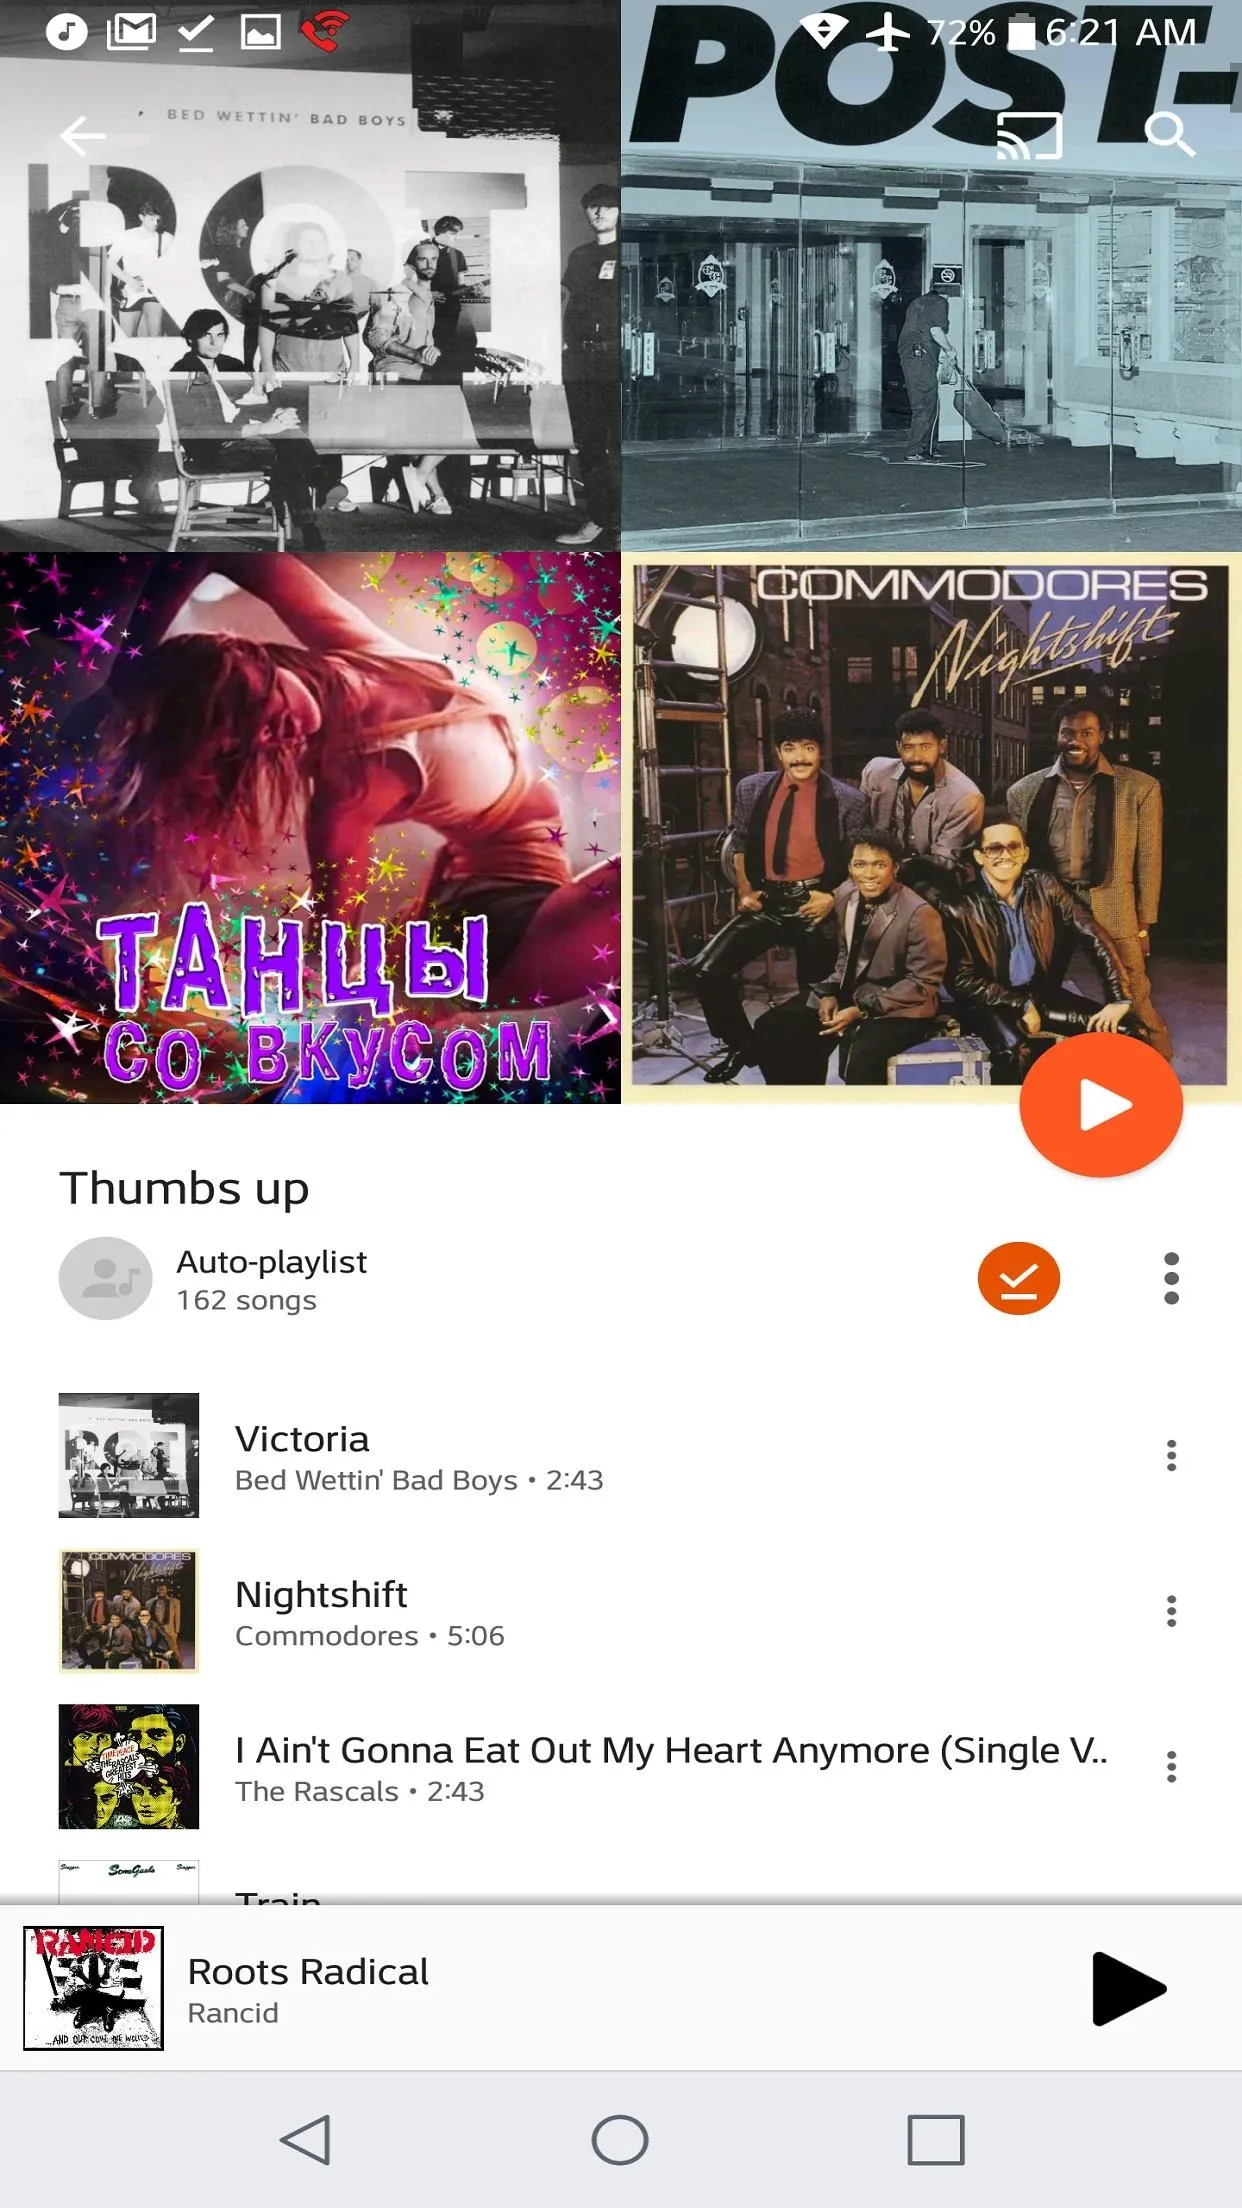
Right, we should probably download something eventually. You can download albums, playlists, and radio stations. One method of doing so is opening up the item in its own page (like expanding a playlist by tapping on it), then tapping the black downward-facing arrow. It should start to fill in orange to indicate that it's being downloaded, and it'll become a check inside an orange bubble when it's done.


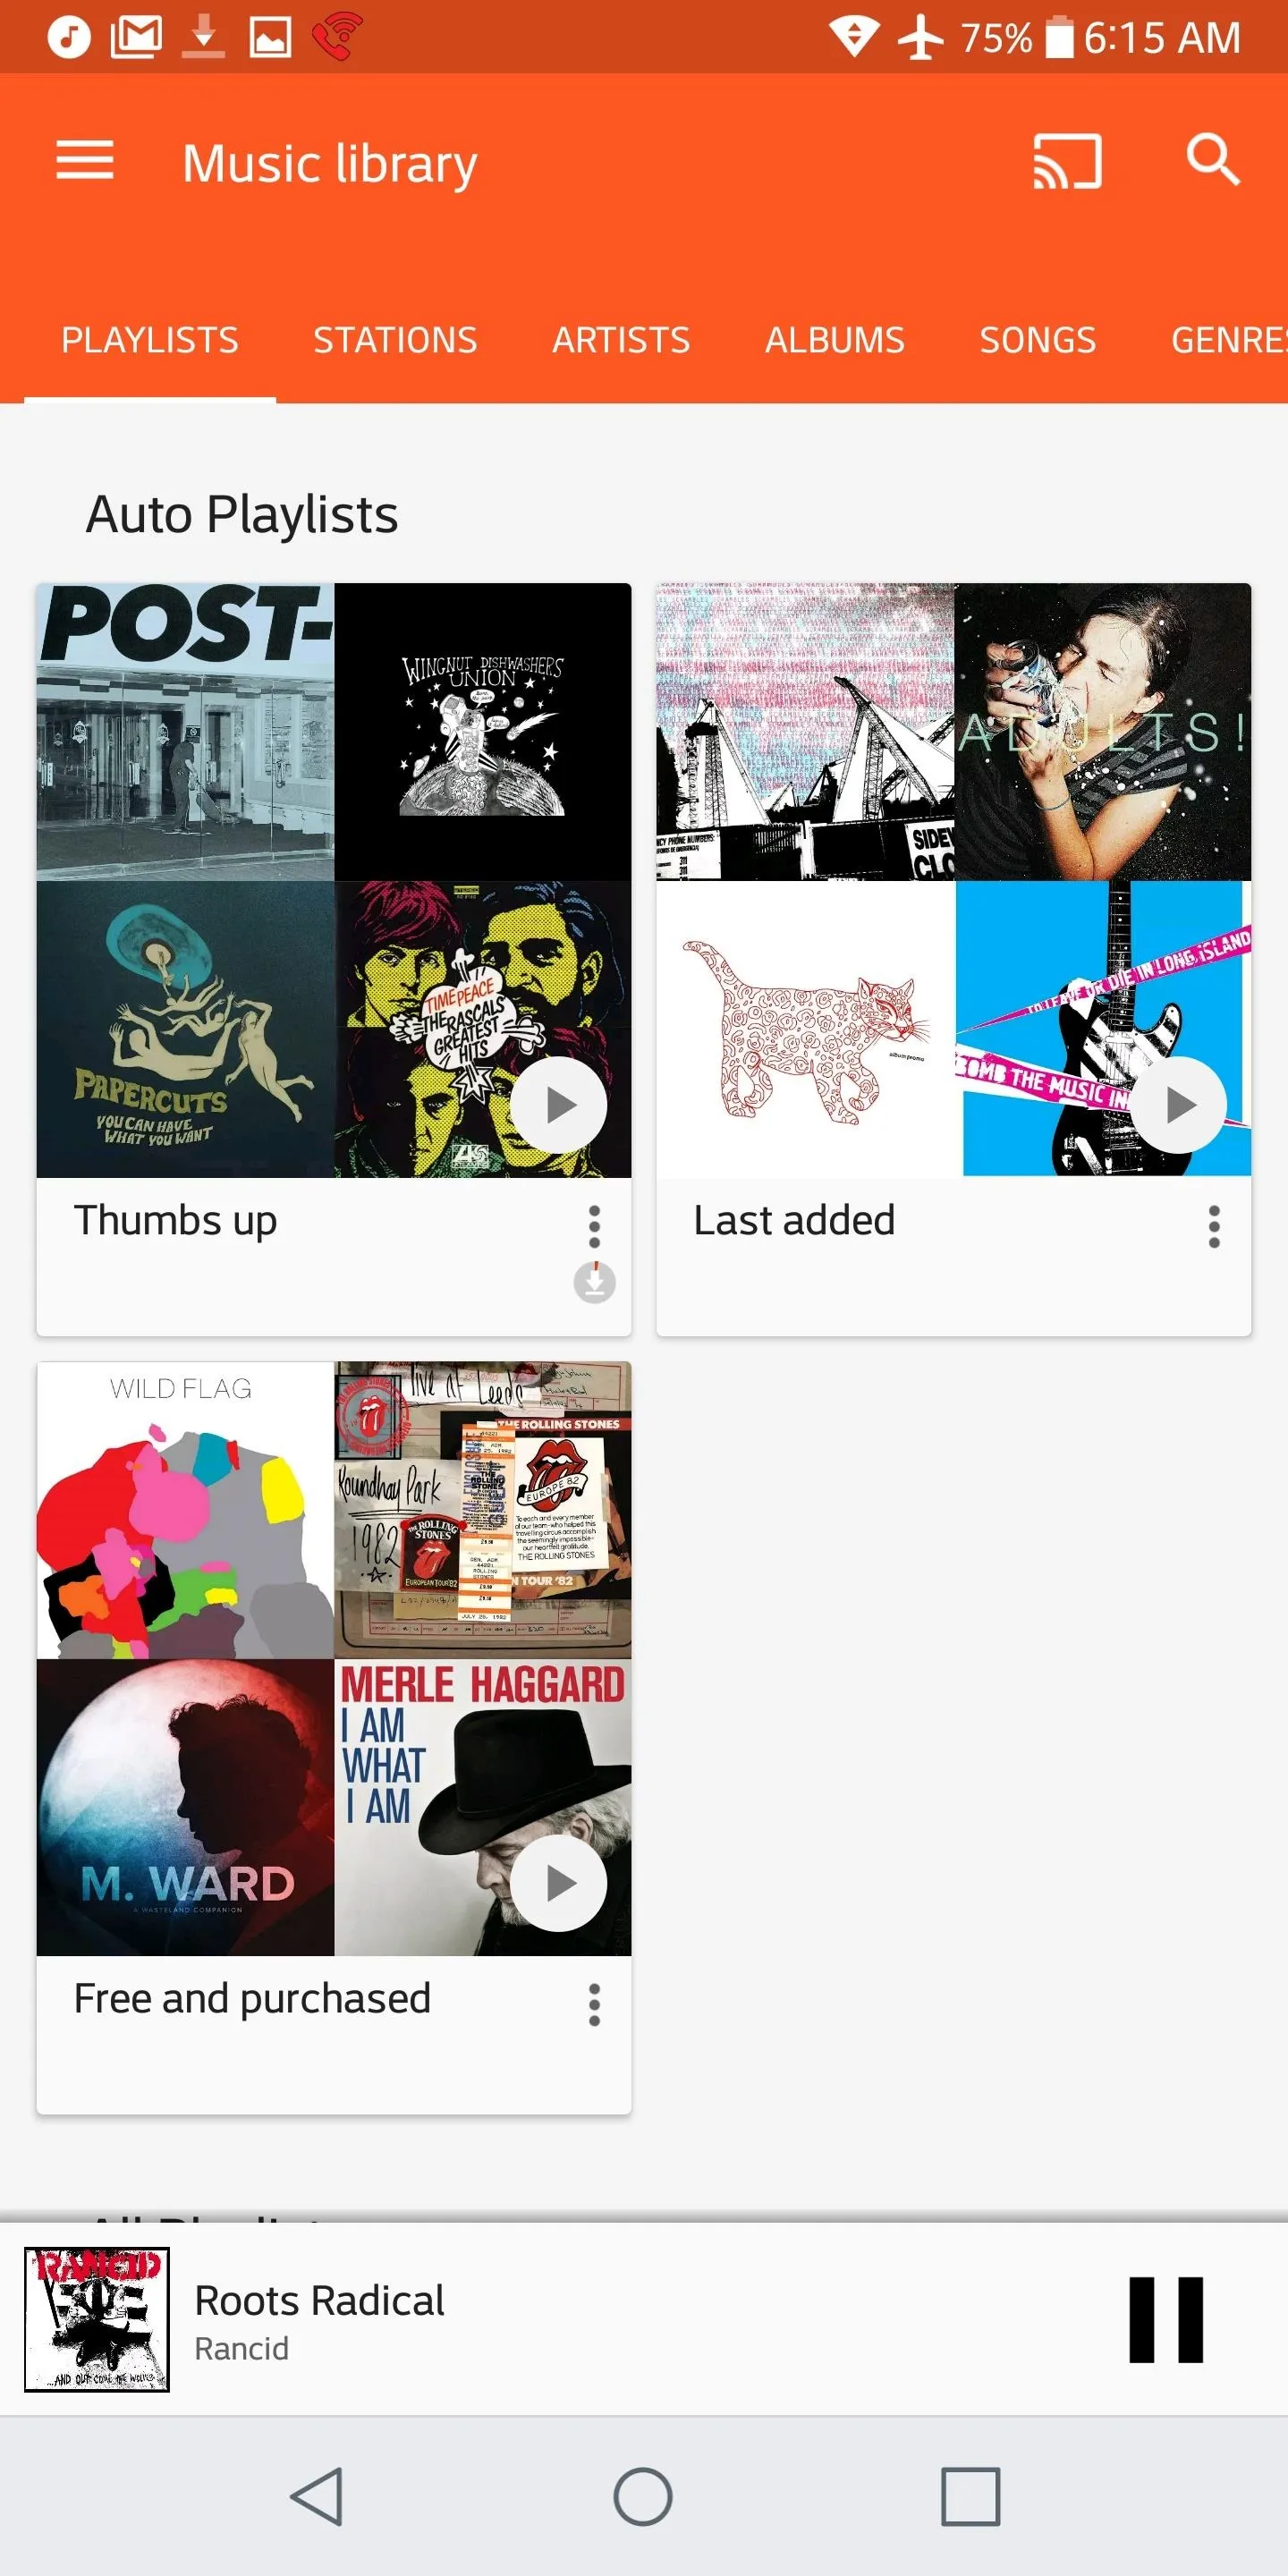
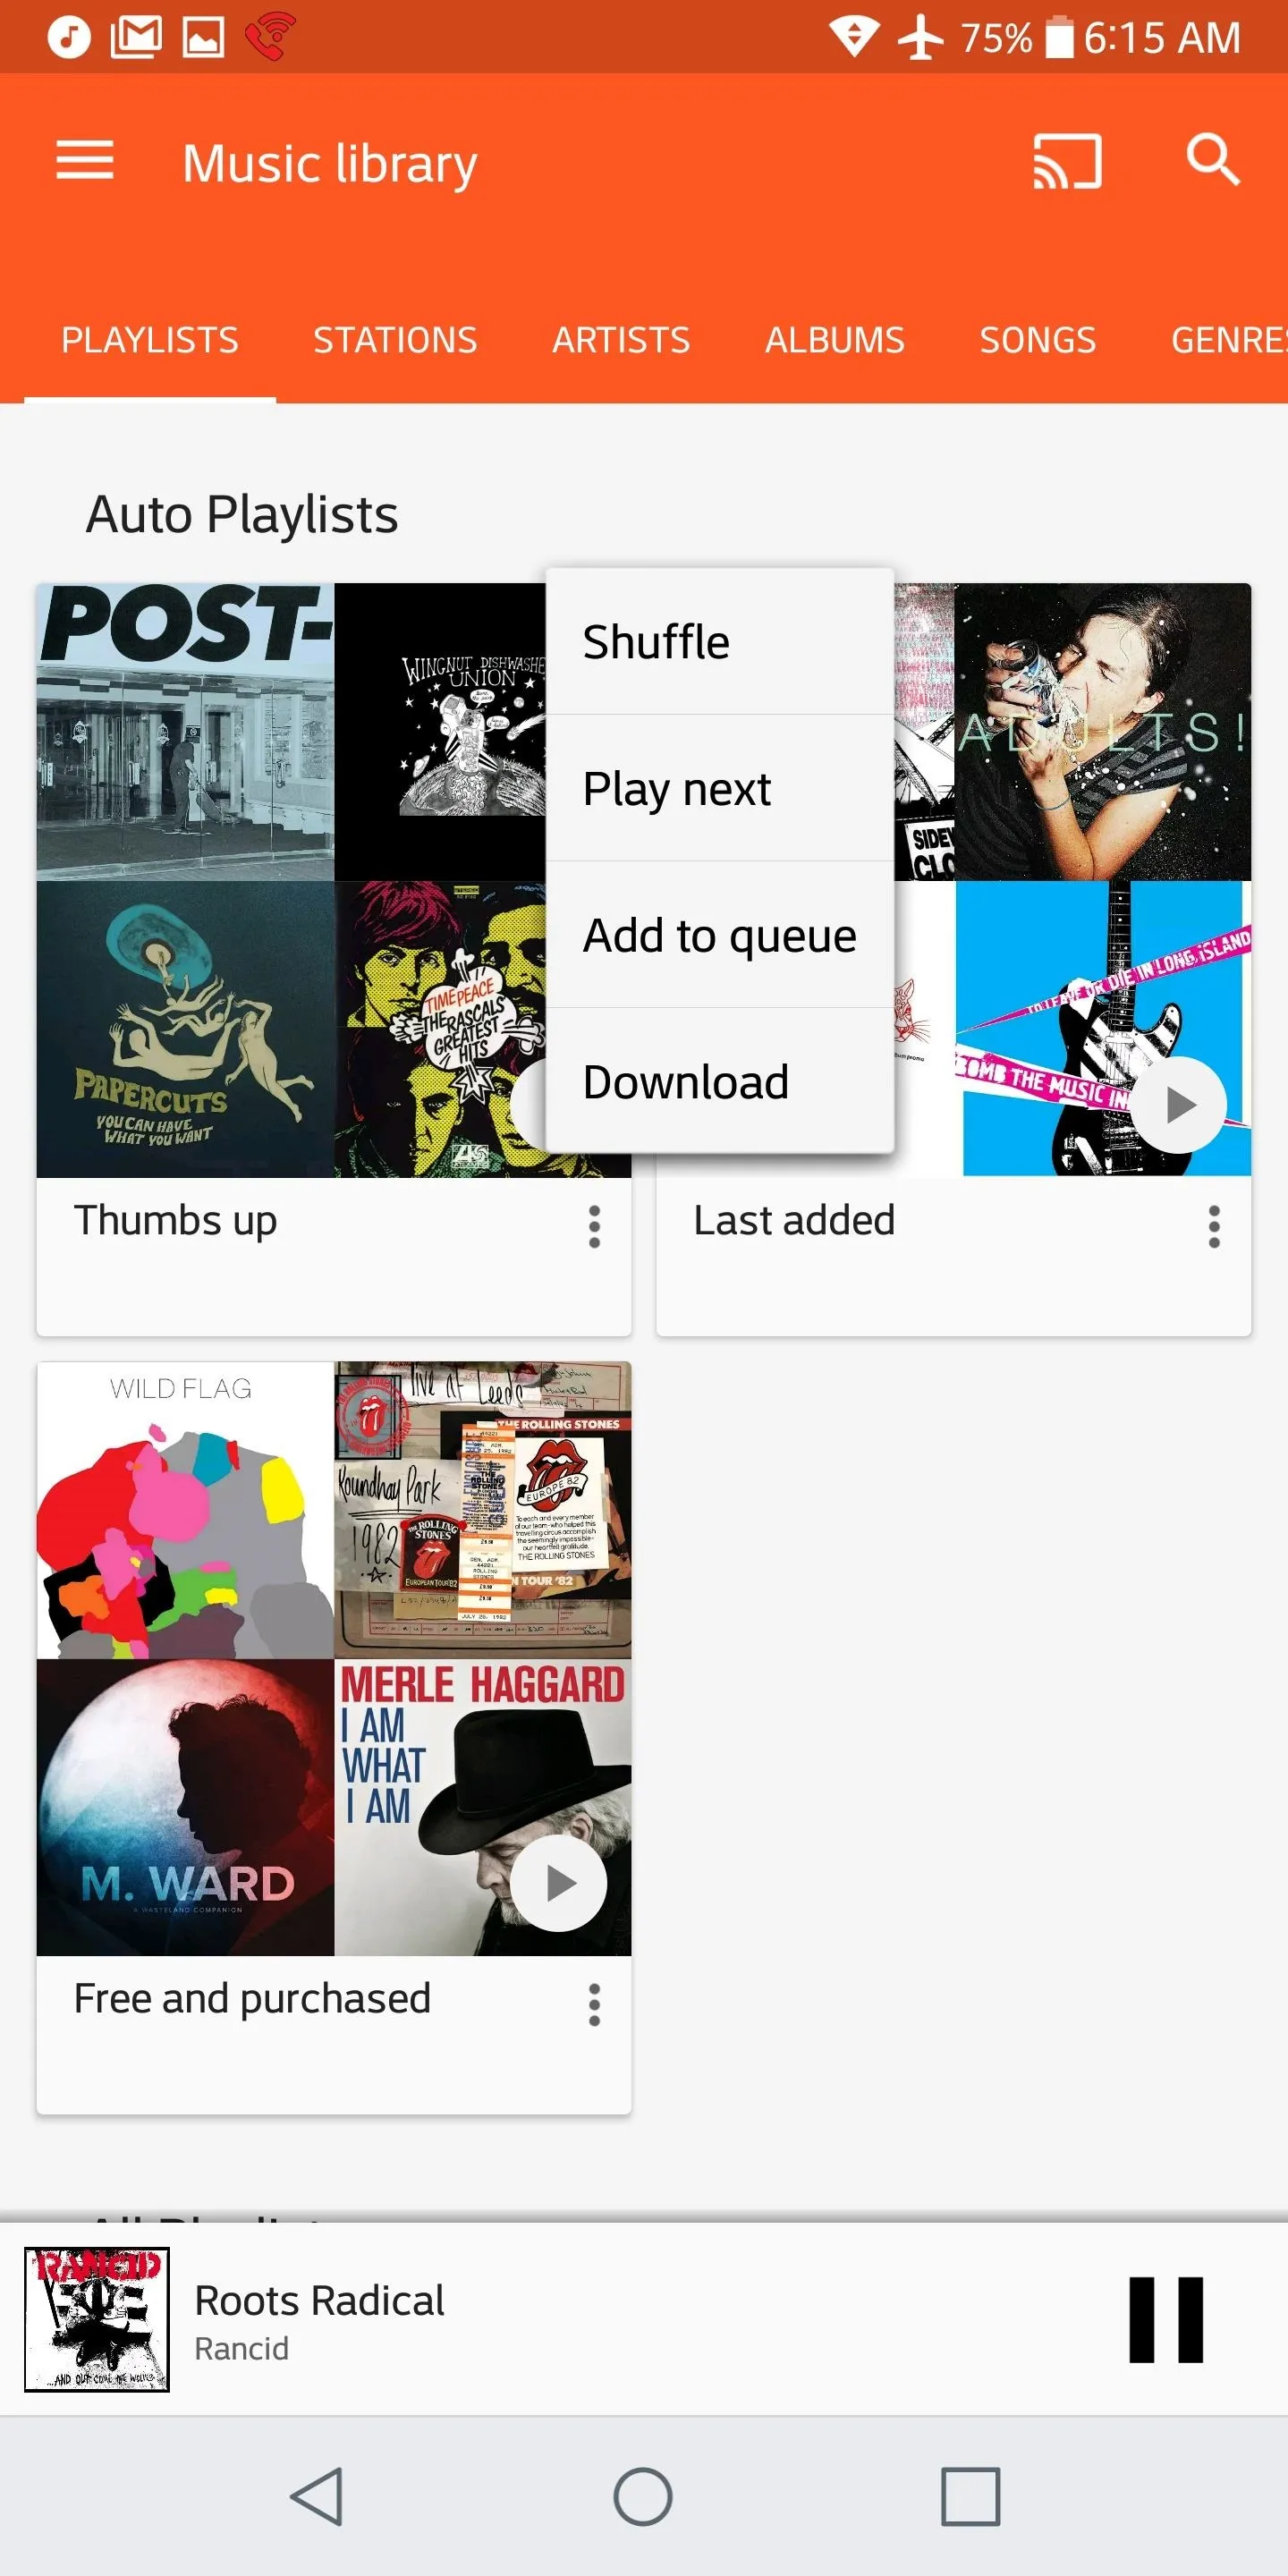
You can also download something by tapping the three-dot menu next to it, and tapping "download."


Tip 1: Manage Your Downloads
It's easy enough to manage your downloads. Do so by tapping "Manage downloads" under Downloading for Android (and Streaming & downloading on iOS). All your downloads will appear here, including ones that are still downloading. You can pause their download by tapping "Pause Downloads." You can also monitor the progress of your downloads — how full the bubble is indicates the percentage of how complete your download is.
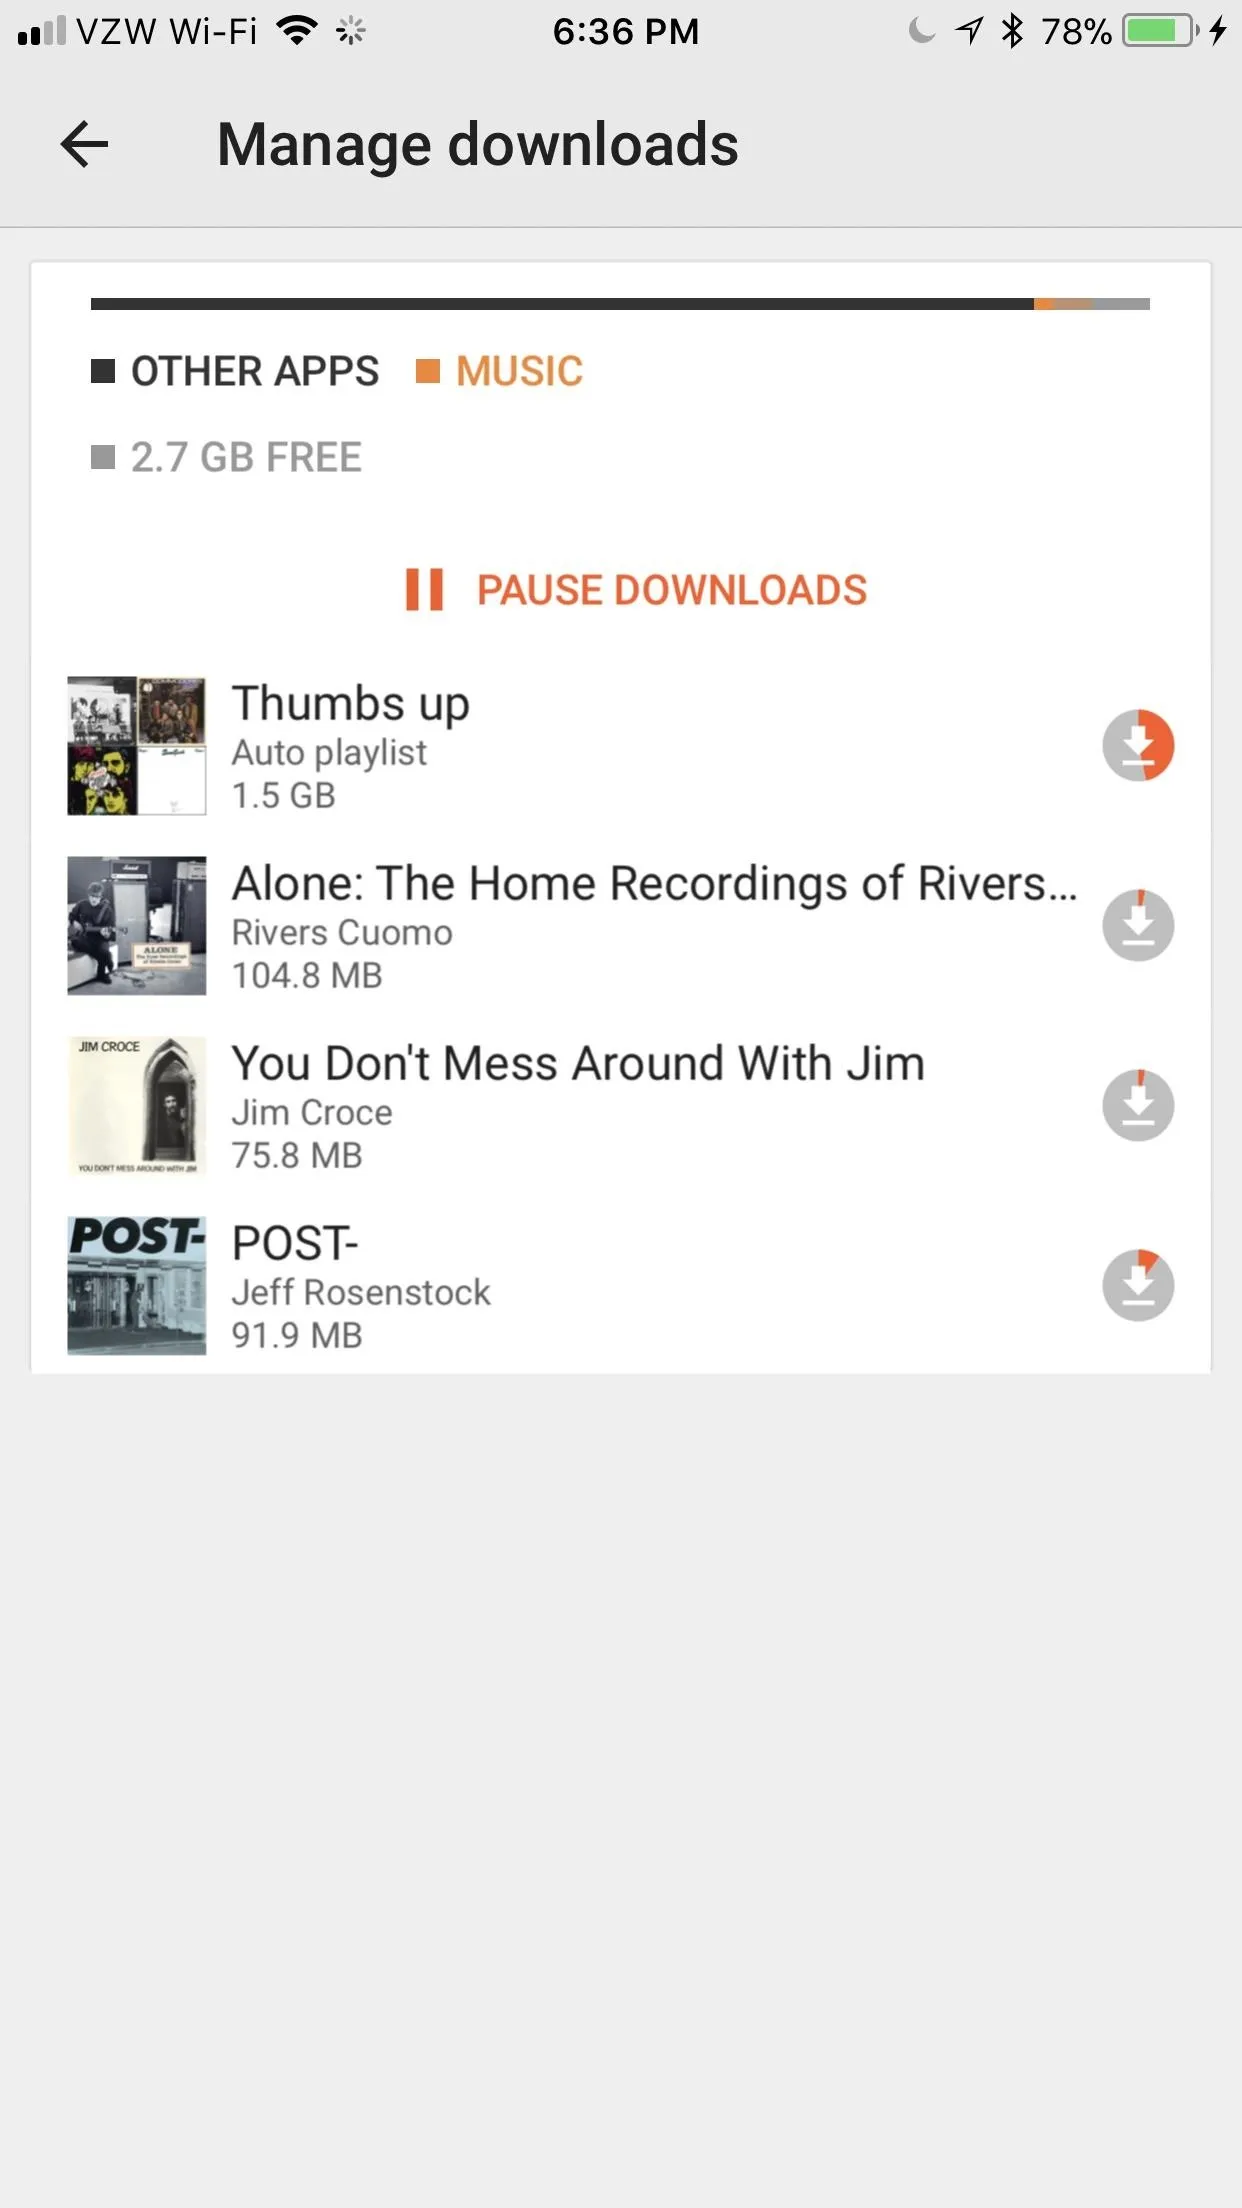
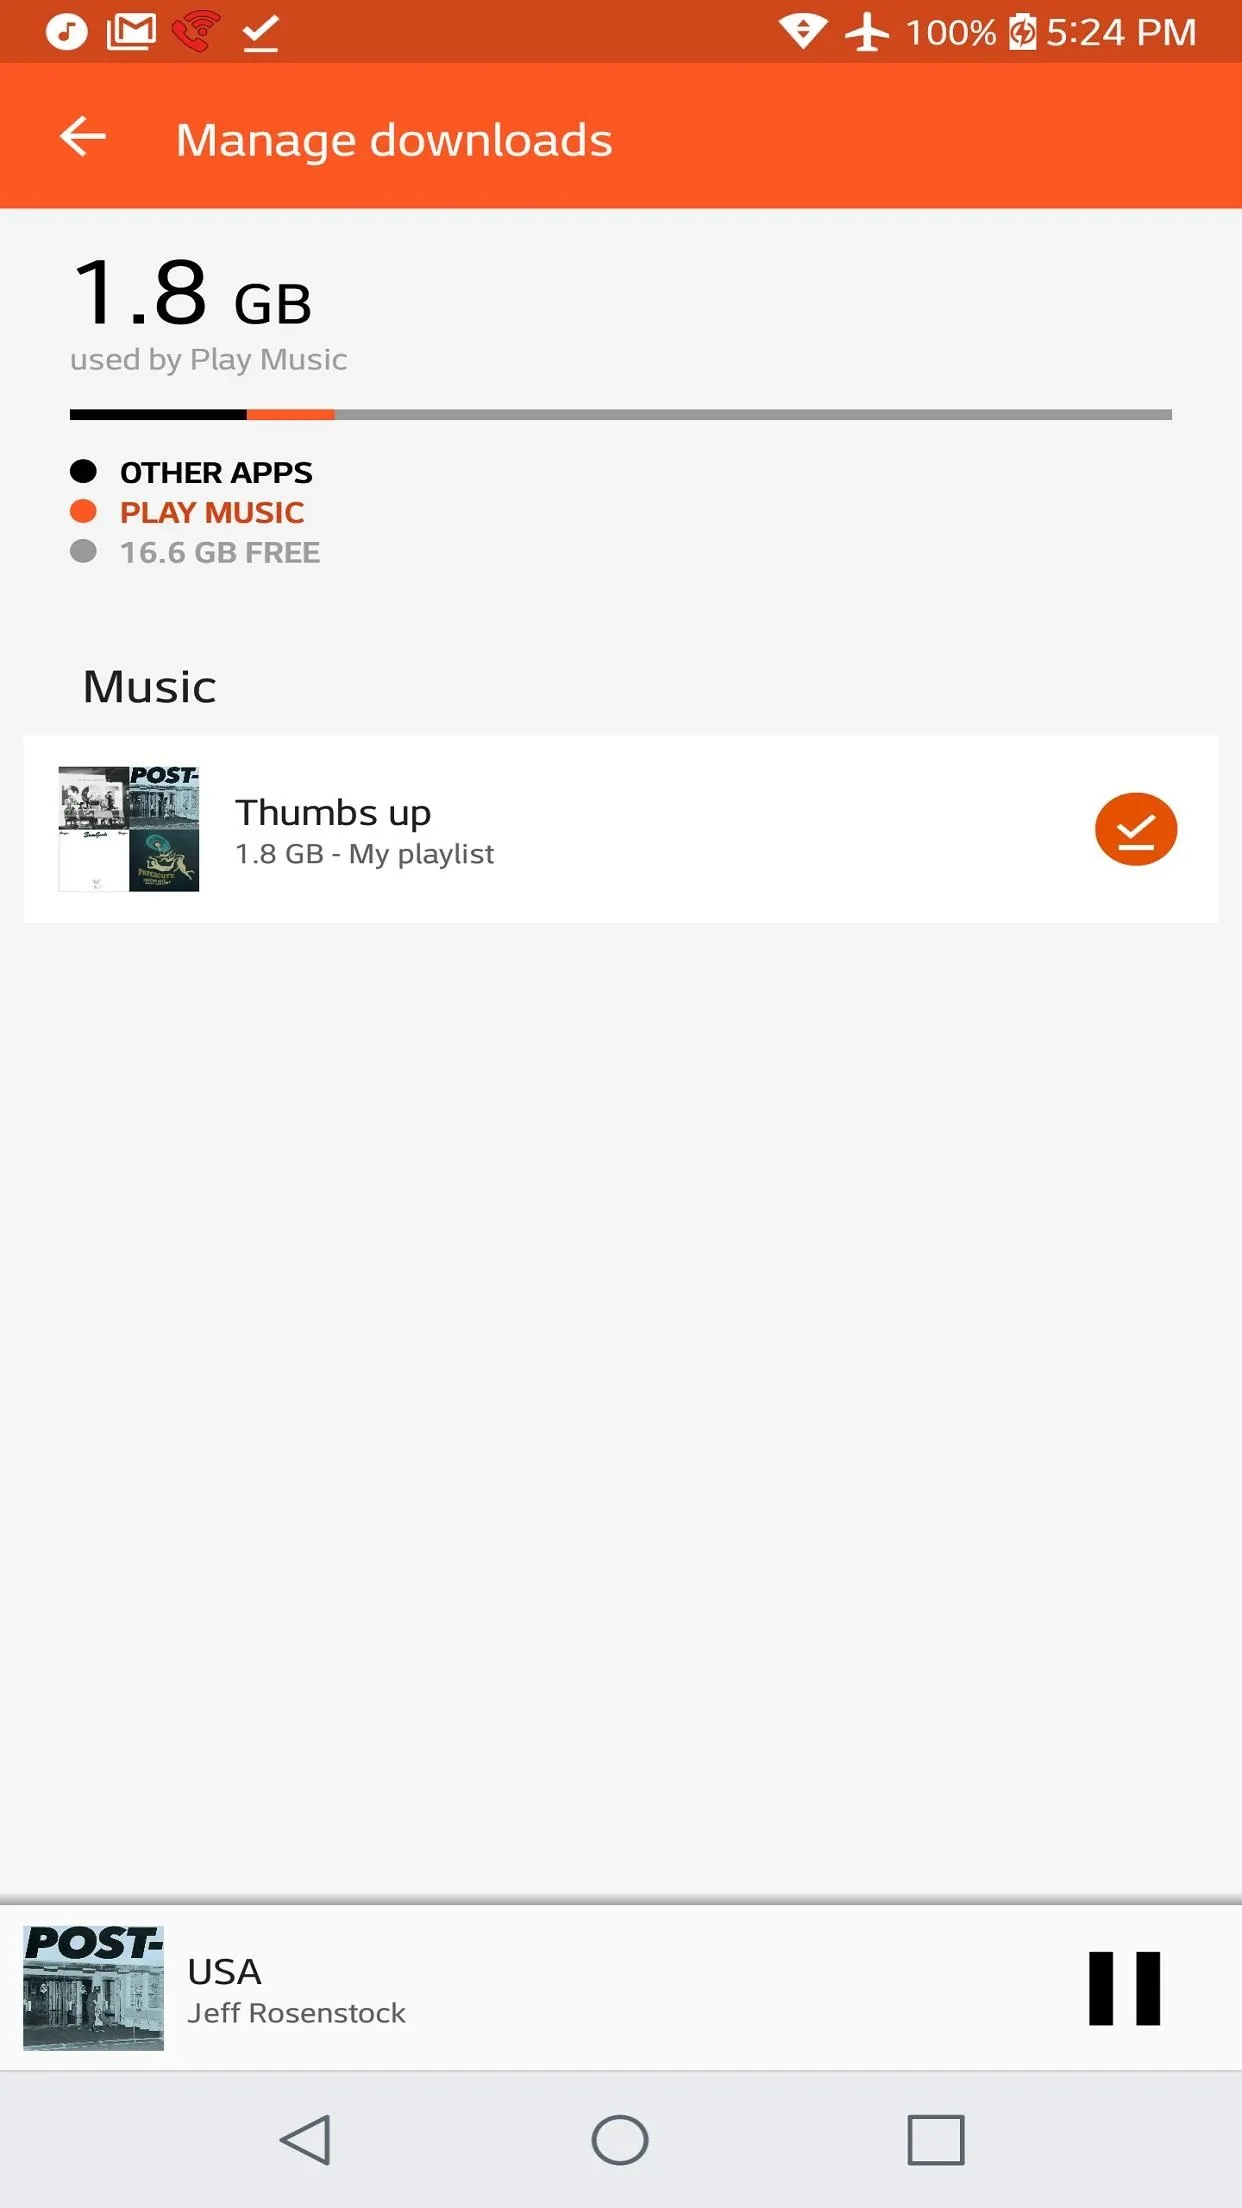


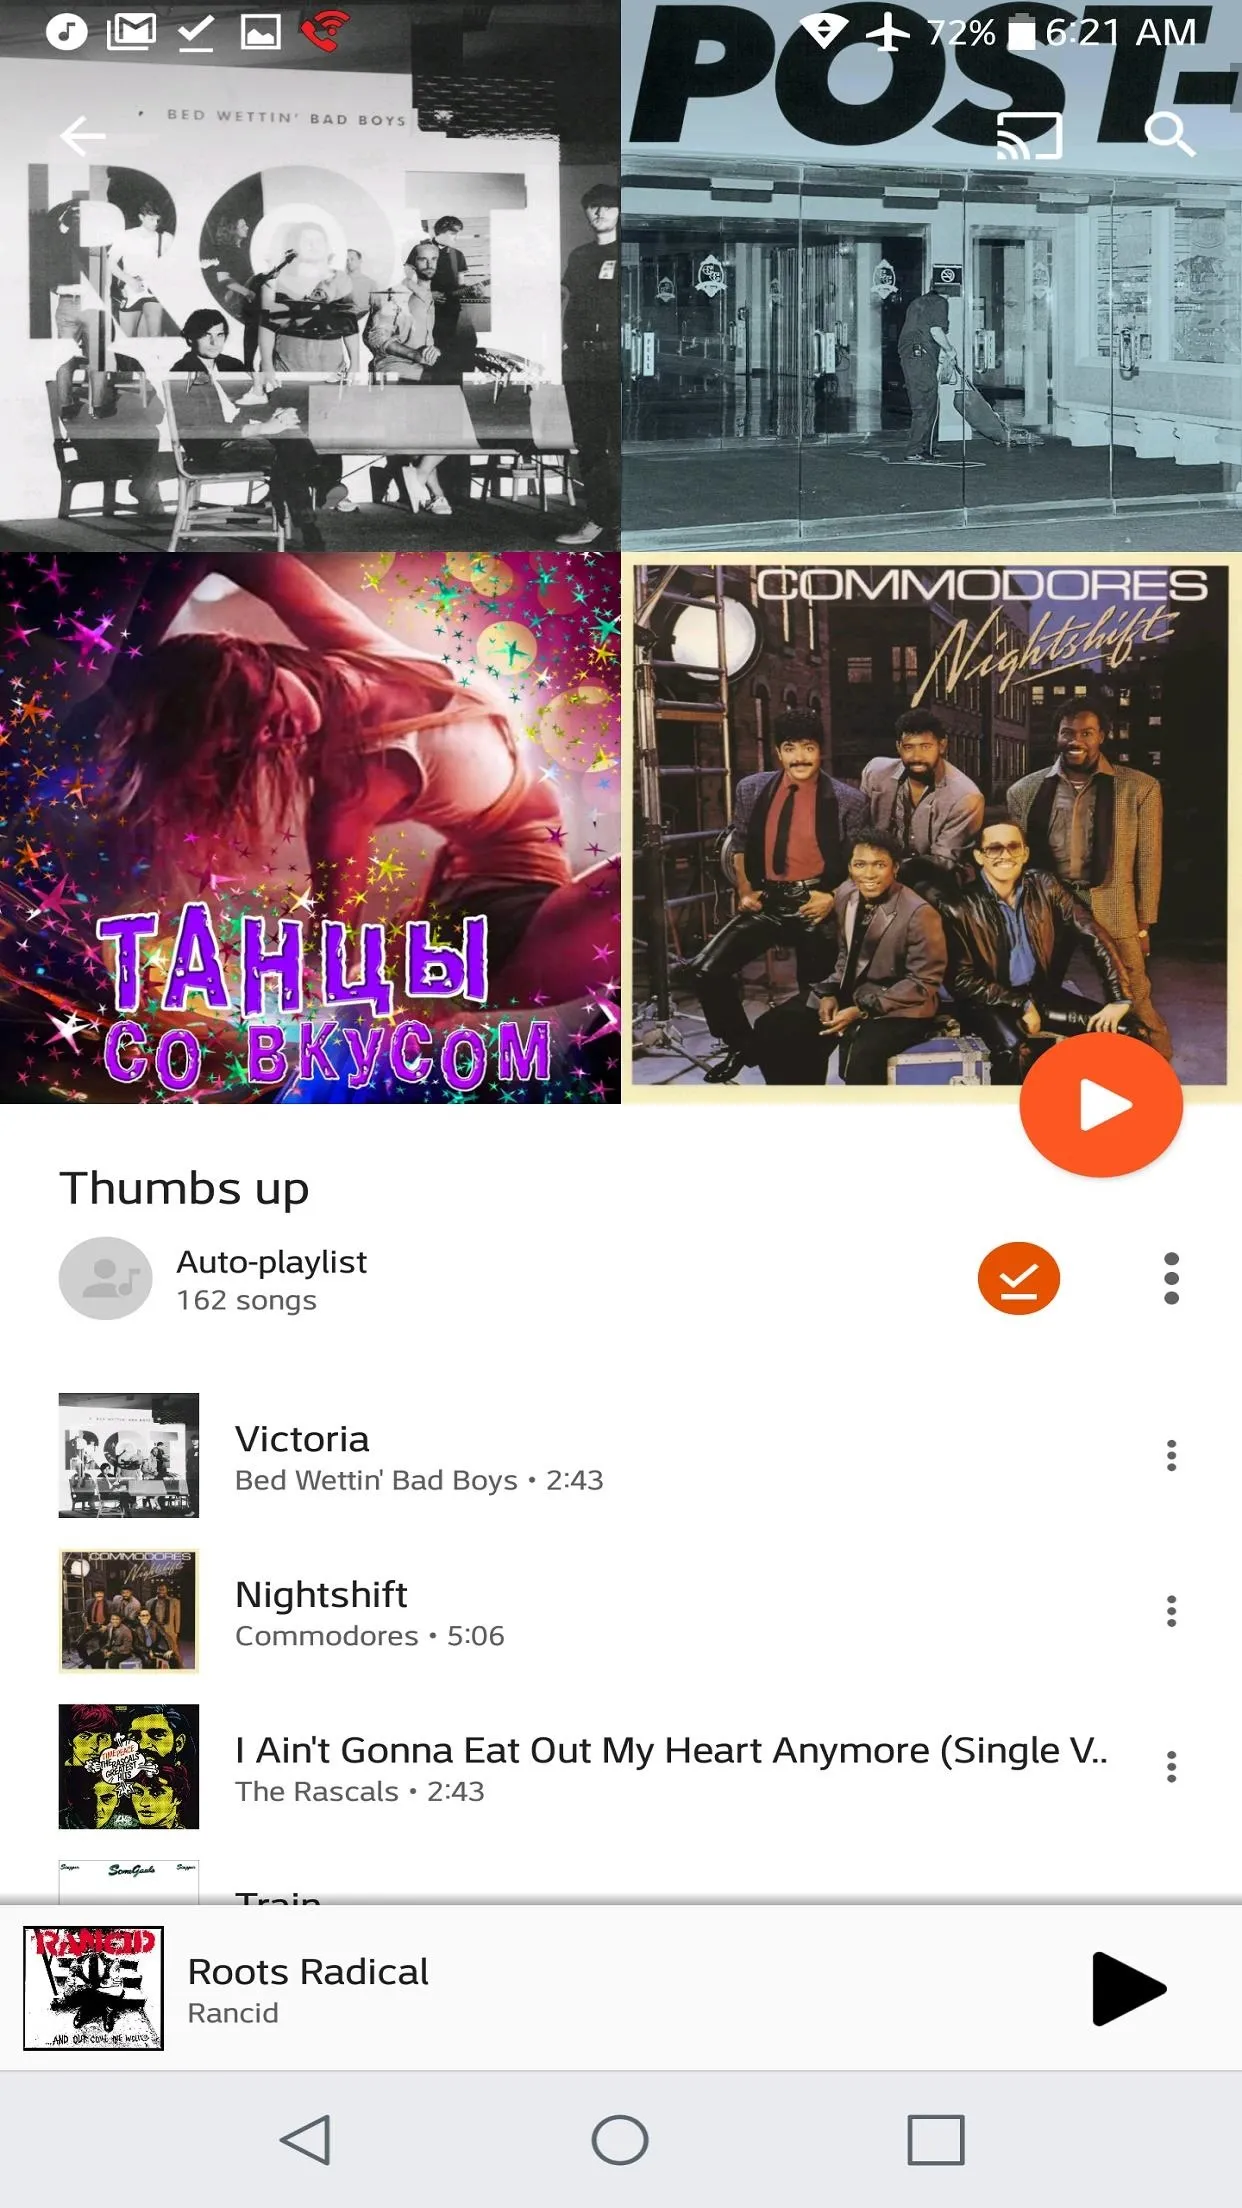
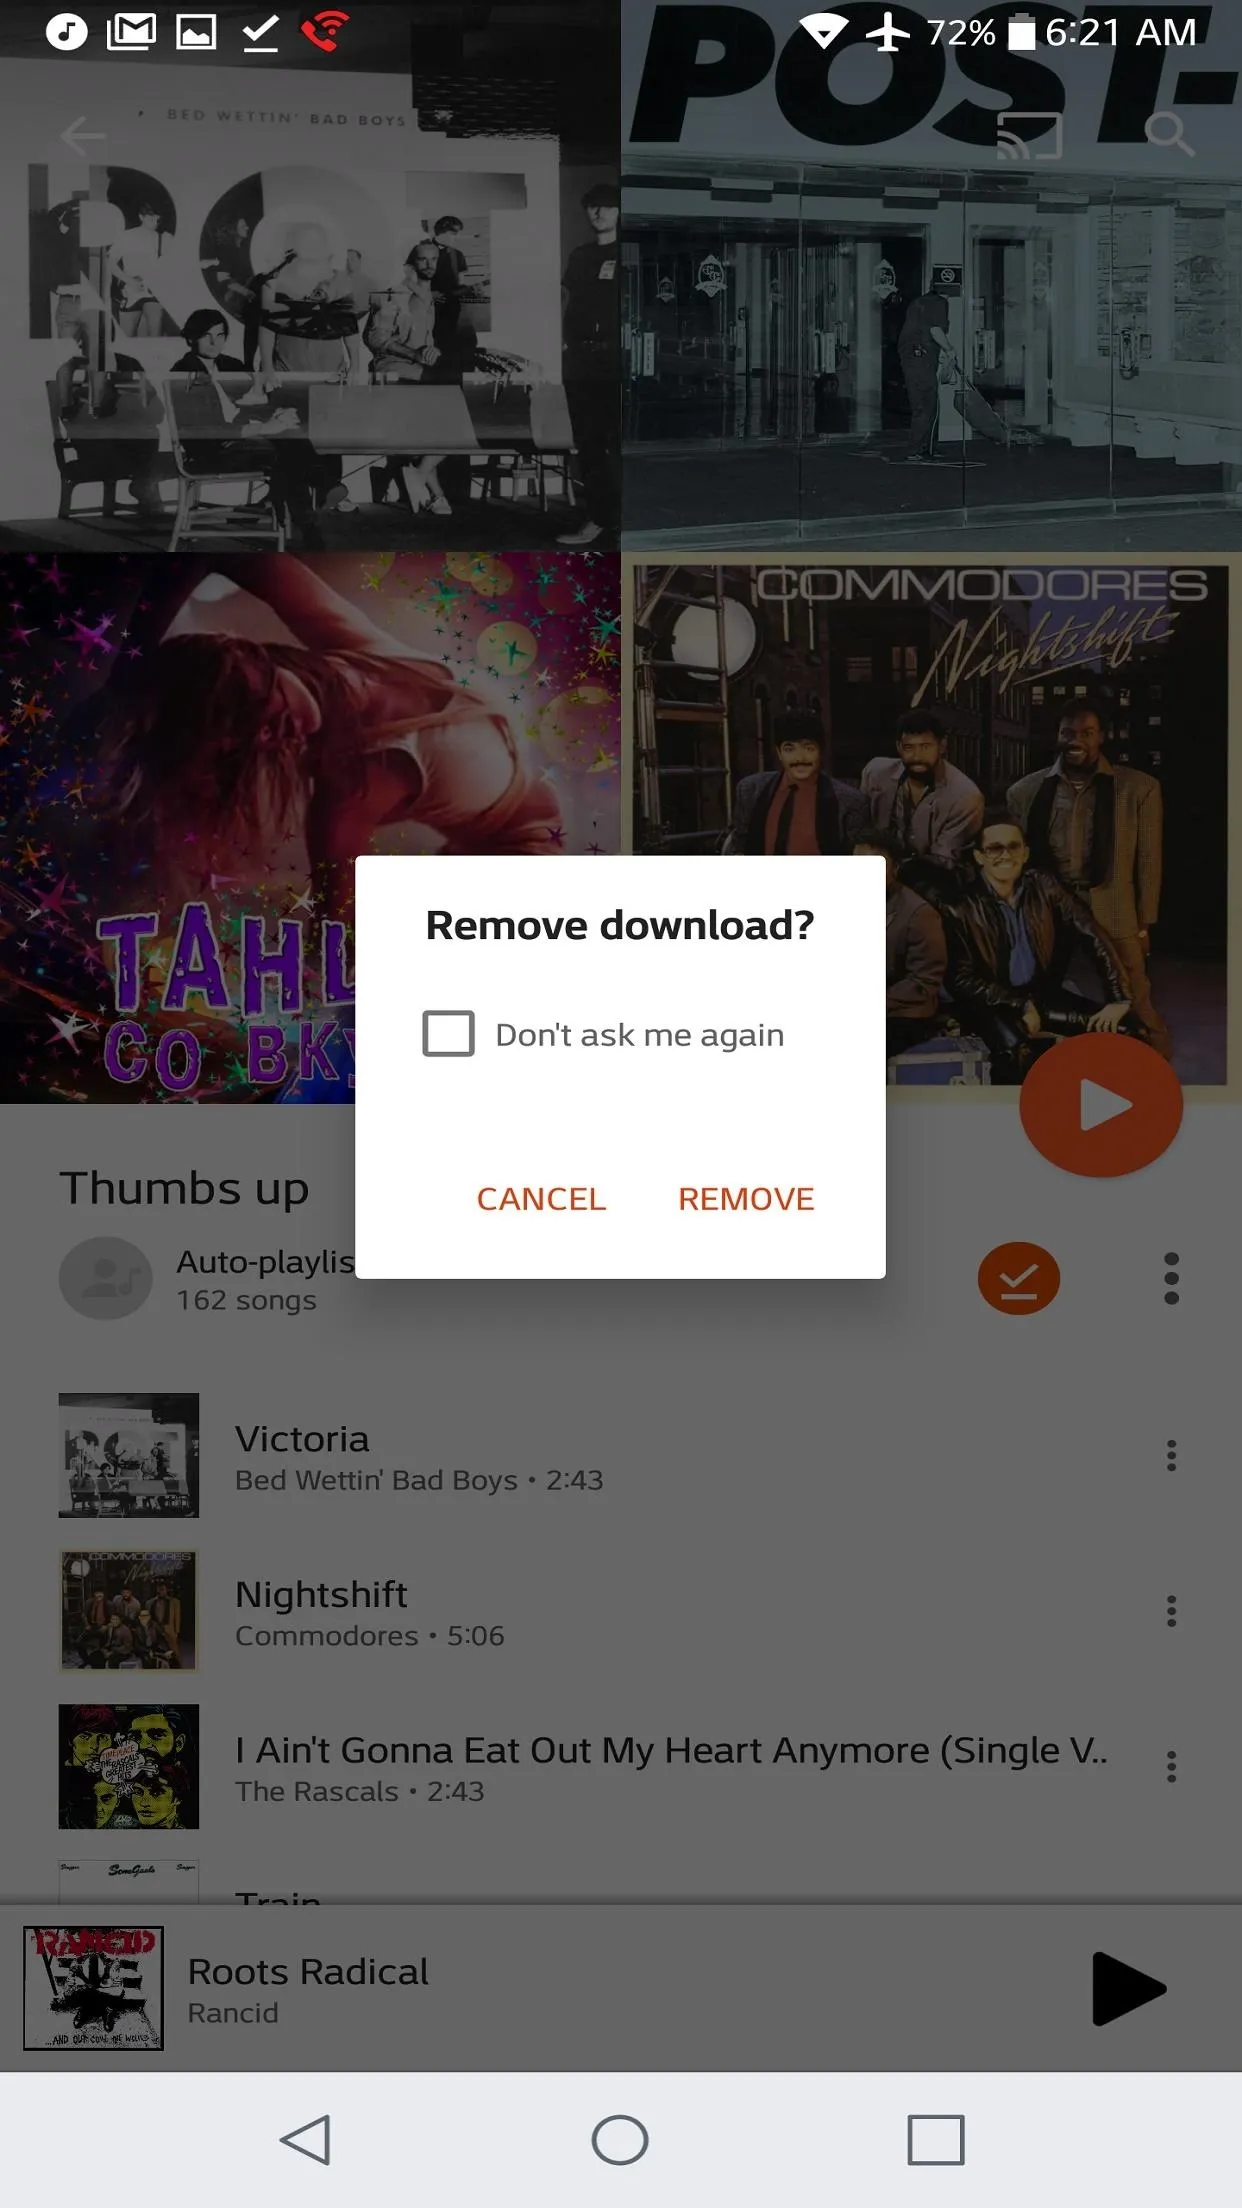
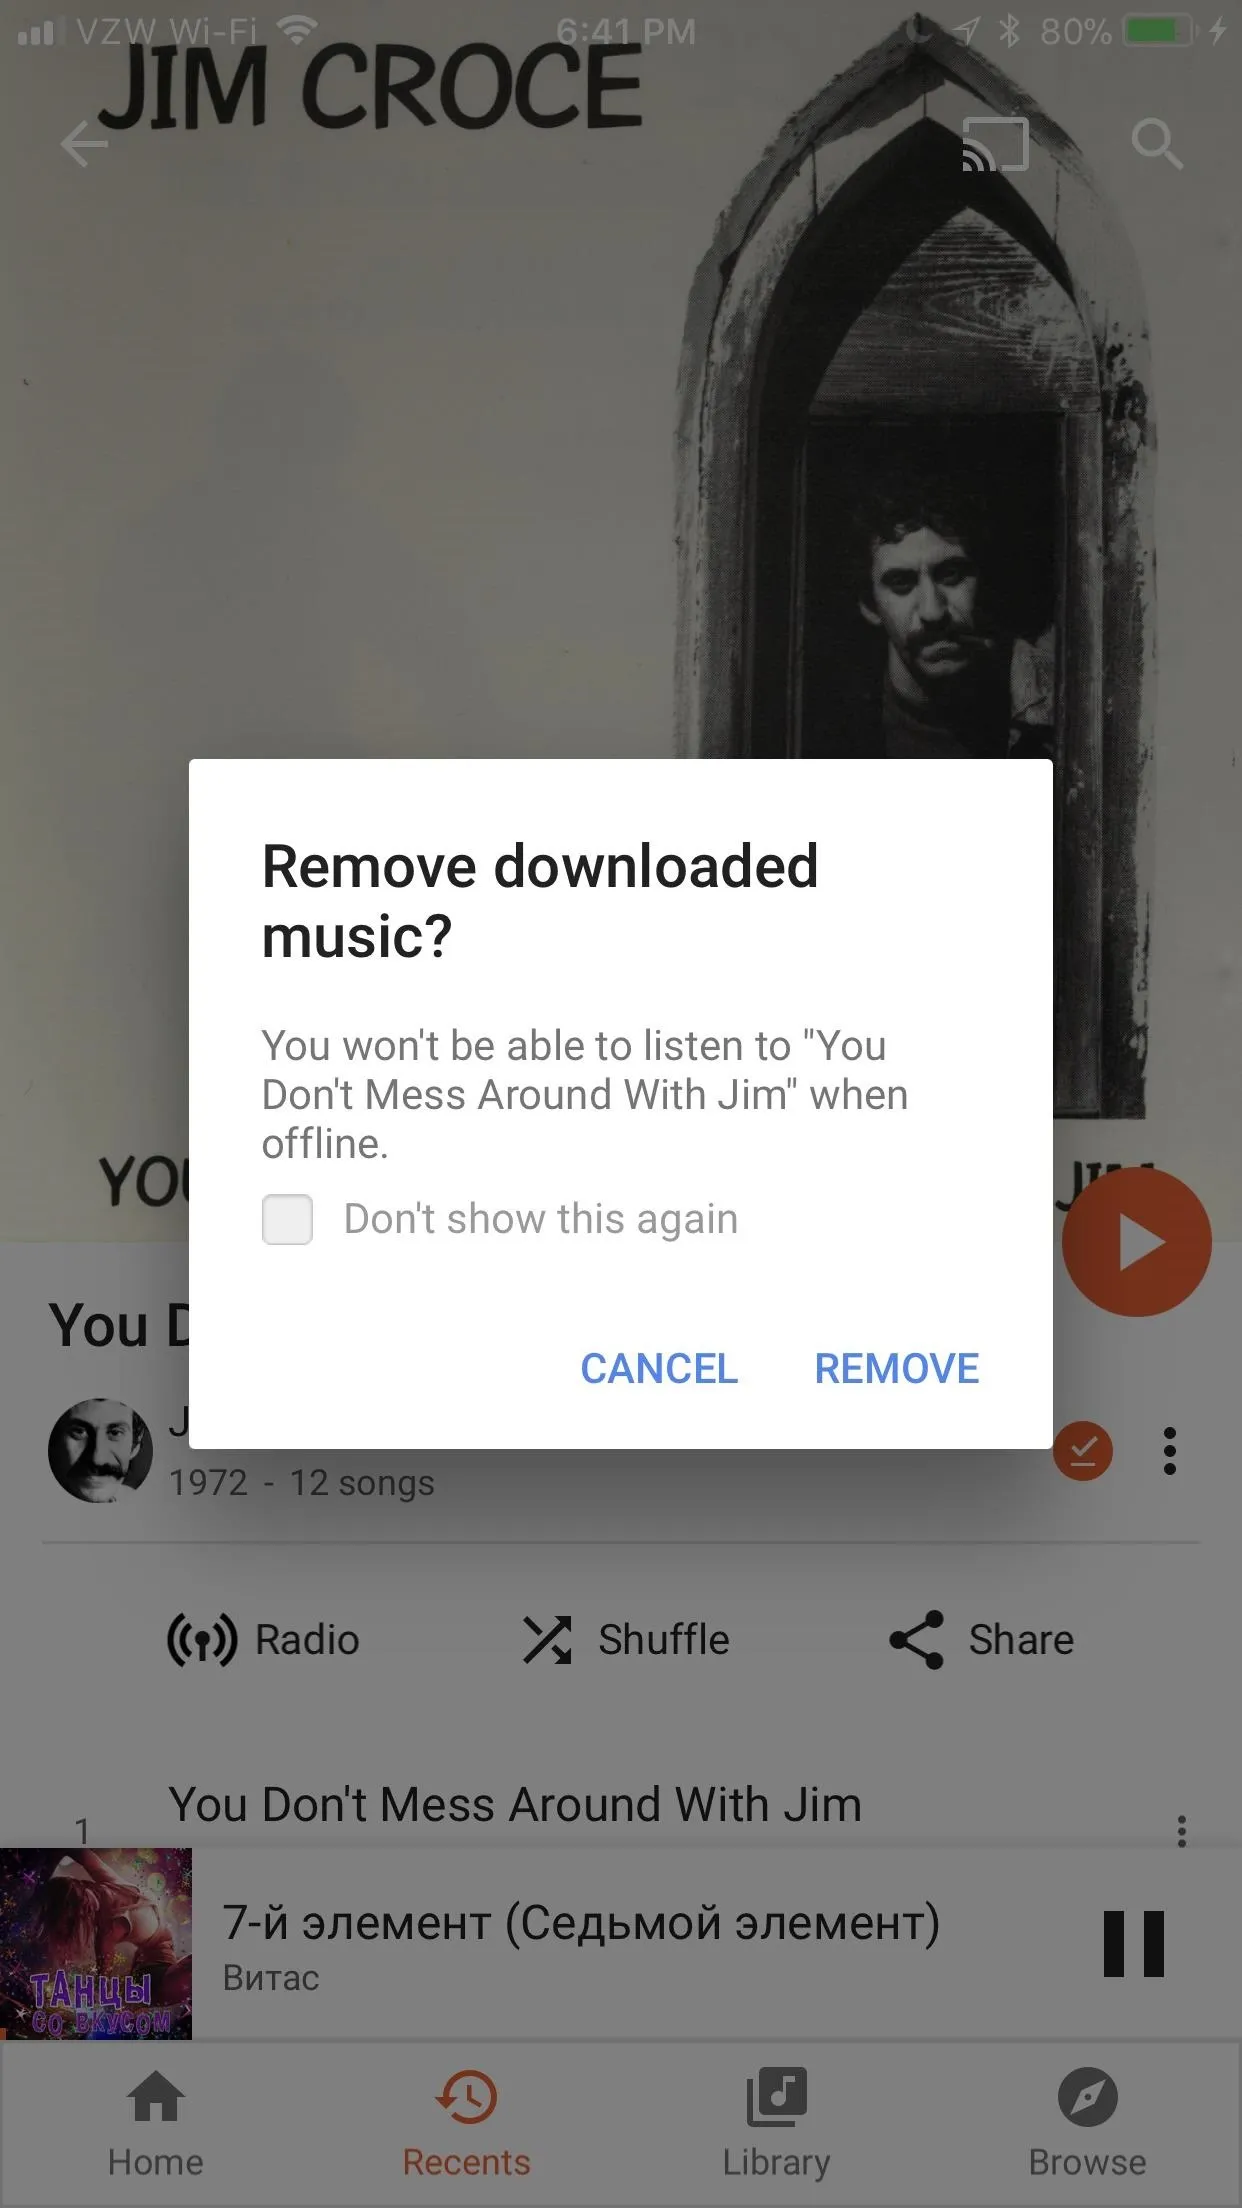
Tap on any of your downloads to go to them, where you can hit the check mark in the orange bubble to delete it from your downloads. You'll need to confirm before Google Play Music lets you get rid of anything, though.


Tip 2: 'Downloaded Only' Mode
If you're really worried about accidentally streaming something, toggle "Downloaded only" mode by going back to the hamburger menu we used to get to Settings. This will only allow you to listen to music that's on your device. This is actually also the only way you can see what Google decided to cache for you, so that's a neat trick.


Tip 3: Auto-Download
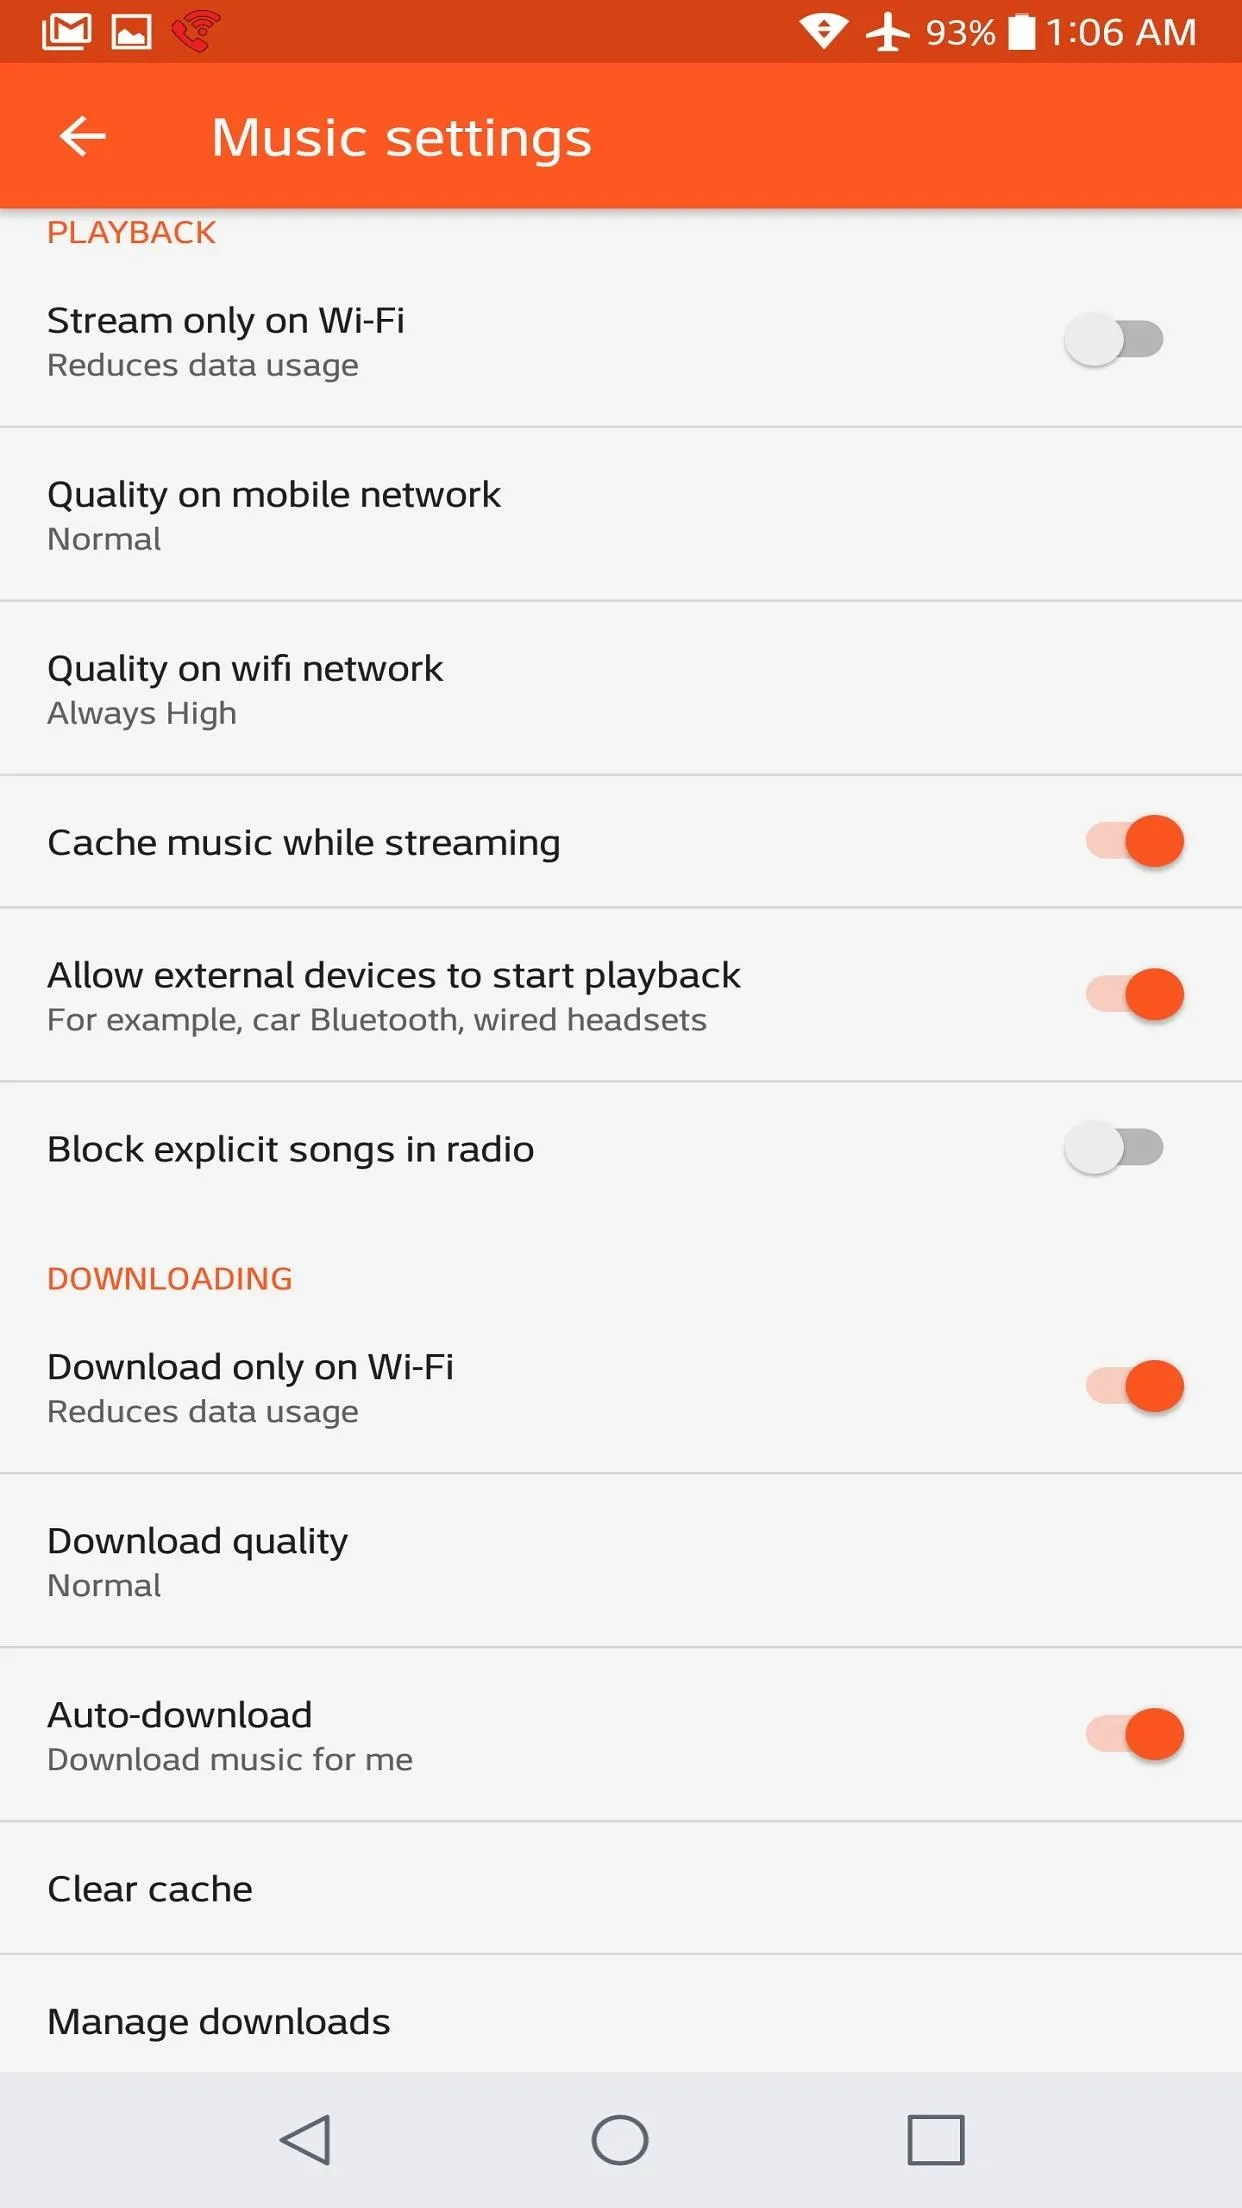
Auto-download is an Android-only feature that automatically downloads music as you listen to it. Whereas the cache shows discretion, this feature does not — so enable it under Downloading if you'd like. However, it won't work if you disable the cache.


Has this helped you become a data cap wizard like you hoped? Do you have any other tips and tricks to offer? Let us know in the comments below.
- Follow Gadget Hacks on Facebook, Twitter, YouTube, and Flipboard
- Follow WonderHowTo on Facebook, Twitter, Pinterest, and Flipboard
Cover image and screenshots by Brian Lang/Gadgethacks




Comments
No Comments Exist
Be the first, drop a comment!