Dark mode is one of the most requested features these days, but it's even more important with a navigation app. If you're using Google Maps for directions while driving at night, the default white background will shock your eyes and make it harder to see the road in front of you. Thankfully, you can now enable a dark theme to make this whole process a lot safer.
Because a full-on dark mode in Google Maps would make it hard to read the regular map, Google only implemented it for navigation. By default, dark mode will automatically be enabled in navigation when your phone's light sensor detects low light, but you can also set it to always be in dark mode. This way, you can easily navigate the map when looking for a destination, but still enjoy some battery savings while actually traveling with turn-by-turn directions.
- Don't Miss: How to Enable Apple's True Dark Mode in iOS 13
Step 1: Download the Latest Version of Google Maps
First, head to the App Store (iOS) or Play Store (Android) and download the latest version of Google Maps, as the dark mode feature is fairly new.

Step 2: Turn on Dark Mode
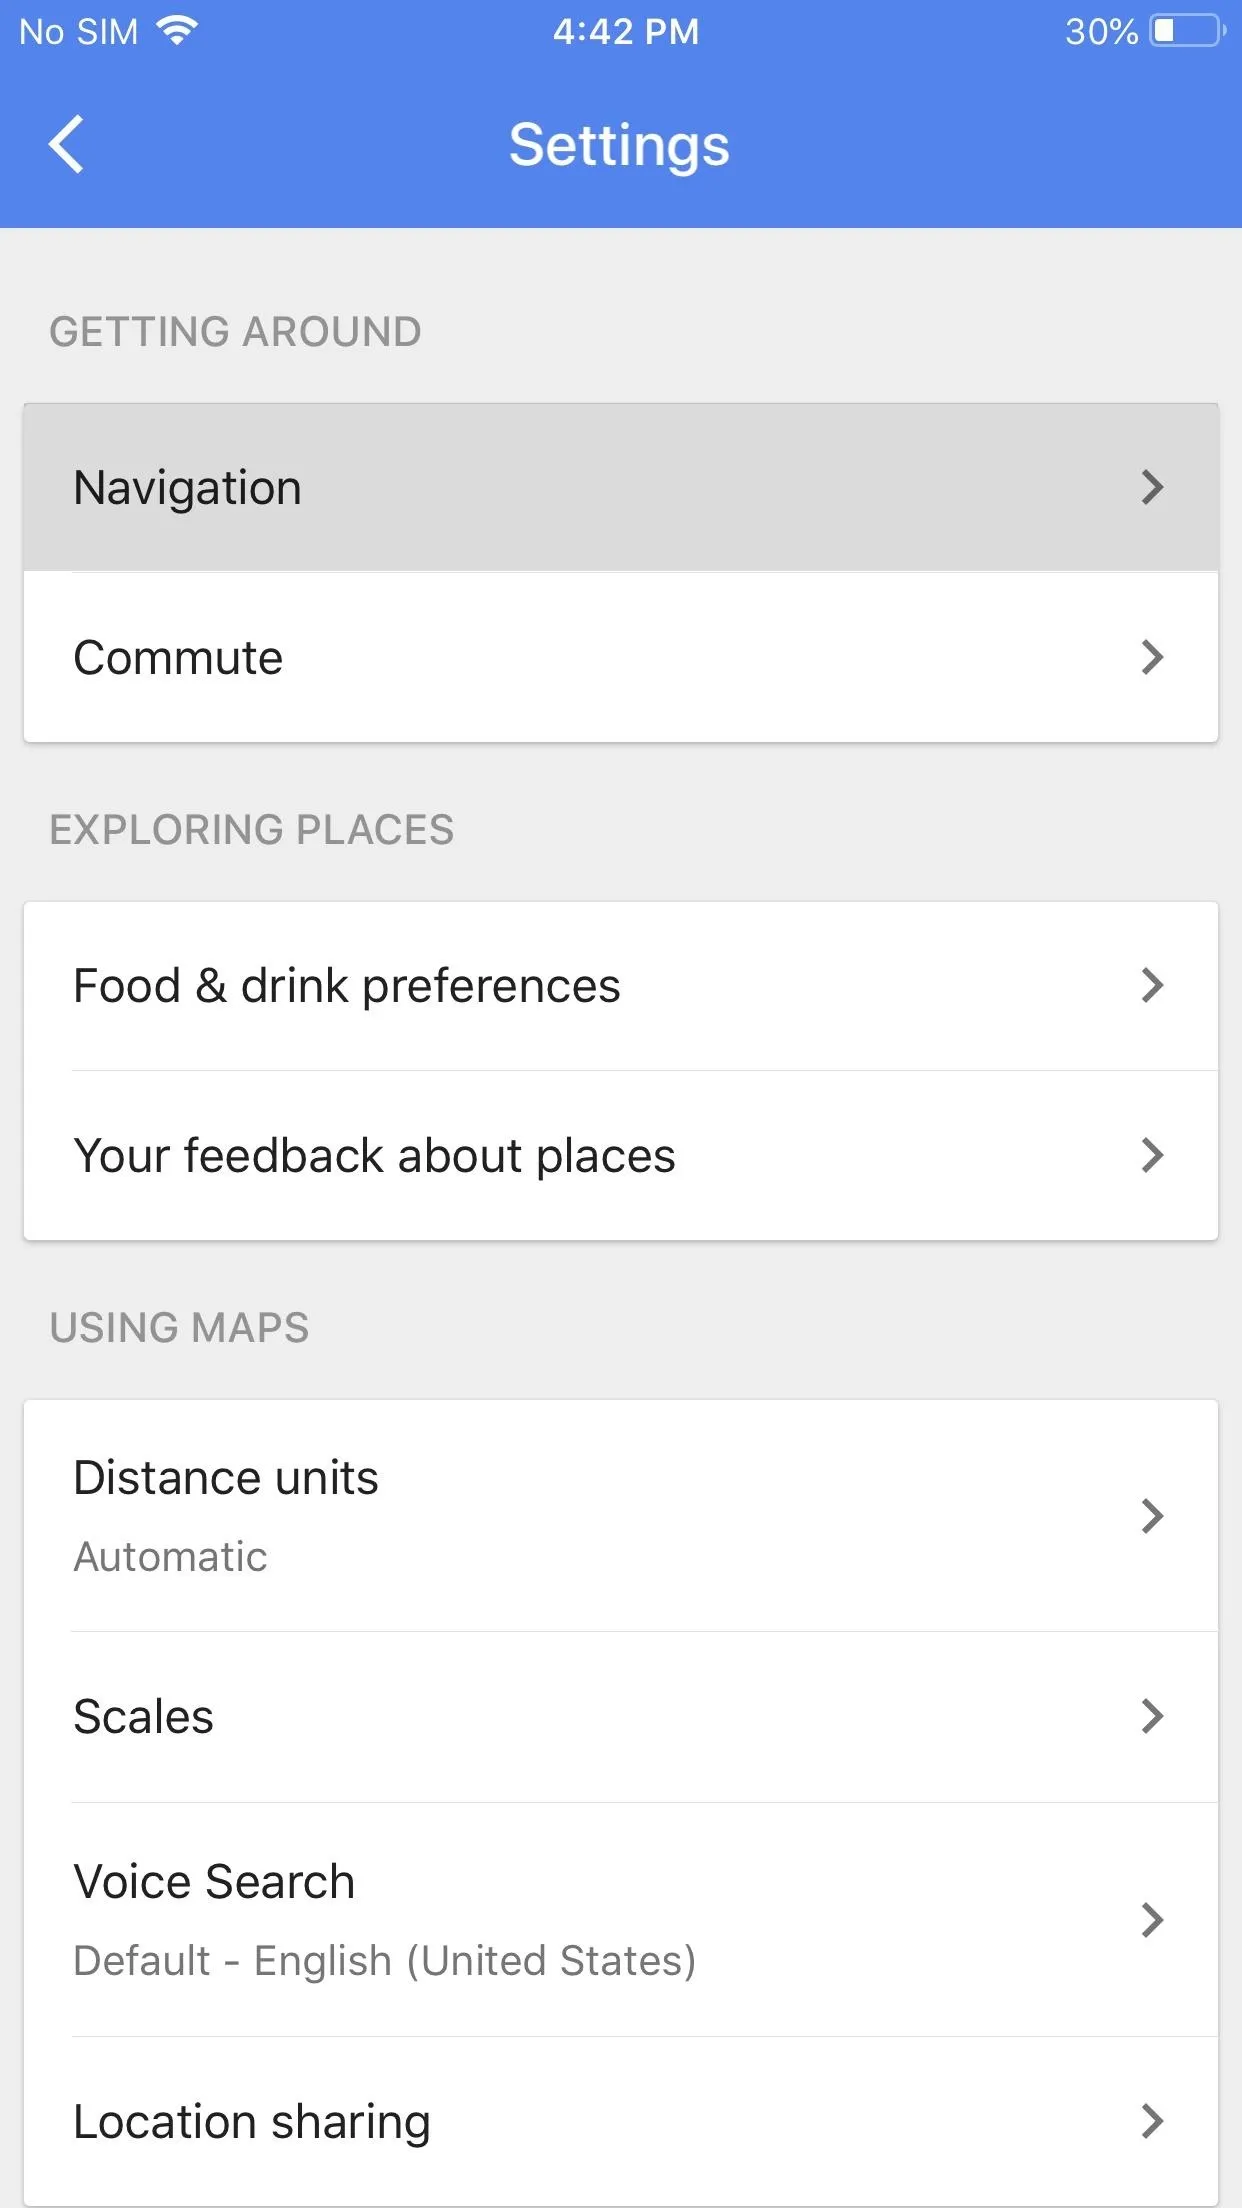
Now, open Google Maps and select the hamburger menu in the upper-left corner of your display. Choose "Settings," then "Navigation." For iPhone users, this option is at the top of the list. Android users will need to scroll down to the bottom to find the "Navigation settings" option.


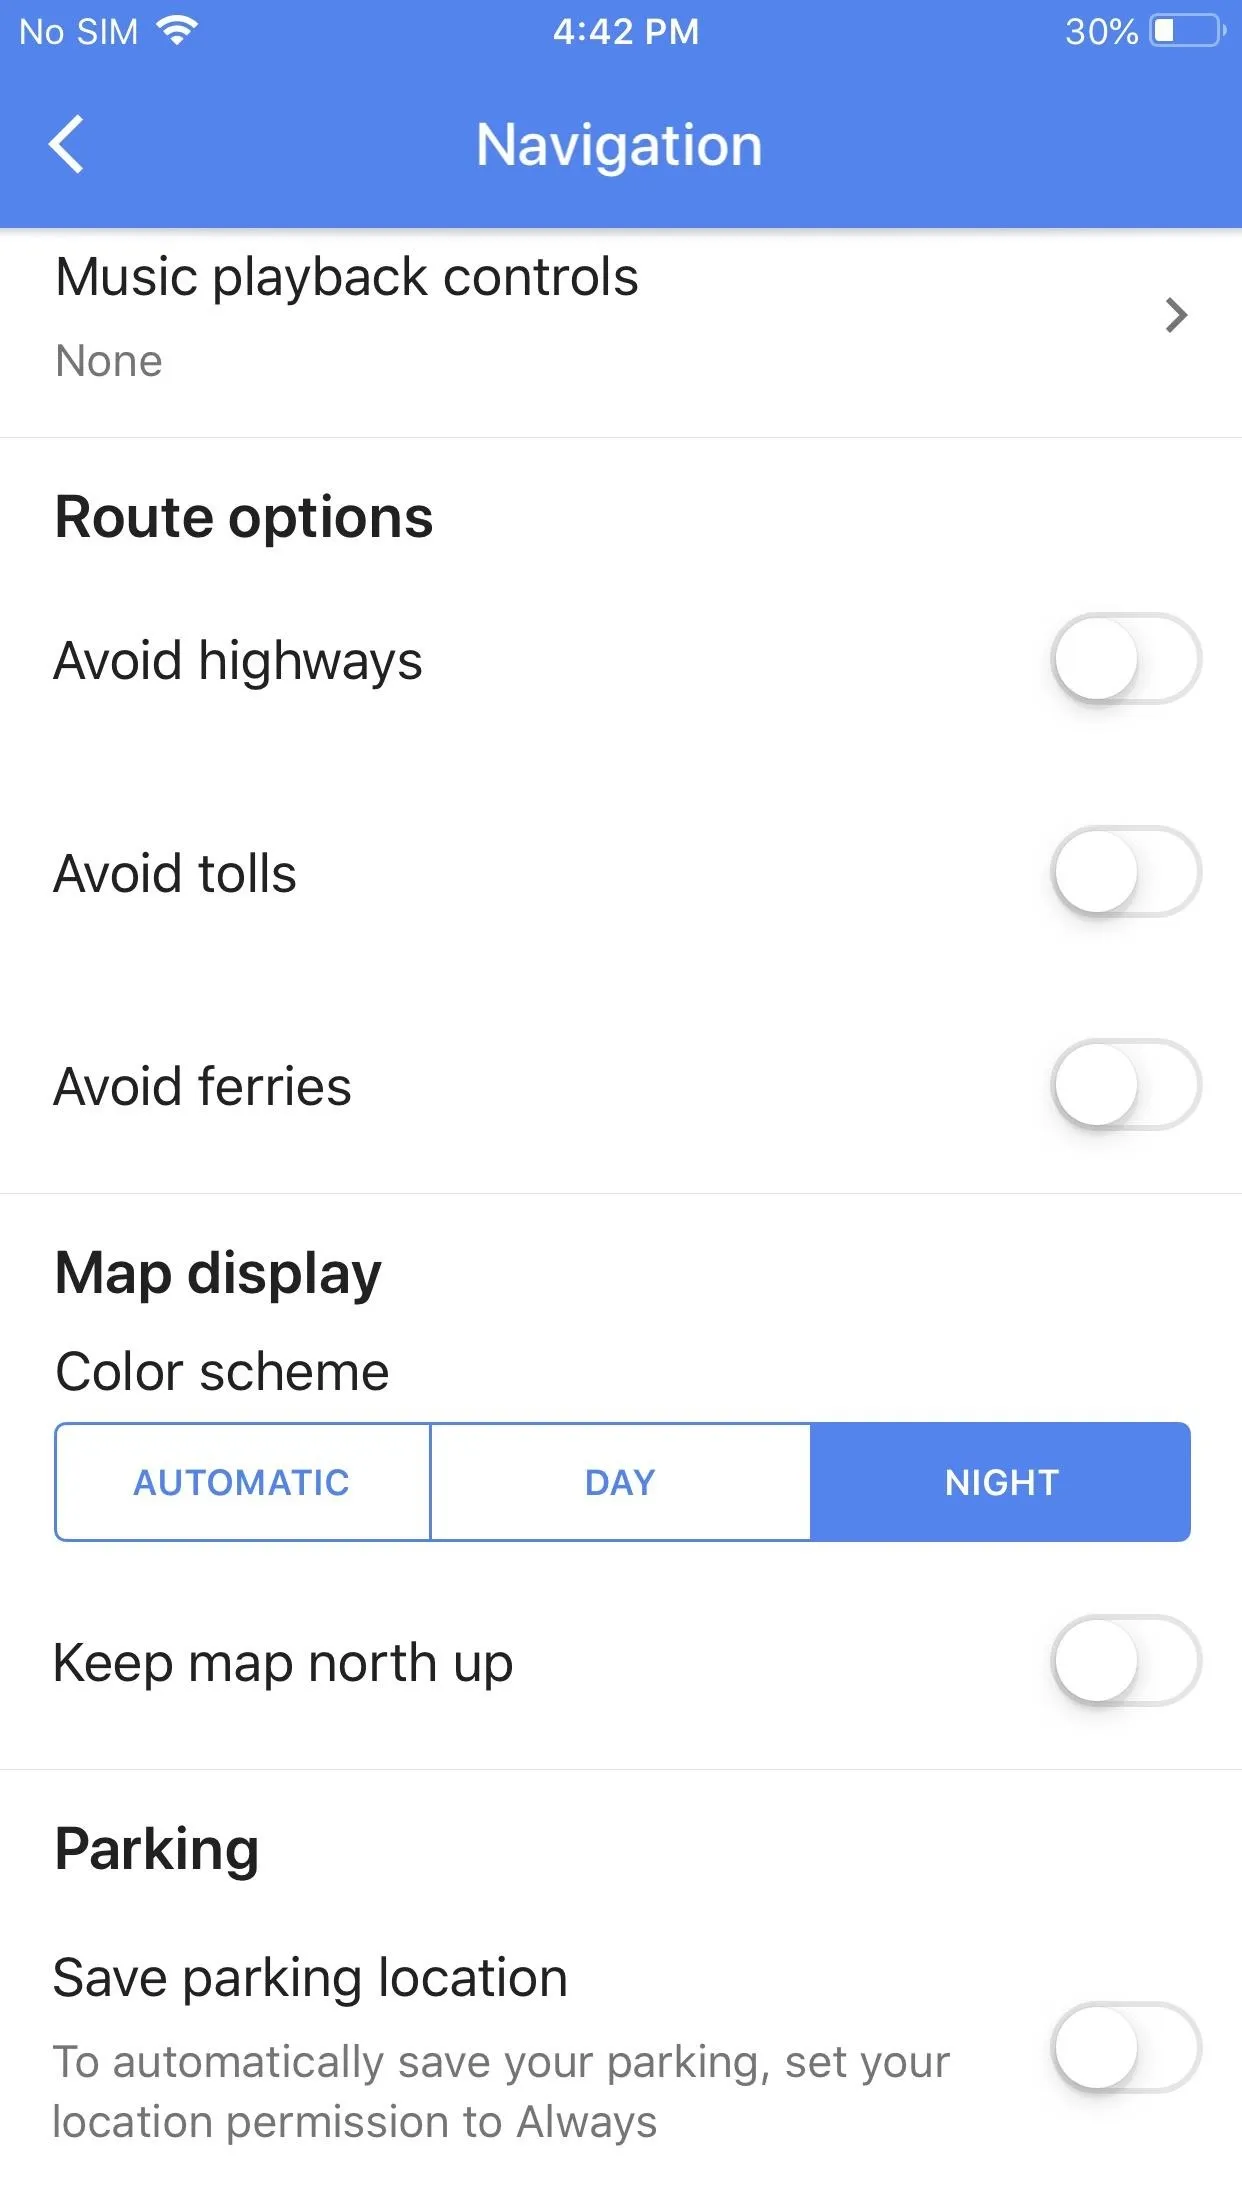
Next, scroll down until you see the "Color scheme" option located underneath "Map display." Choose "Night" (again, the default setting is automatic), then dark mode will be enabled for turn-by-turn navigation at all times.


- Follow Gadget Hacks on Pinterest, Reddit, Twitter, YouTube, and Flipboard
- Sign up for Gadget Hacks' daily newsletter or weekly Android and iOS updates
- Follow WonderHowTo on Facebook, Twitter, Pinterest, and Flipboard
Cover image and screenshots by Jon Knight/Gadget Hacks


Comments
No Comments Exist
Be the first, drop a comment!