If you have a screen recording with distracting UI elements, black borders, and other unneeded visuals, Google Photos can help you crop out all the junk from the video, leaving you with only the important stuff.
Google Photos' crop tool also has a companion rotate functionality that can help you tilt a video a few degrees to match the horizon line, rotate a video because you shot it in landscape instead of portrait mode, or reorient a video for dramatic effect, like when using a Dutch angle to heighten tension.
Your smartphone likely already has built-in tools to crop and rotate video, and you can go ahead and use those if you use those photo/video apps more regularly. There are versions available in Apple's Photos for iOS and iPadOS and Samsung's Gallery on Galaxy devices, to name a few. Google Photos is the default photo and video editor on Goole Pixel phones, but it's also available on other smartphones.
If you prefer Google Photos over other photo/video editors, its crop and rotate tools are easy to use. There's little difference between the Android and iOS app versions of Google Photos, but the Android app has a few more adjustments you can make.
Entering the Video Editor
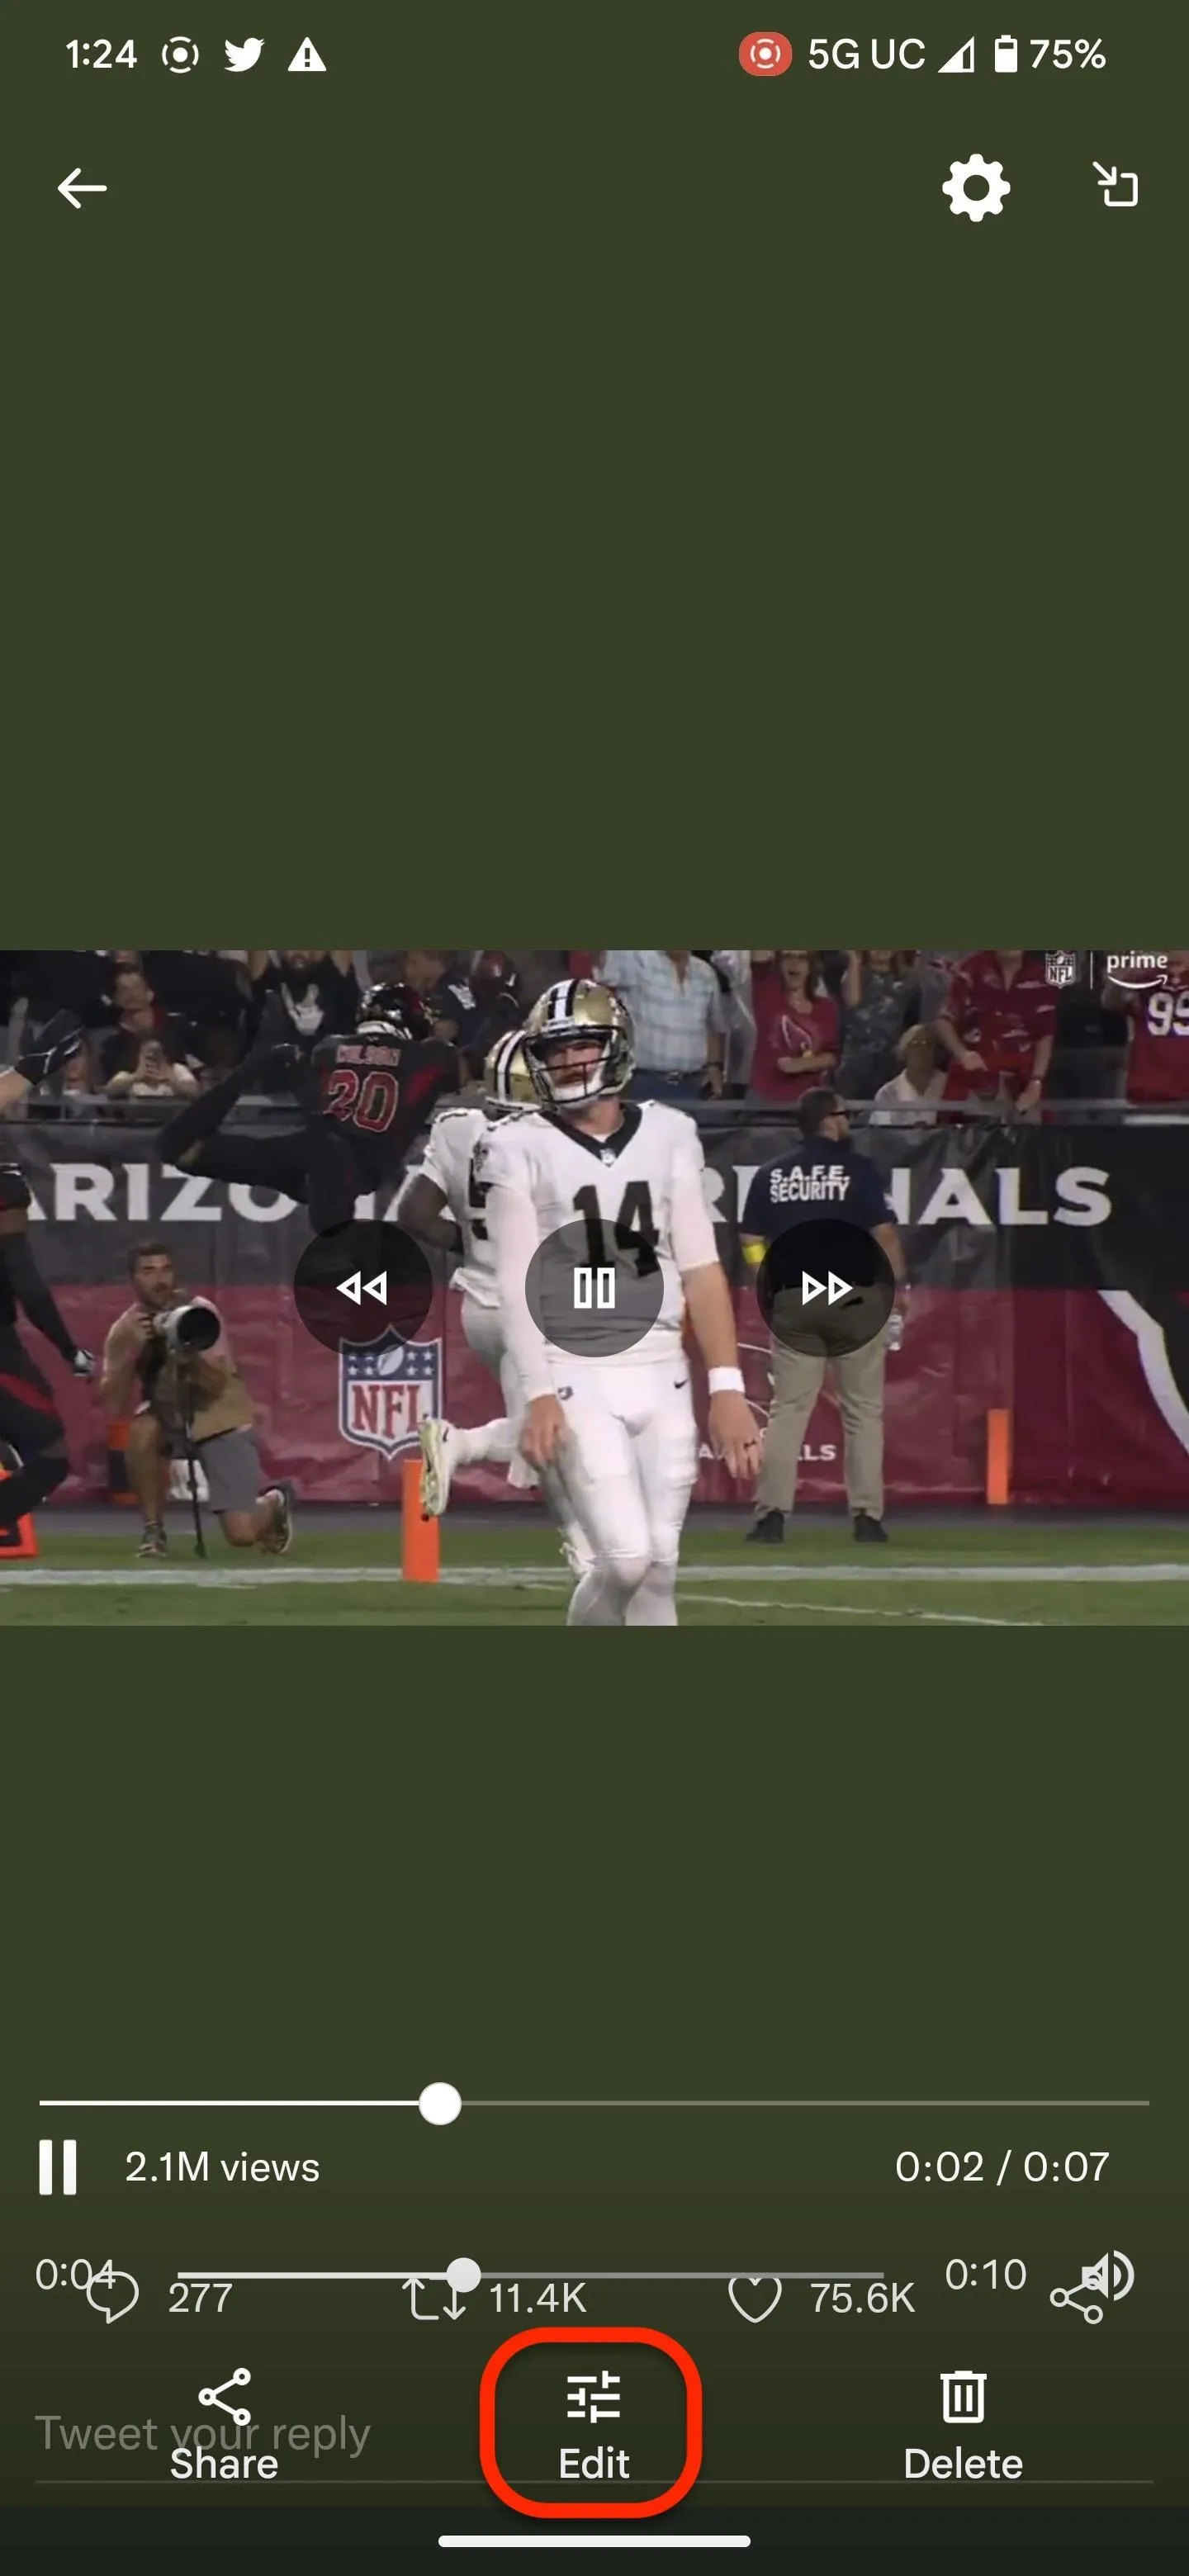
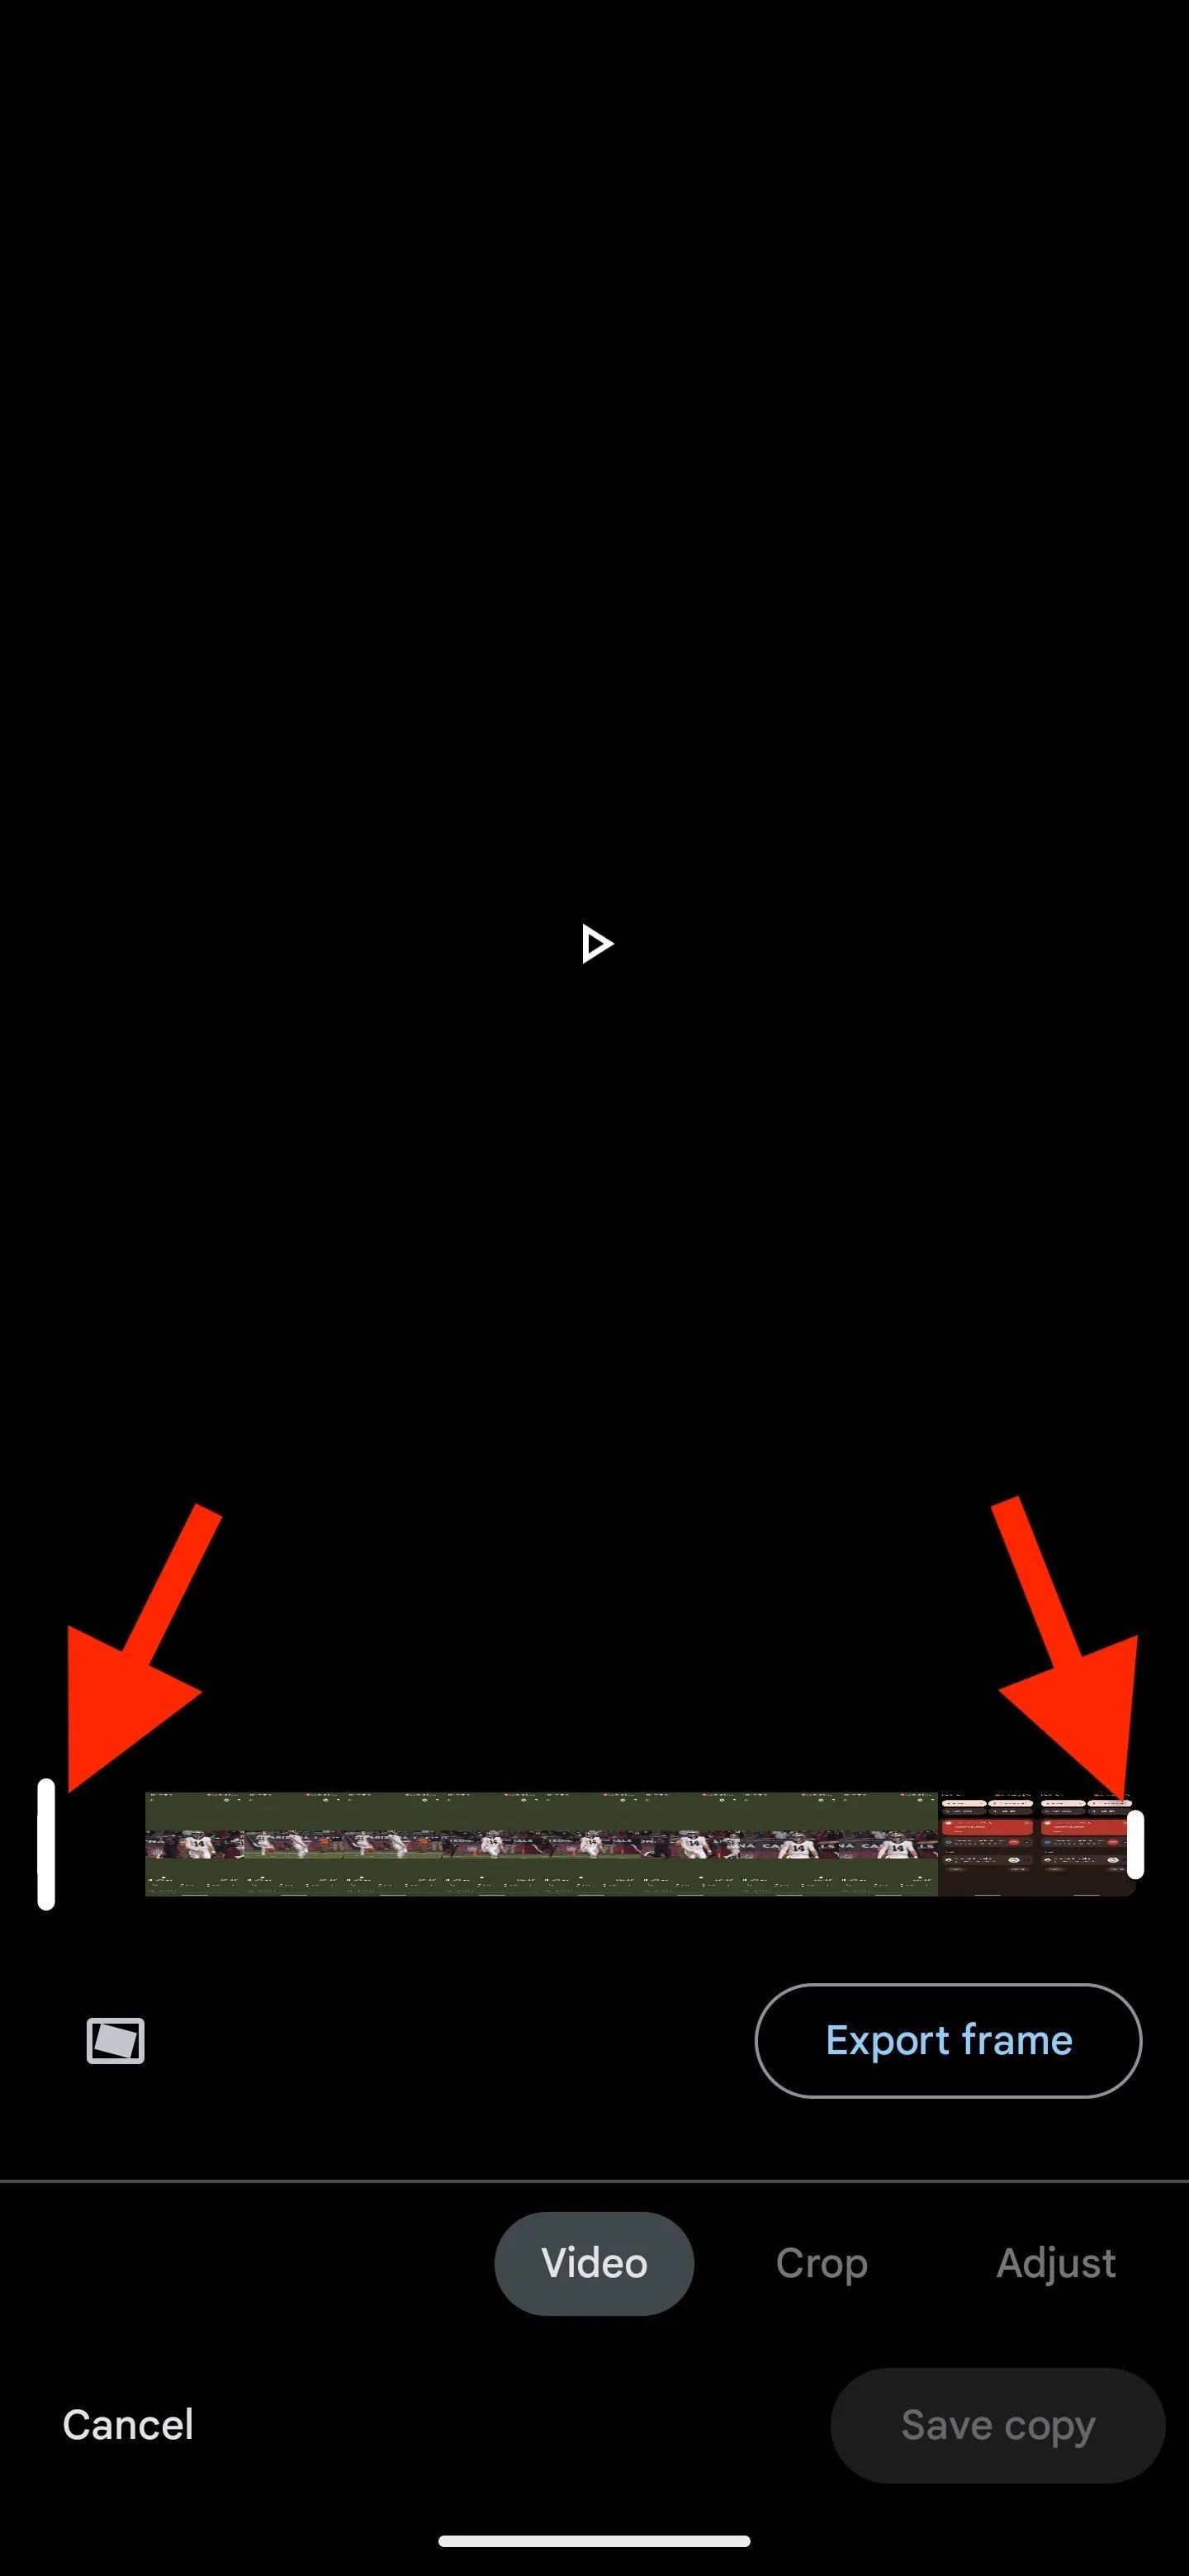
Open Google Photos and select the video you want to edit. If the toolbar doesn't appear right away, tap the screen to unhide it. Next, tap "Edit" (the button that looks like a set of adjustment sliders). By default, the editor opens the trimming tool. If you want to trim a little fat off the ends of your video before cropping or rotating it, move the endpoints inward on the timeline to the desired locations.



Cropping the Video
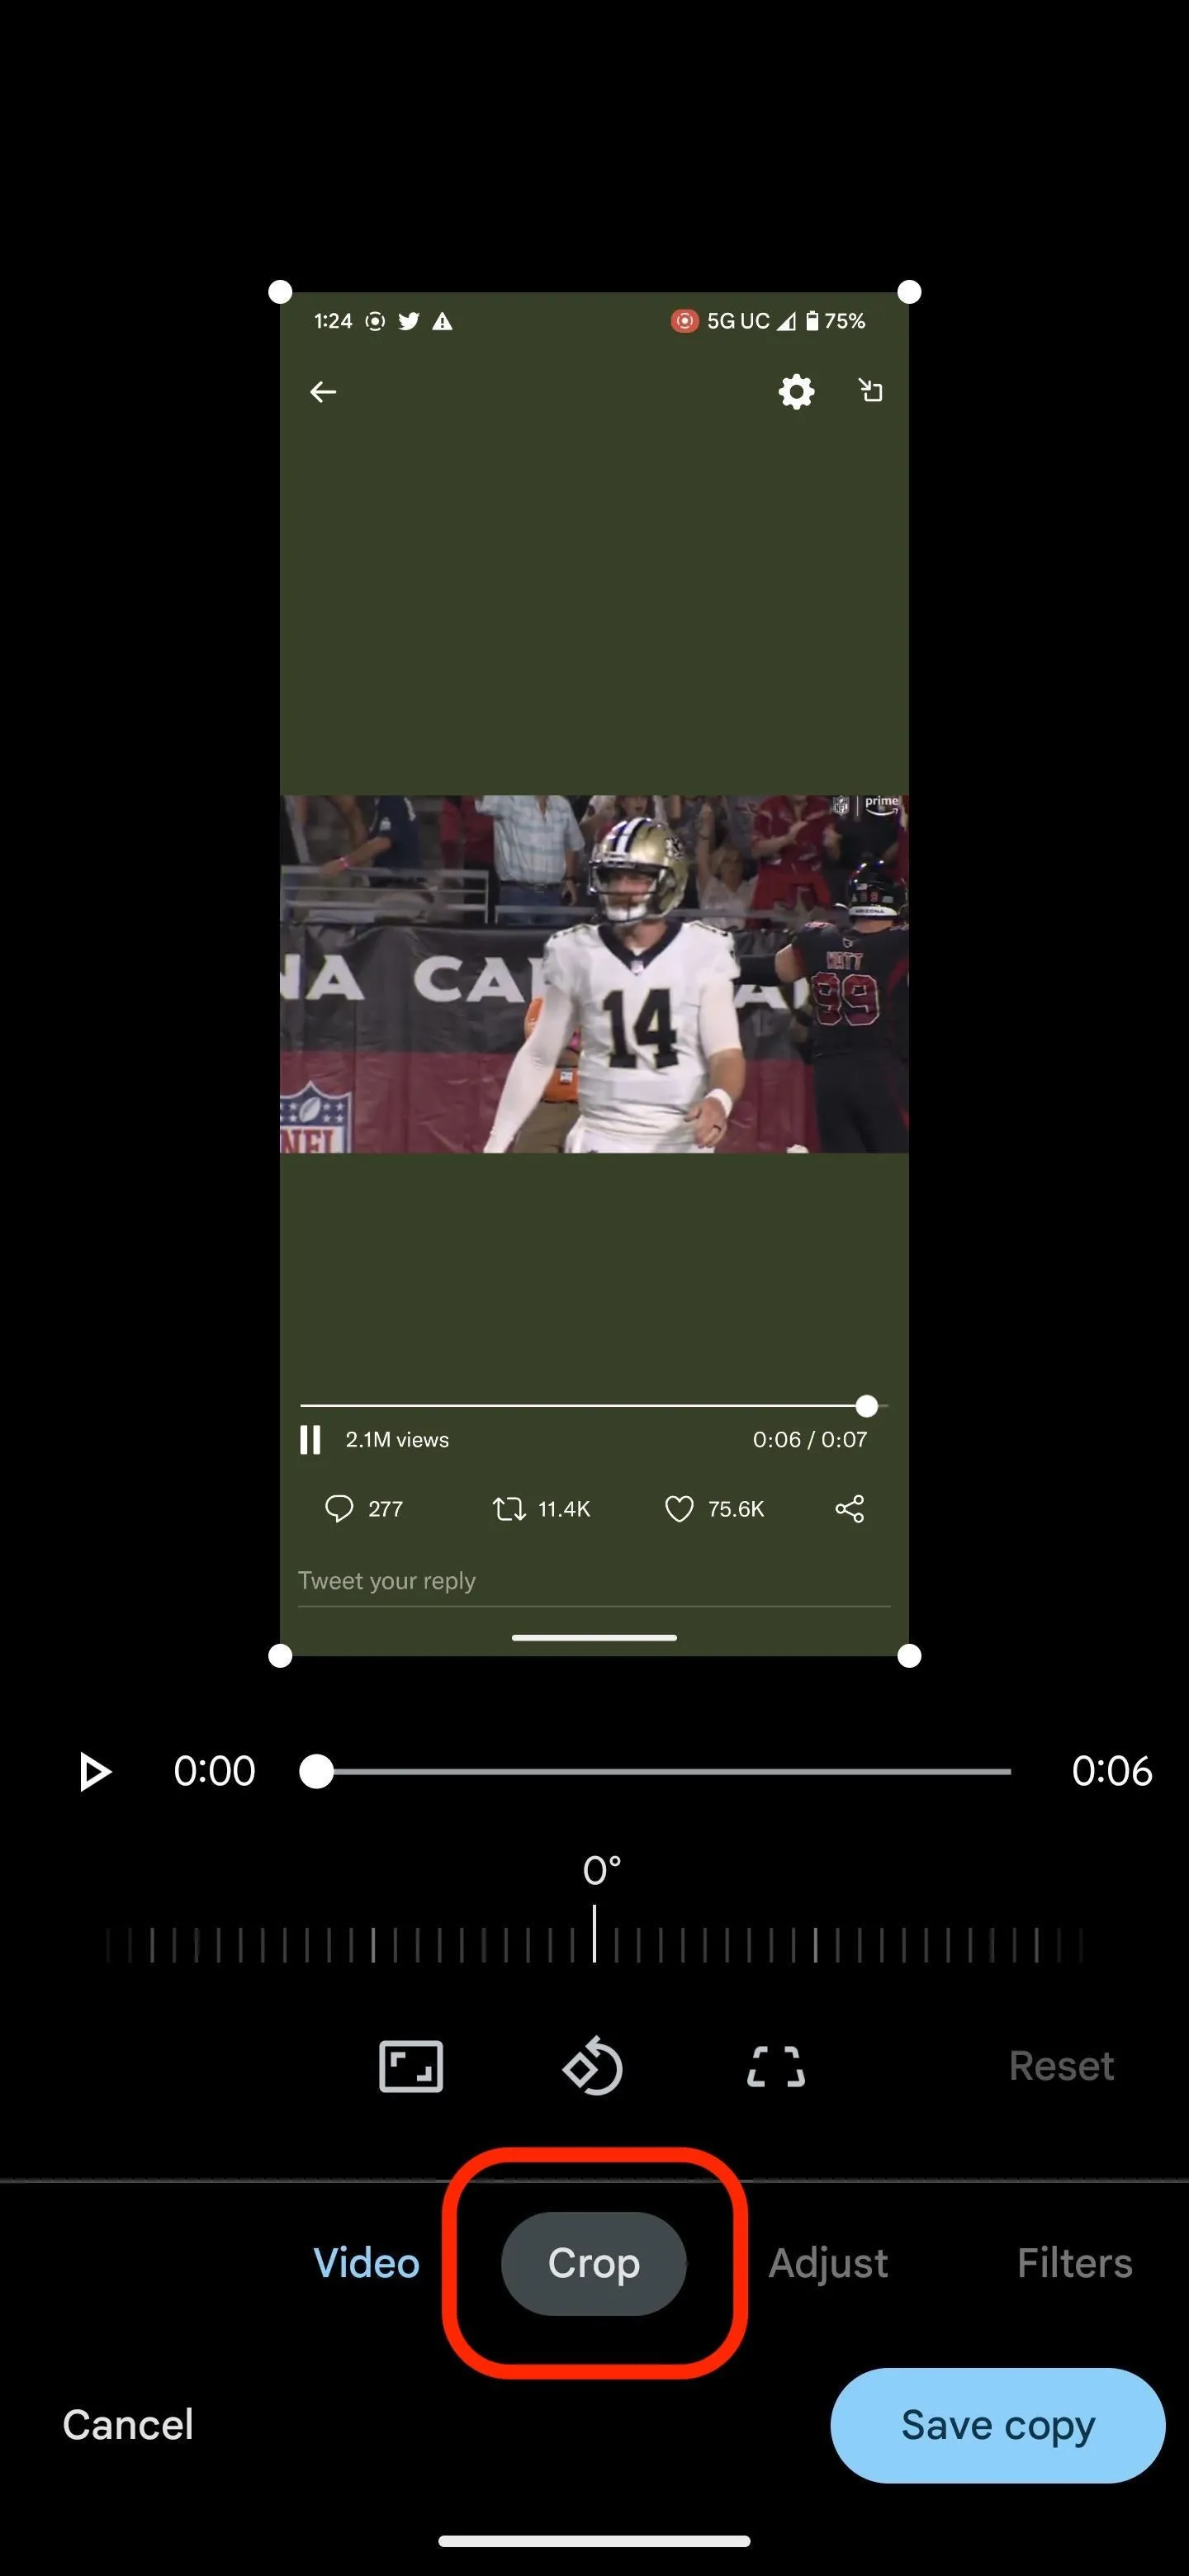
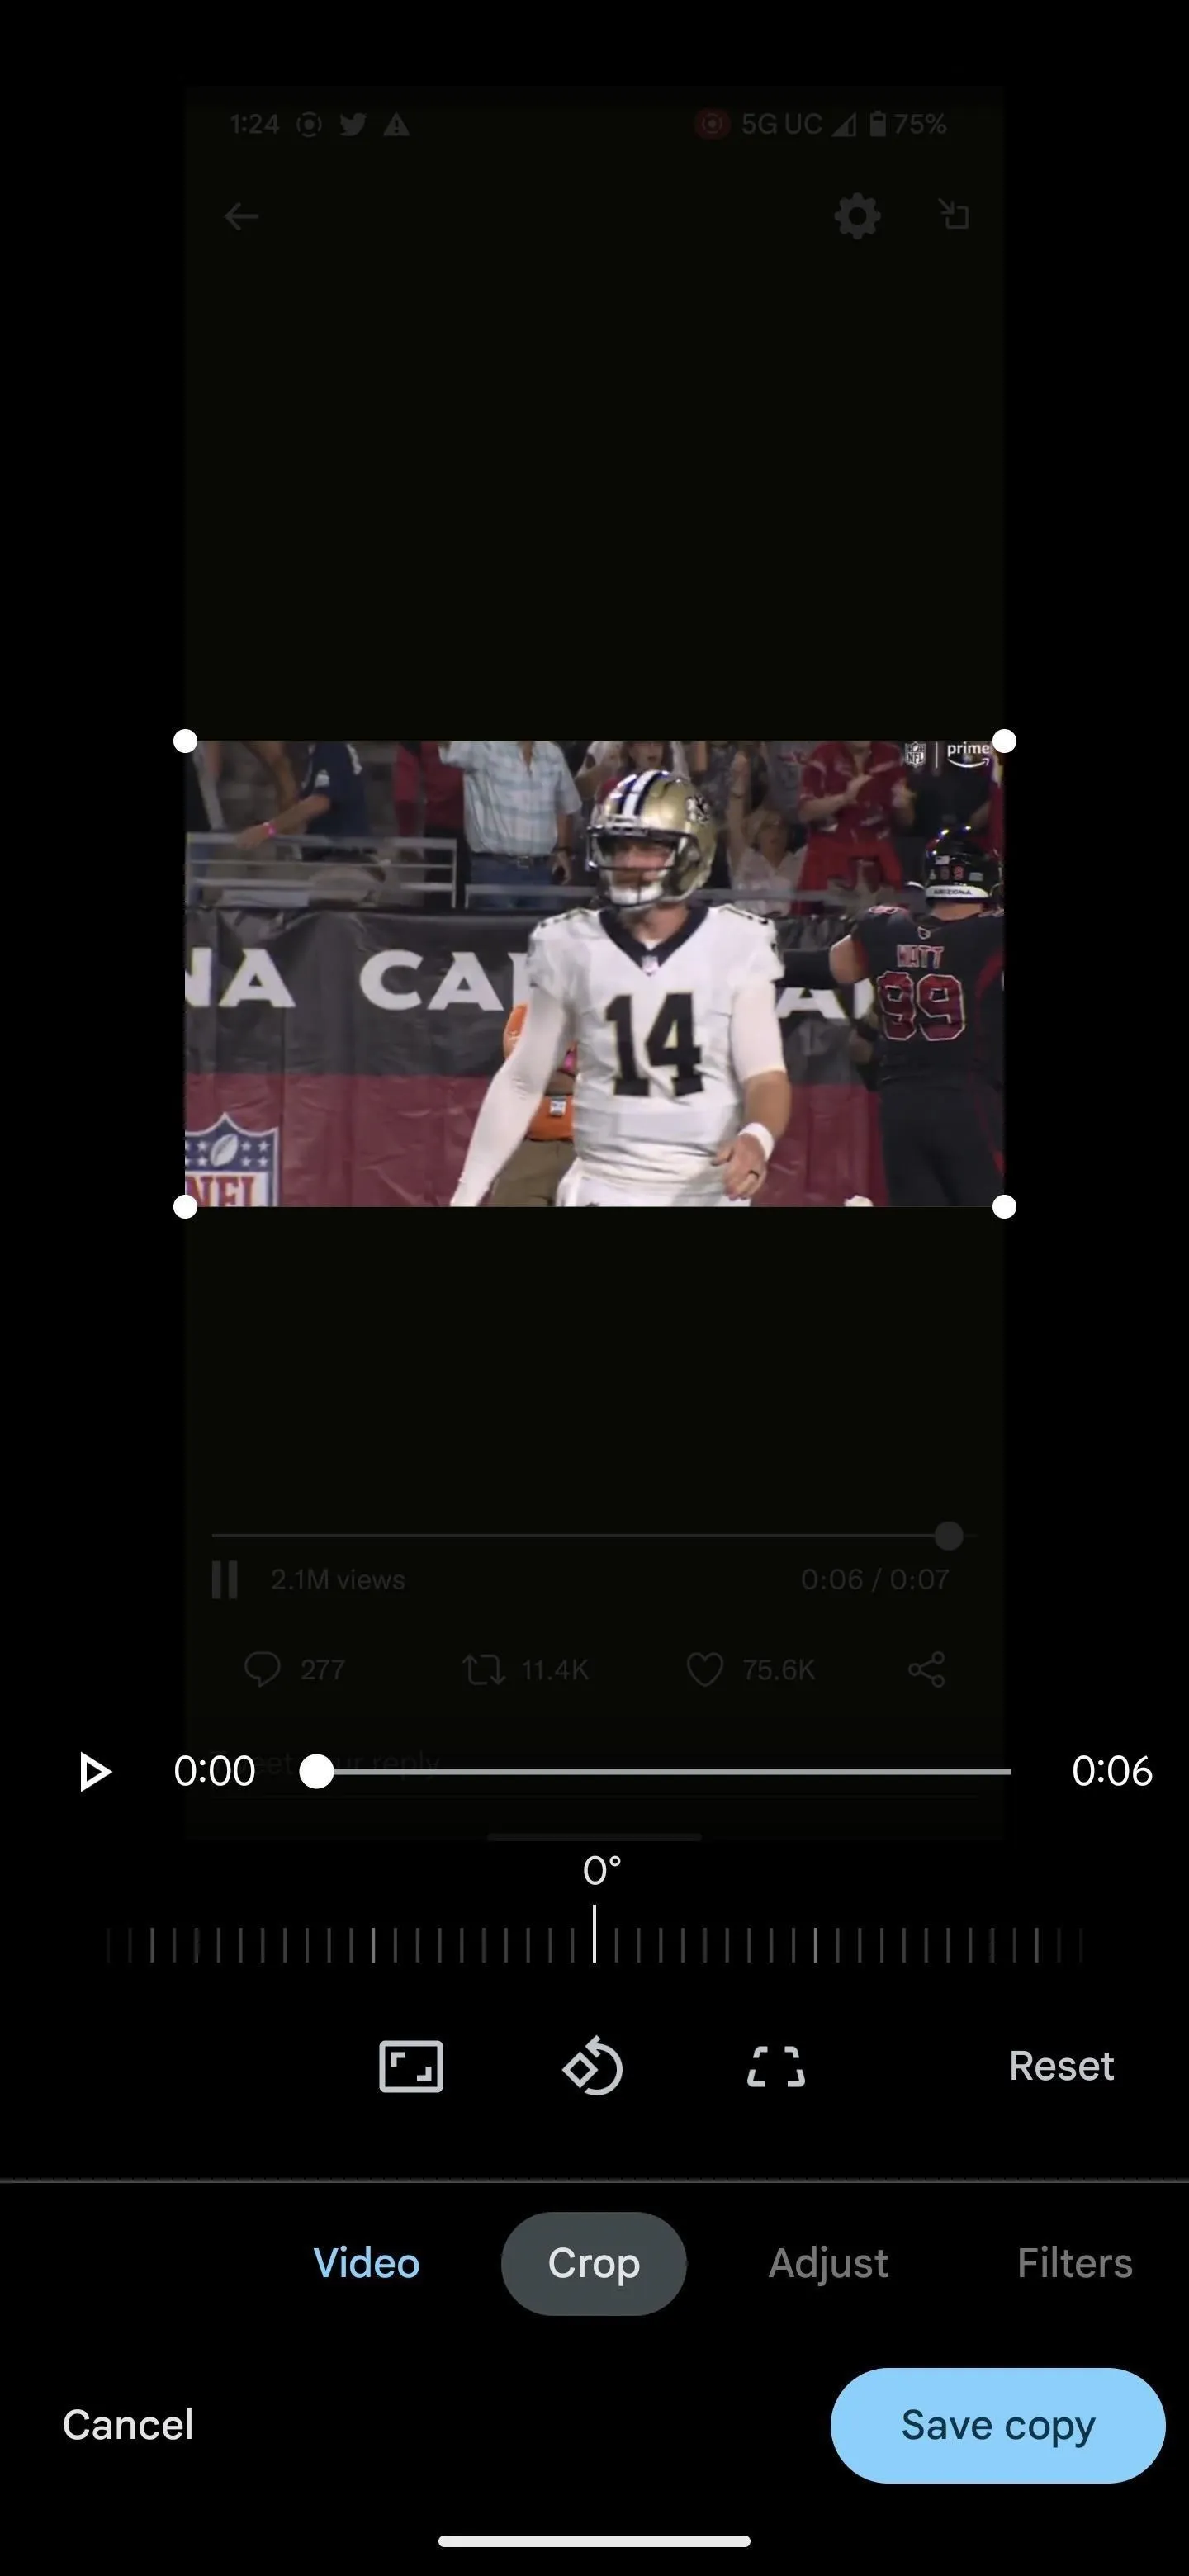
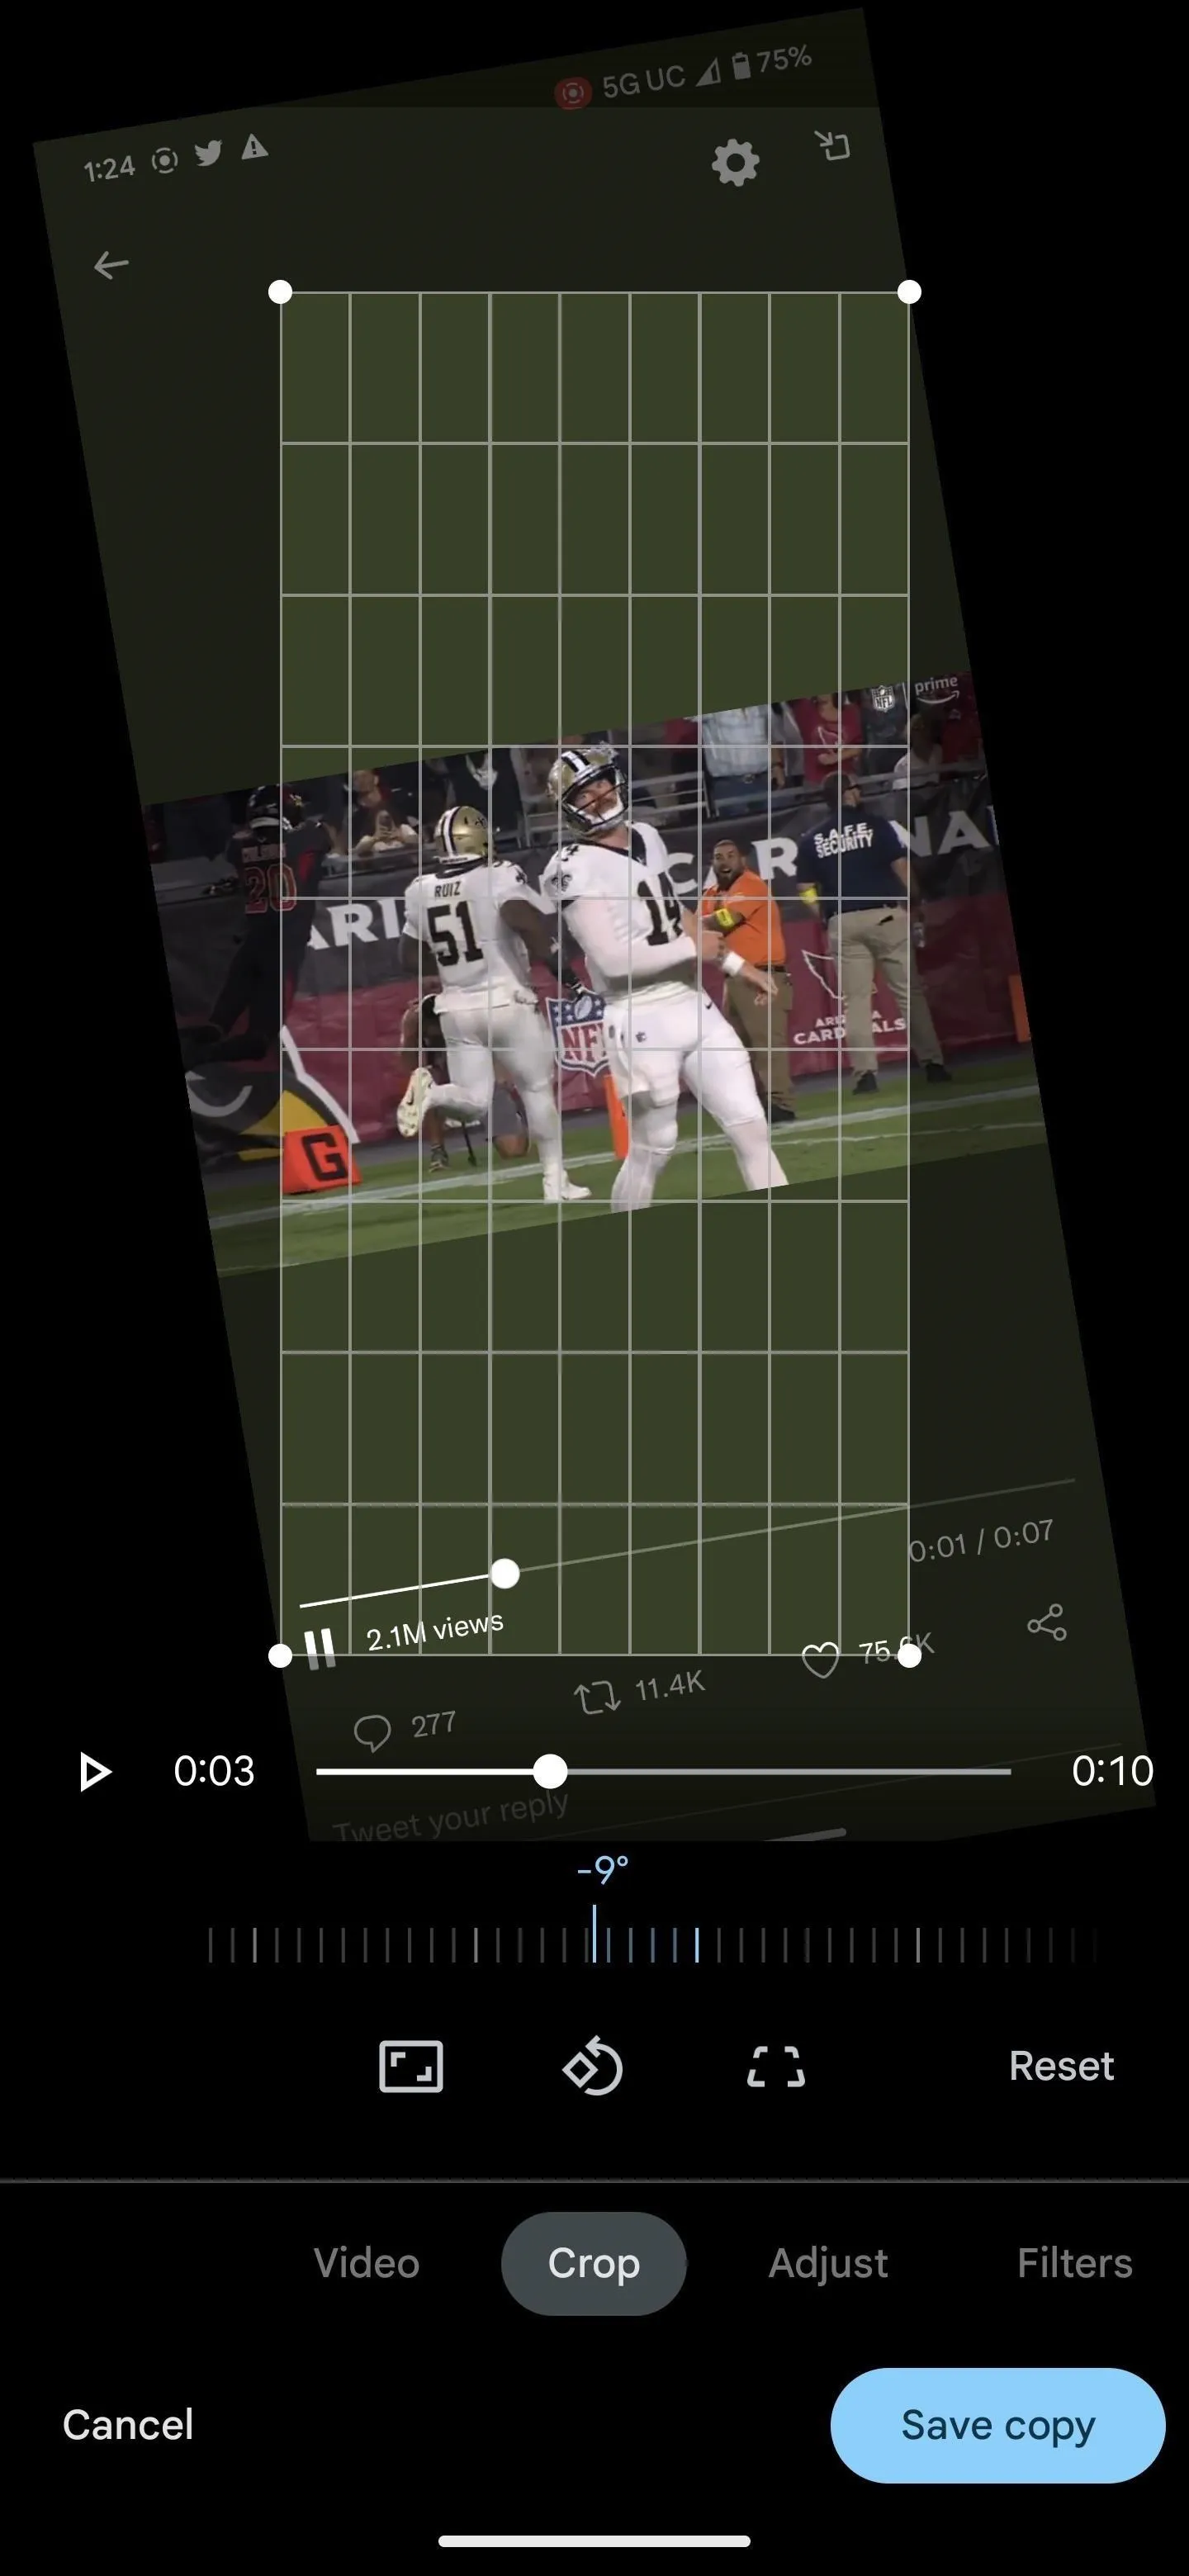
To access the crop and rotate tools, tap or slide to "Crop" in the editing options near the bottom. In the preview, you'll see four white dots, one at each corner of the video. Tap and drag the corners to move horizontally and/or vertically to where you want the crop. You can also tap and drag from the edge of the video to move the crop border horizontally or vertically.


Rotating the Video
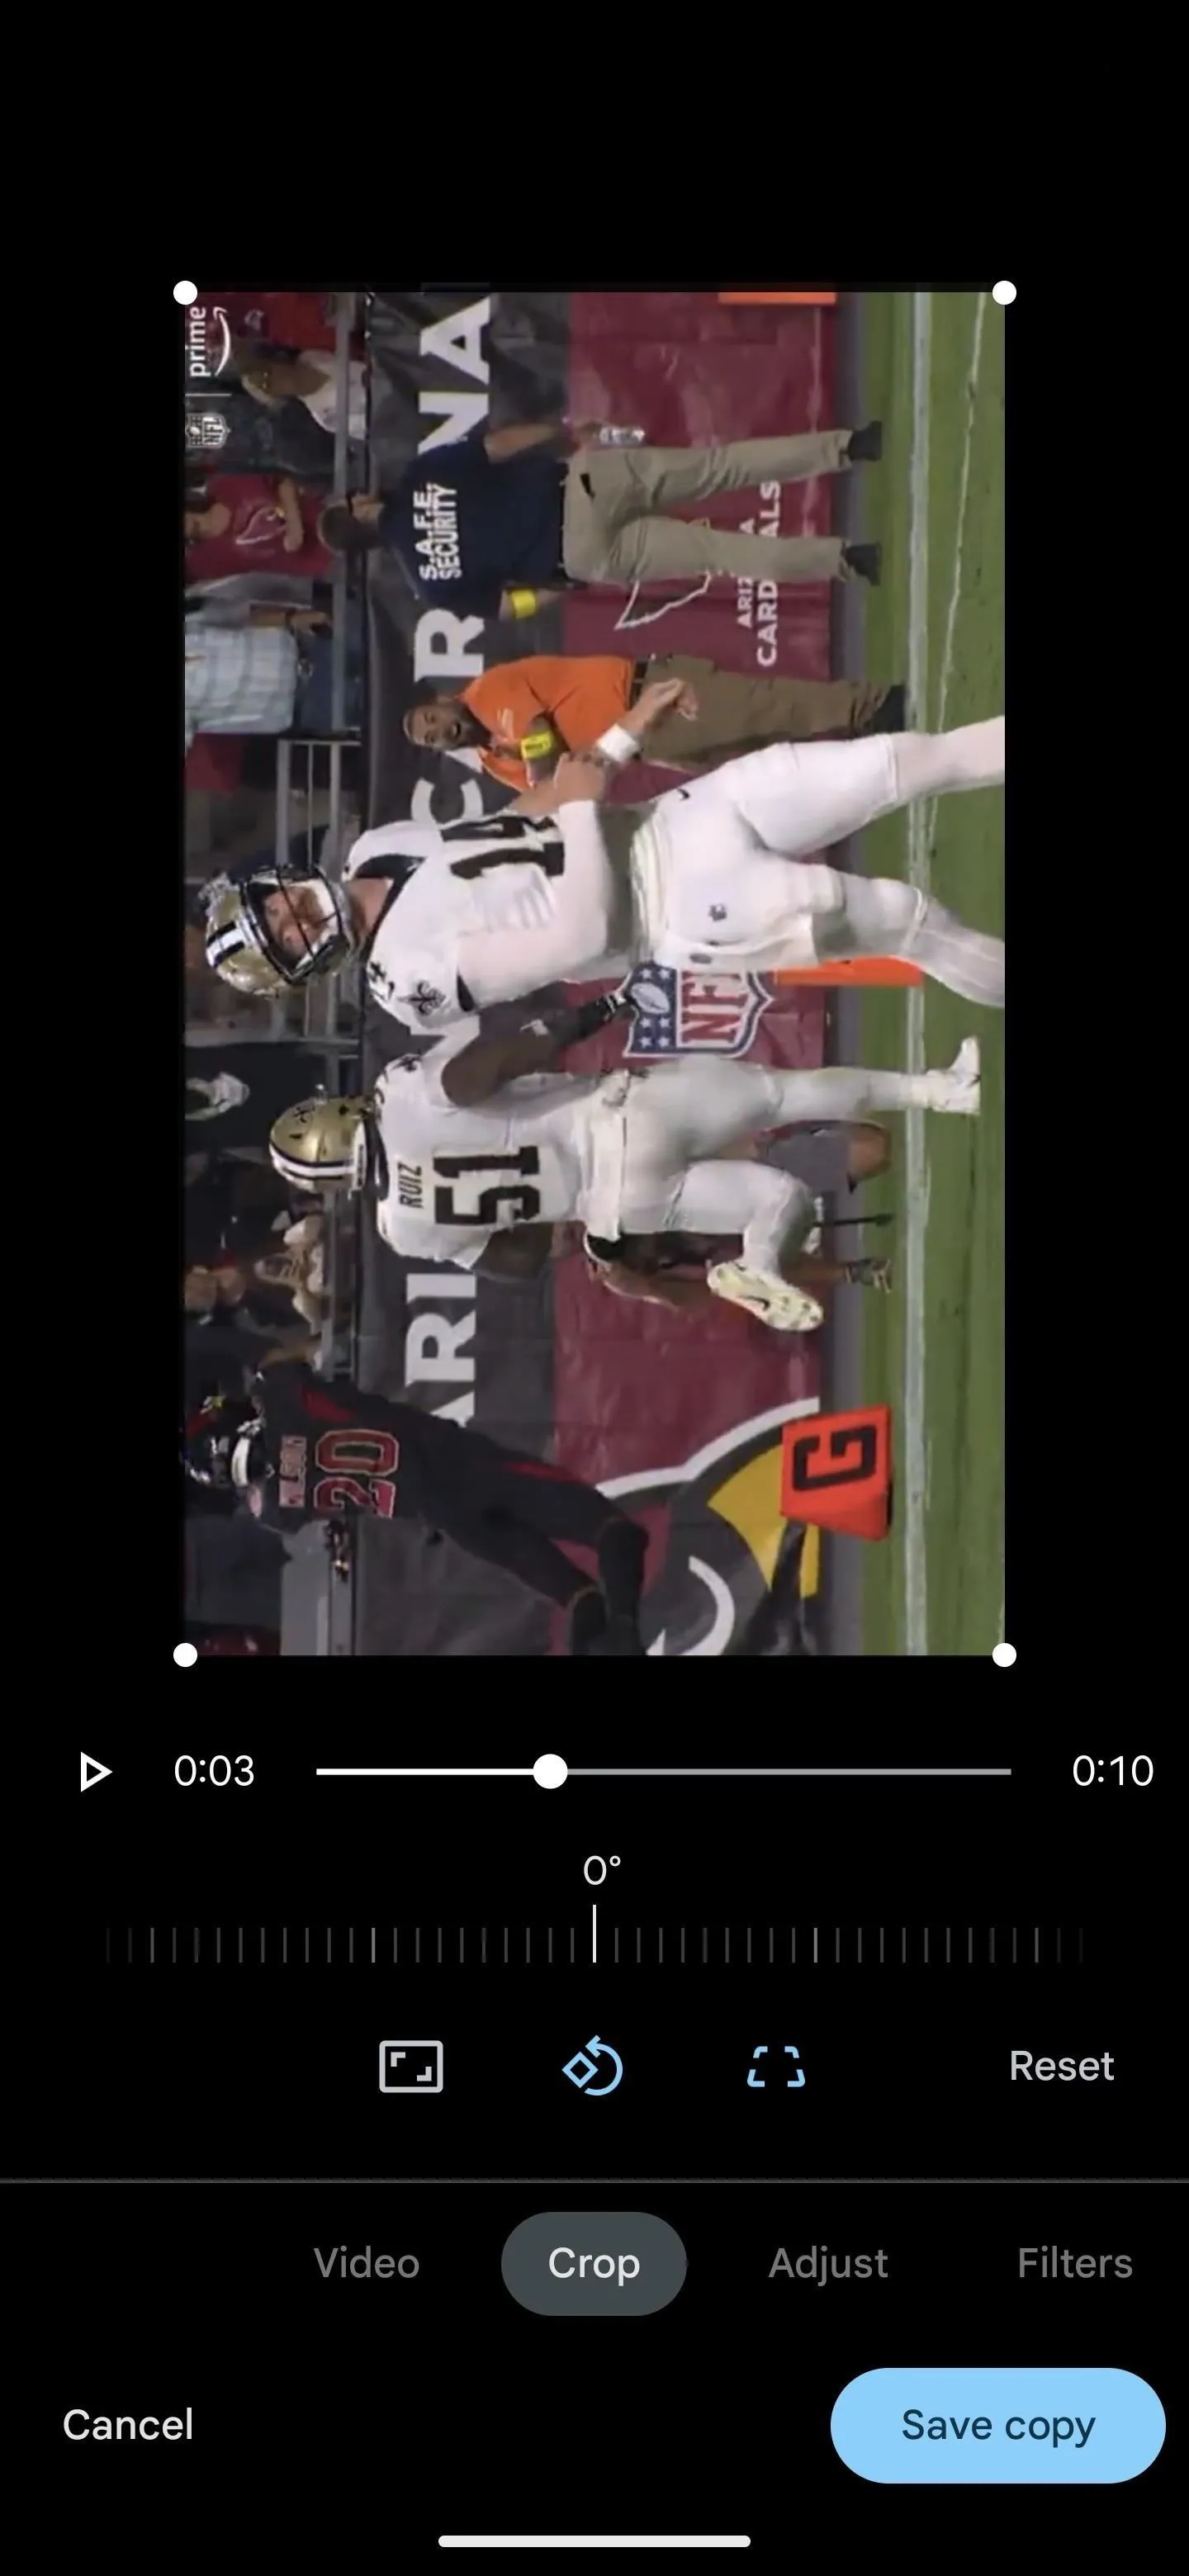
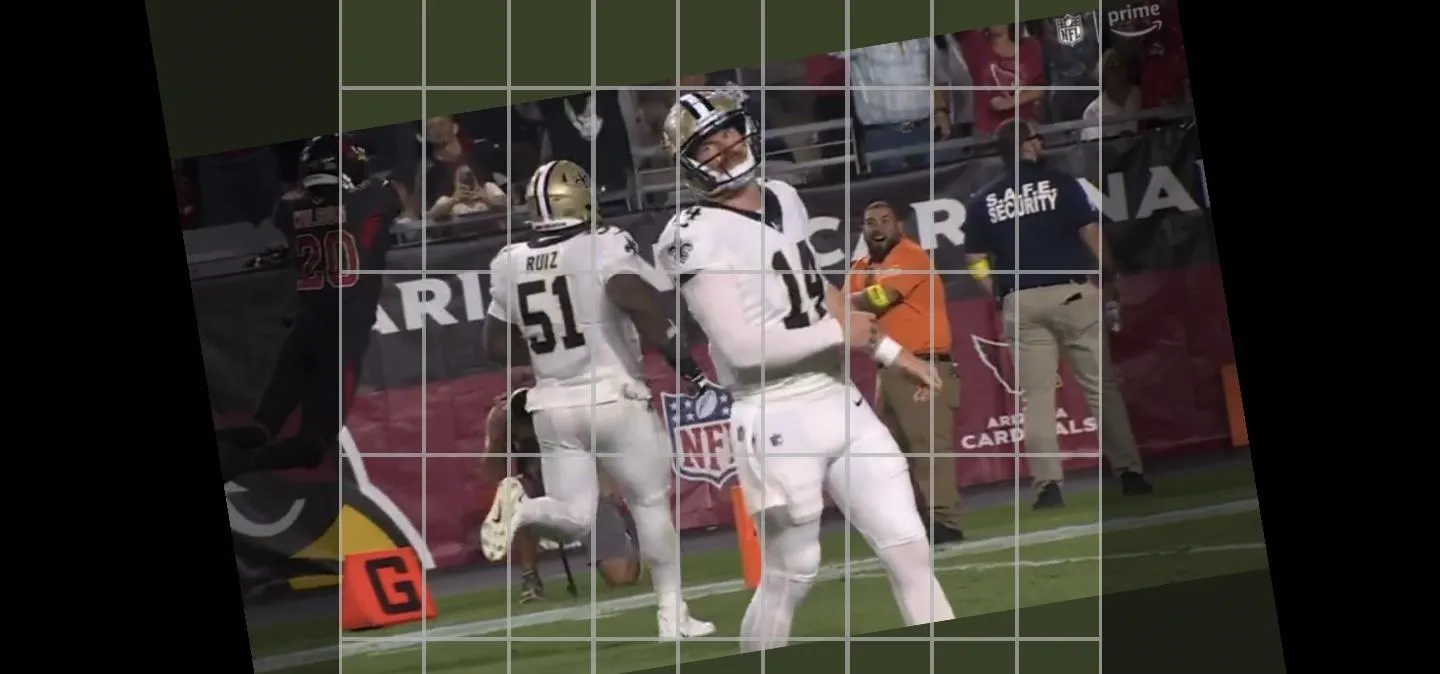
Under the playback controls, you'll find the tilt adjustment bar, which lets you tilt the video in the cropped area between –45 degrees and 45 degrees in one-degree increments. This gives you precise control over the rotation, so you can make minor adjustments. If you want to rotate the video by 90 degrees, tap the rotate button below the tilt bar to turn the video counterclockwise.


Making Other Adjustments
The Crop menu has a few more tricks beyond the basic crop, rotate, and tilt tools discussed above. You can also adjust the video's aspect ratio, skew the image, and use the auto correction option.
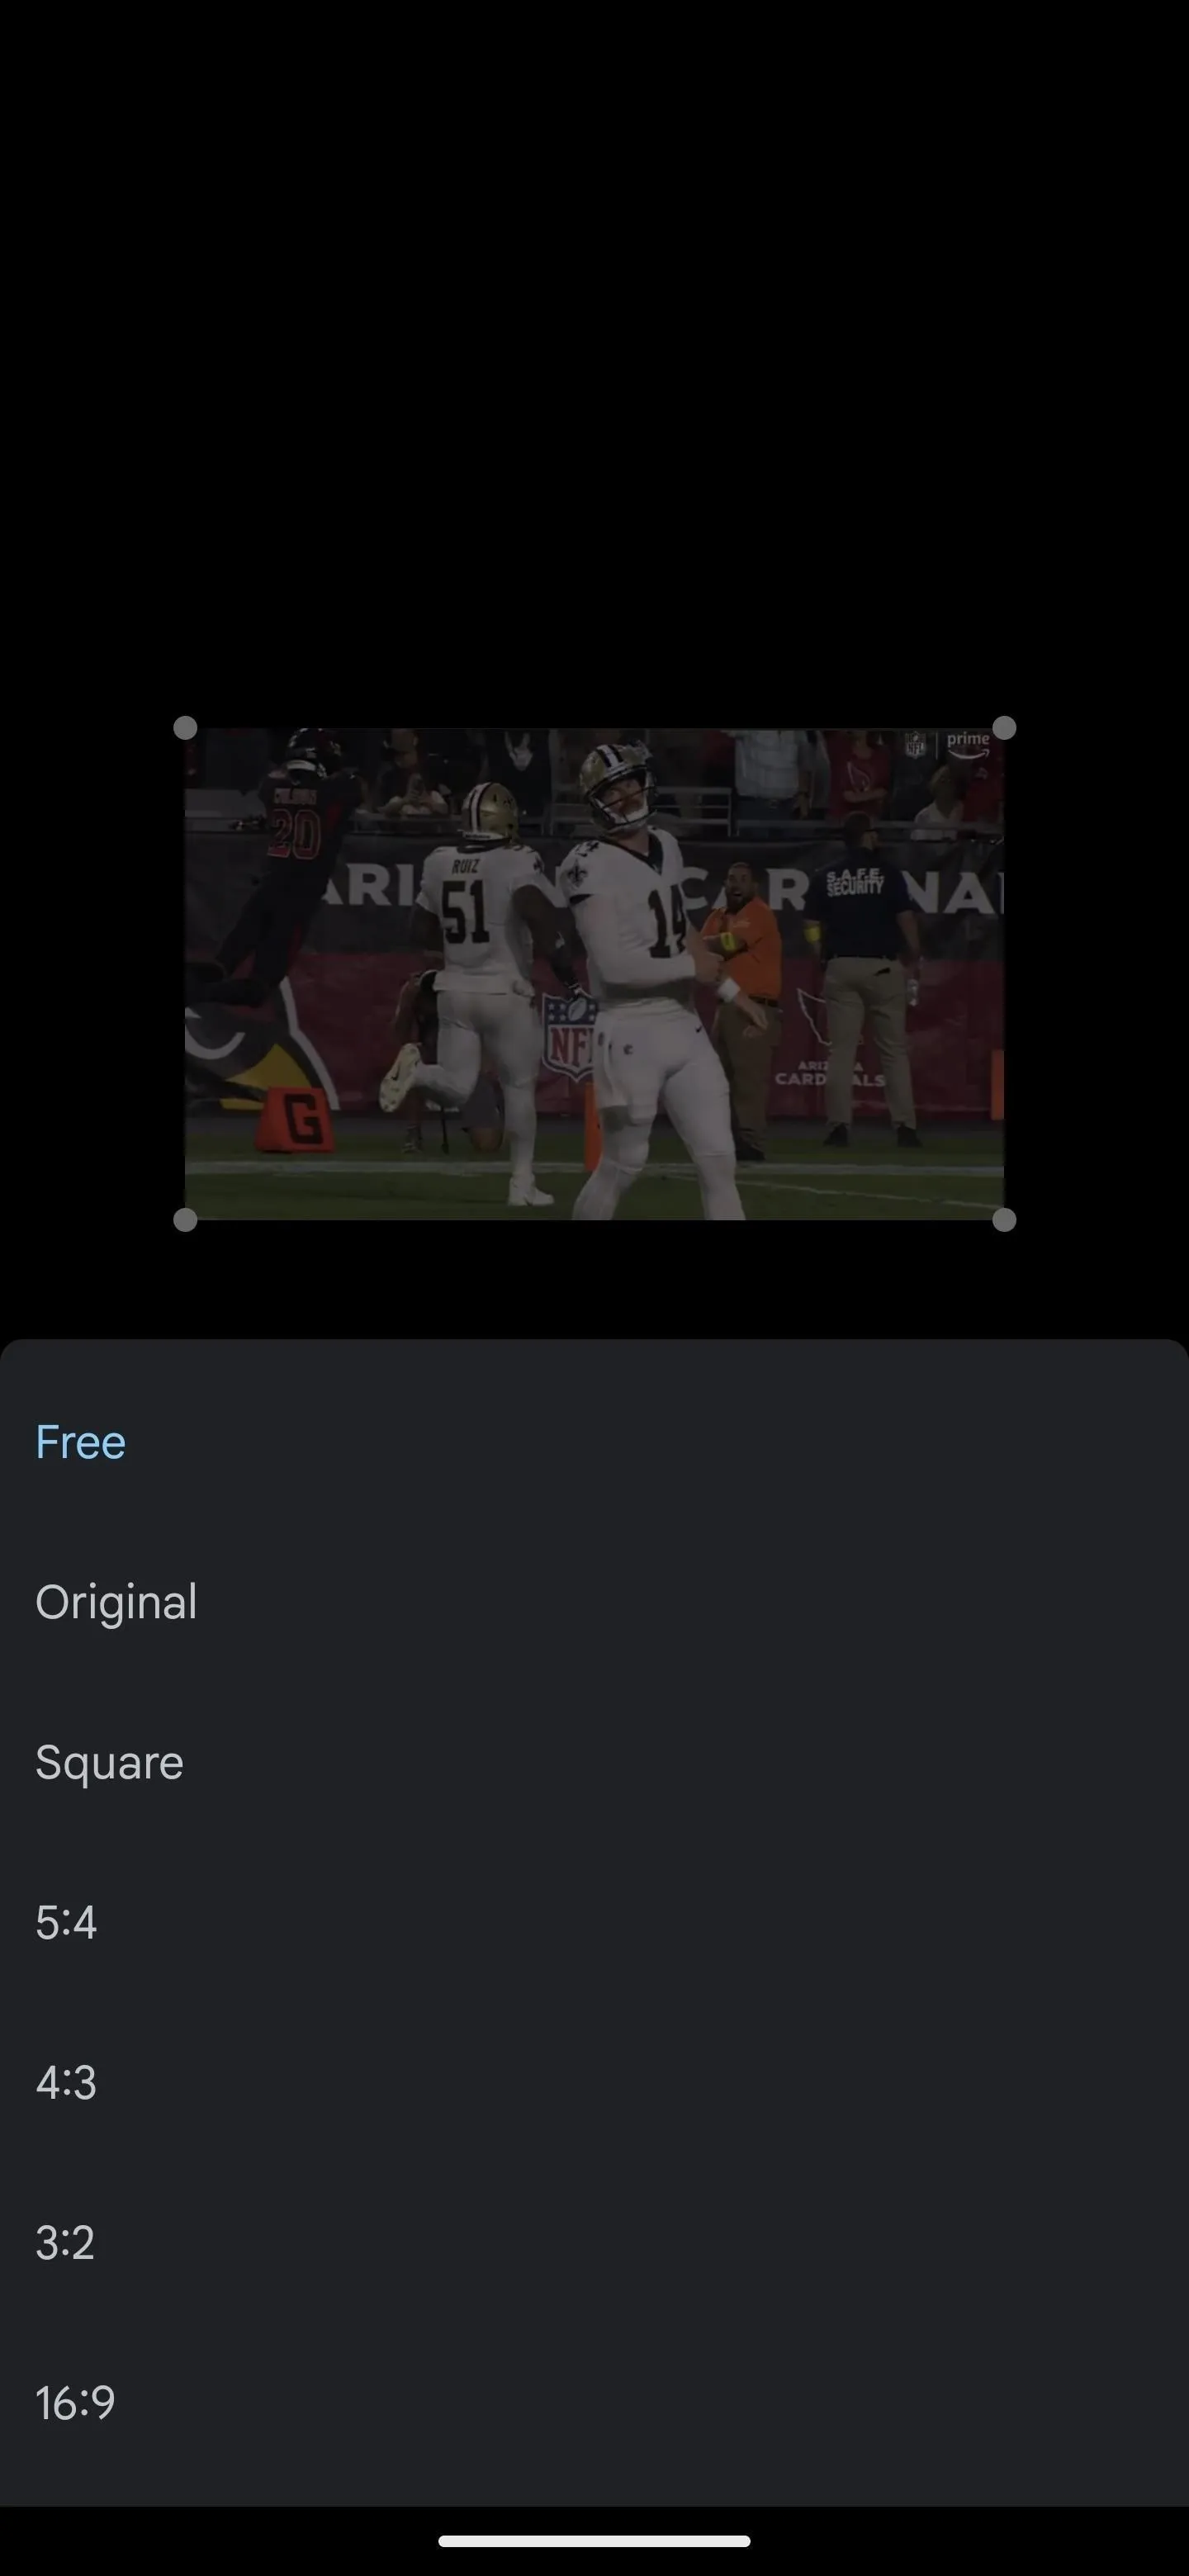
- Aspect ratio panel: "Free" is the default preset, which leaves the crop perimeter freeform, so there are no constraints. You can lock the crop perimeter to a specific ratio, such as the video's original ratio. The other options include 5:4, 4:3, 3:2, 16:9, and each one's inverse.
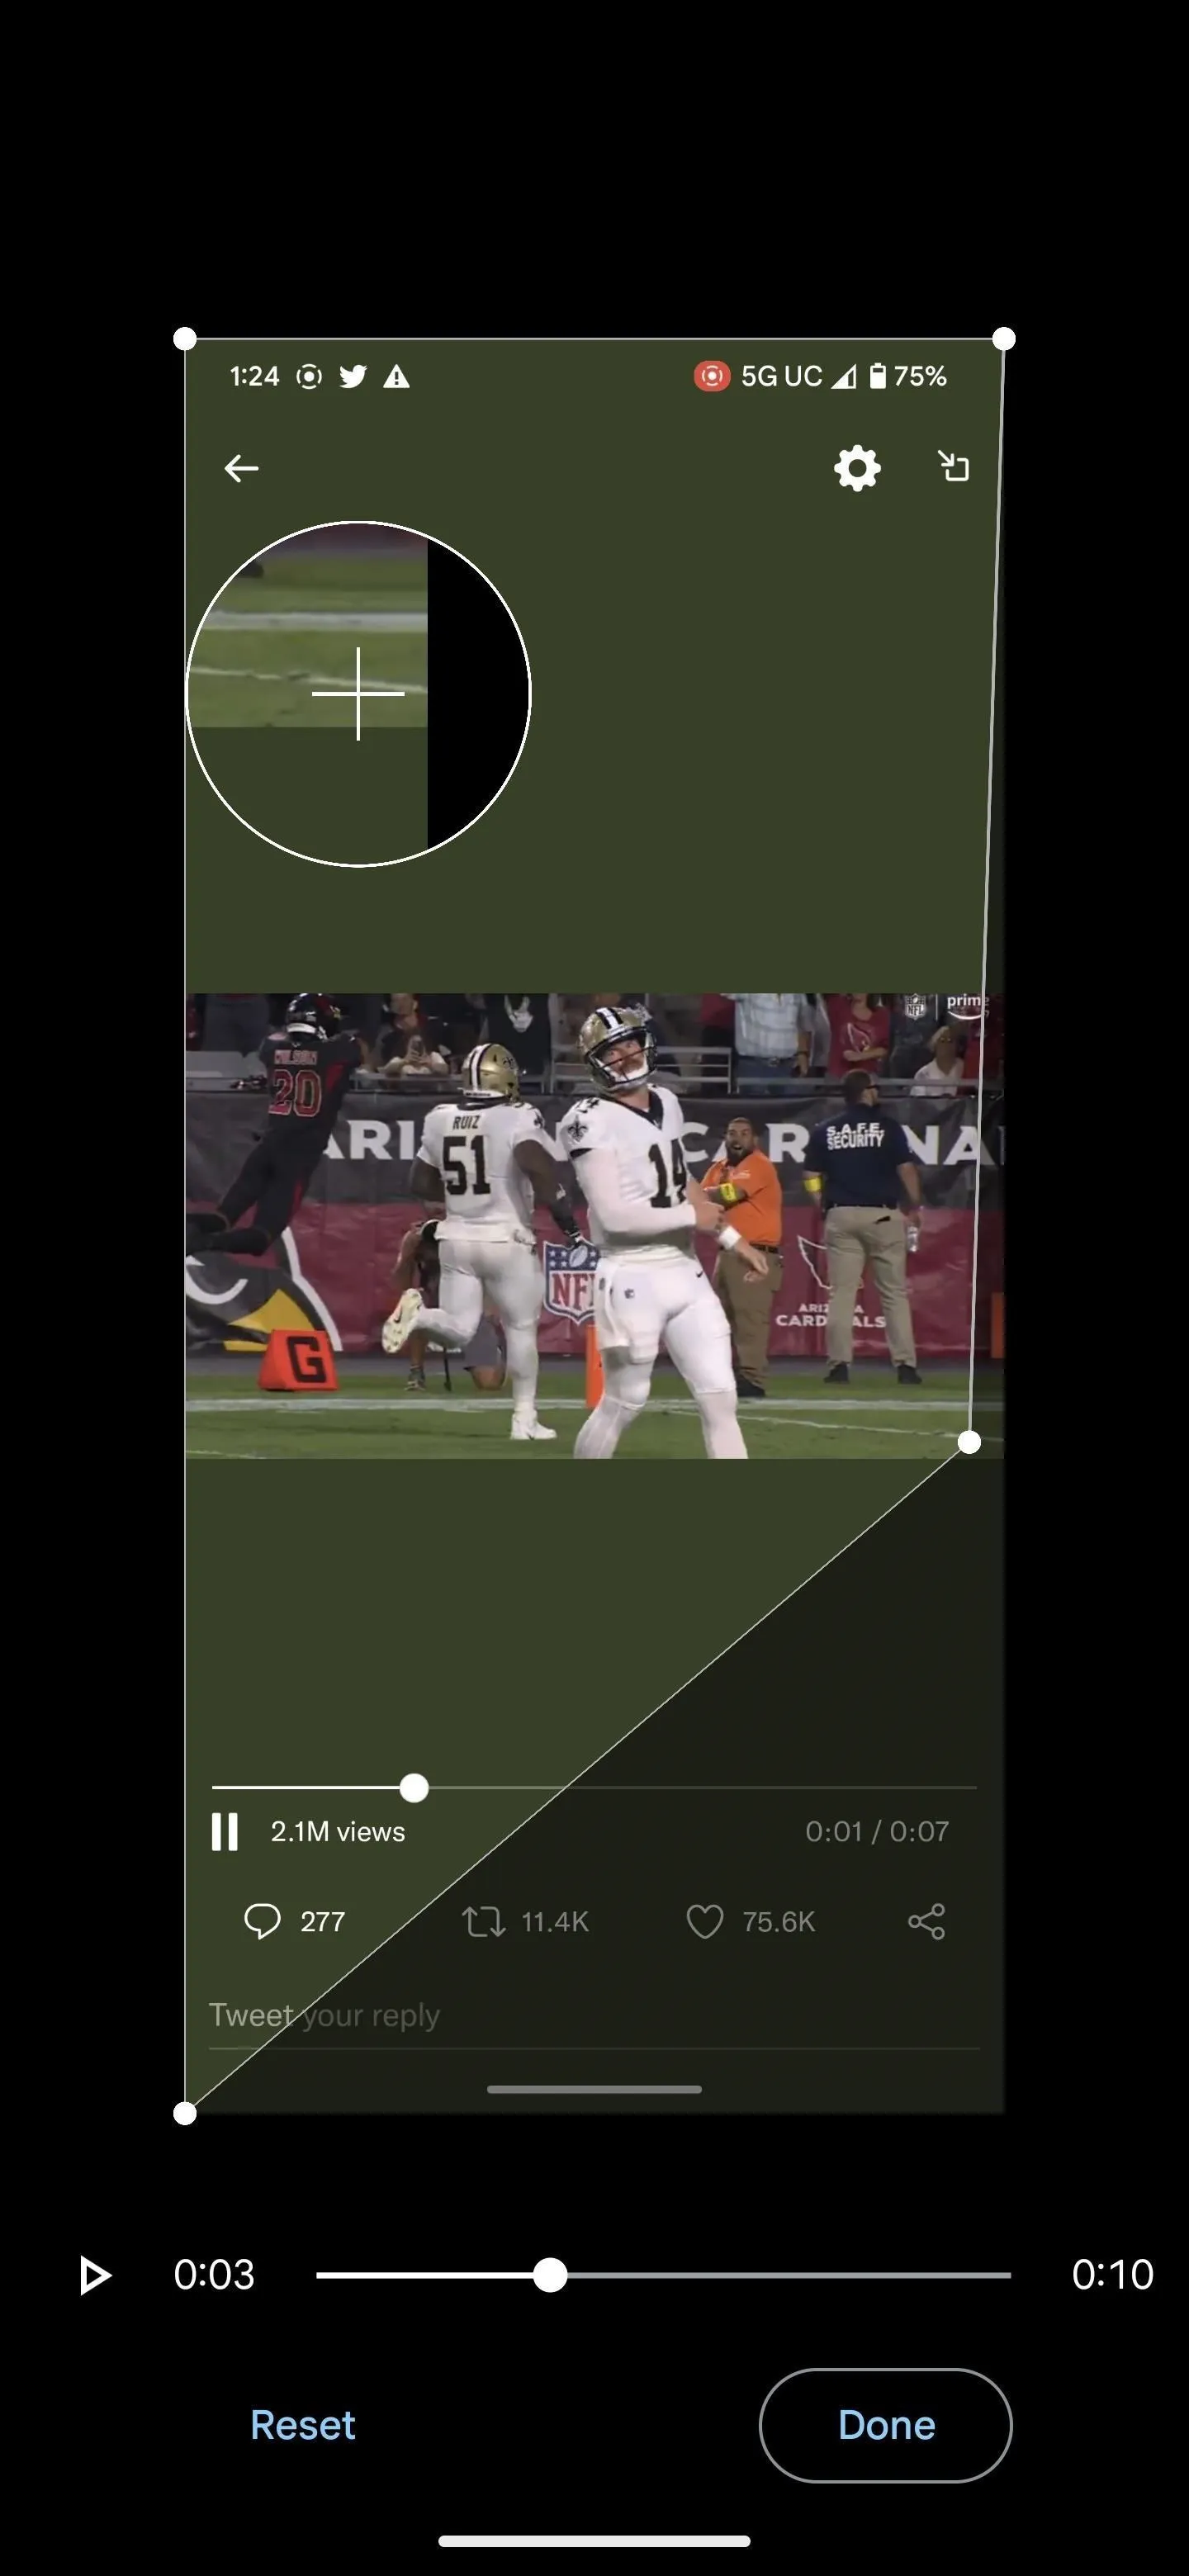
- Transform: This tool is Android only and lets you adjust the perspective by dragging each corner. You'll see a zoomed preview at each point for fine adjustments. To see how the video is skewed before saving, tap and hold the video preview, which shows the distorted view until you let go. You can use the play controls to play the video during the preview or find a specific frame to use as a reference. Tap "Done" to exit back to the editor. (More info.)
- Reset: If you want to start over with any of the crop adjustments, tap this button. It won't impact any other editors except those available in the Crop menu.
- Auto: You won't always see this option, but when Google Photos detects something in the video it thinks should be straightened, you'll see "Auto" appear. Tapping it will auto-rotate the footage in the cropped area. To undo it, tap the "Reset" button mentioned above or manually readjust the video.
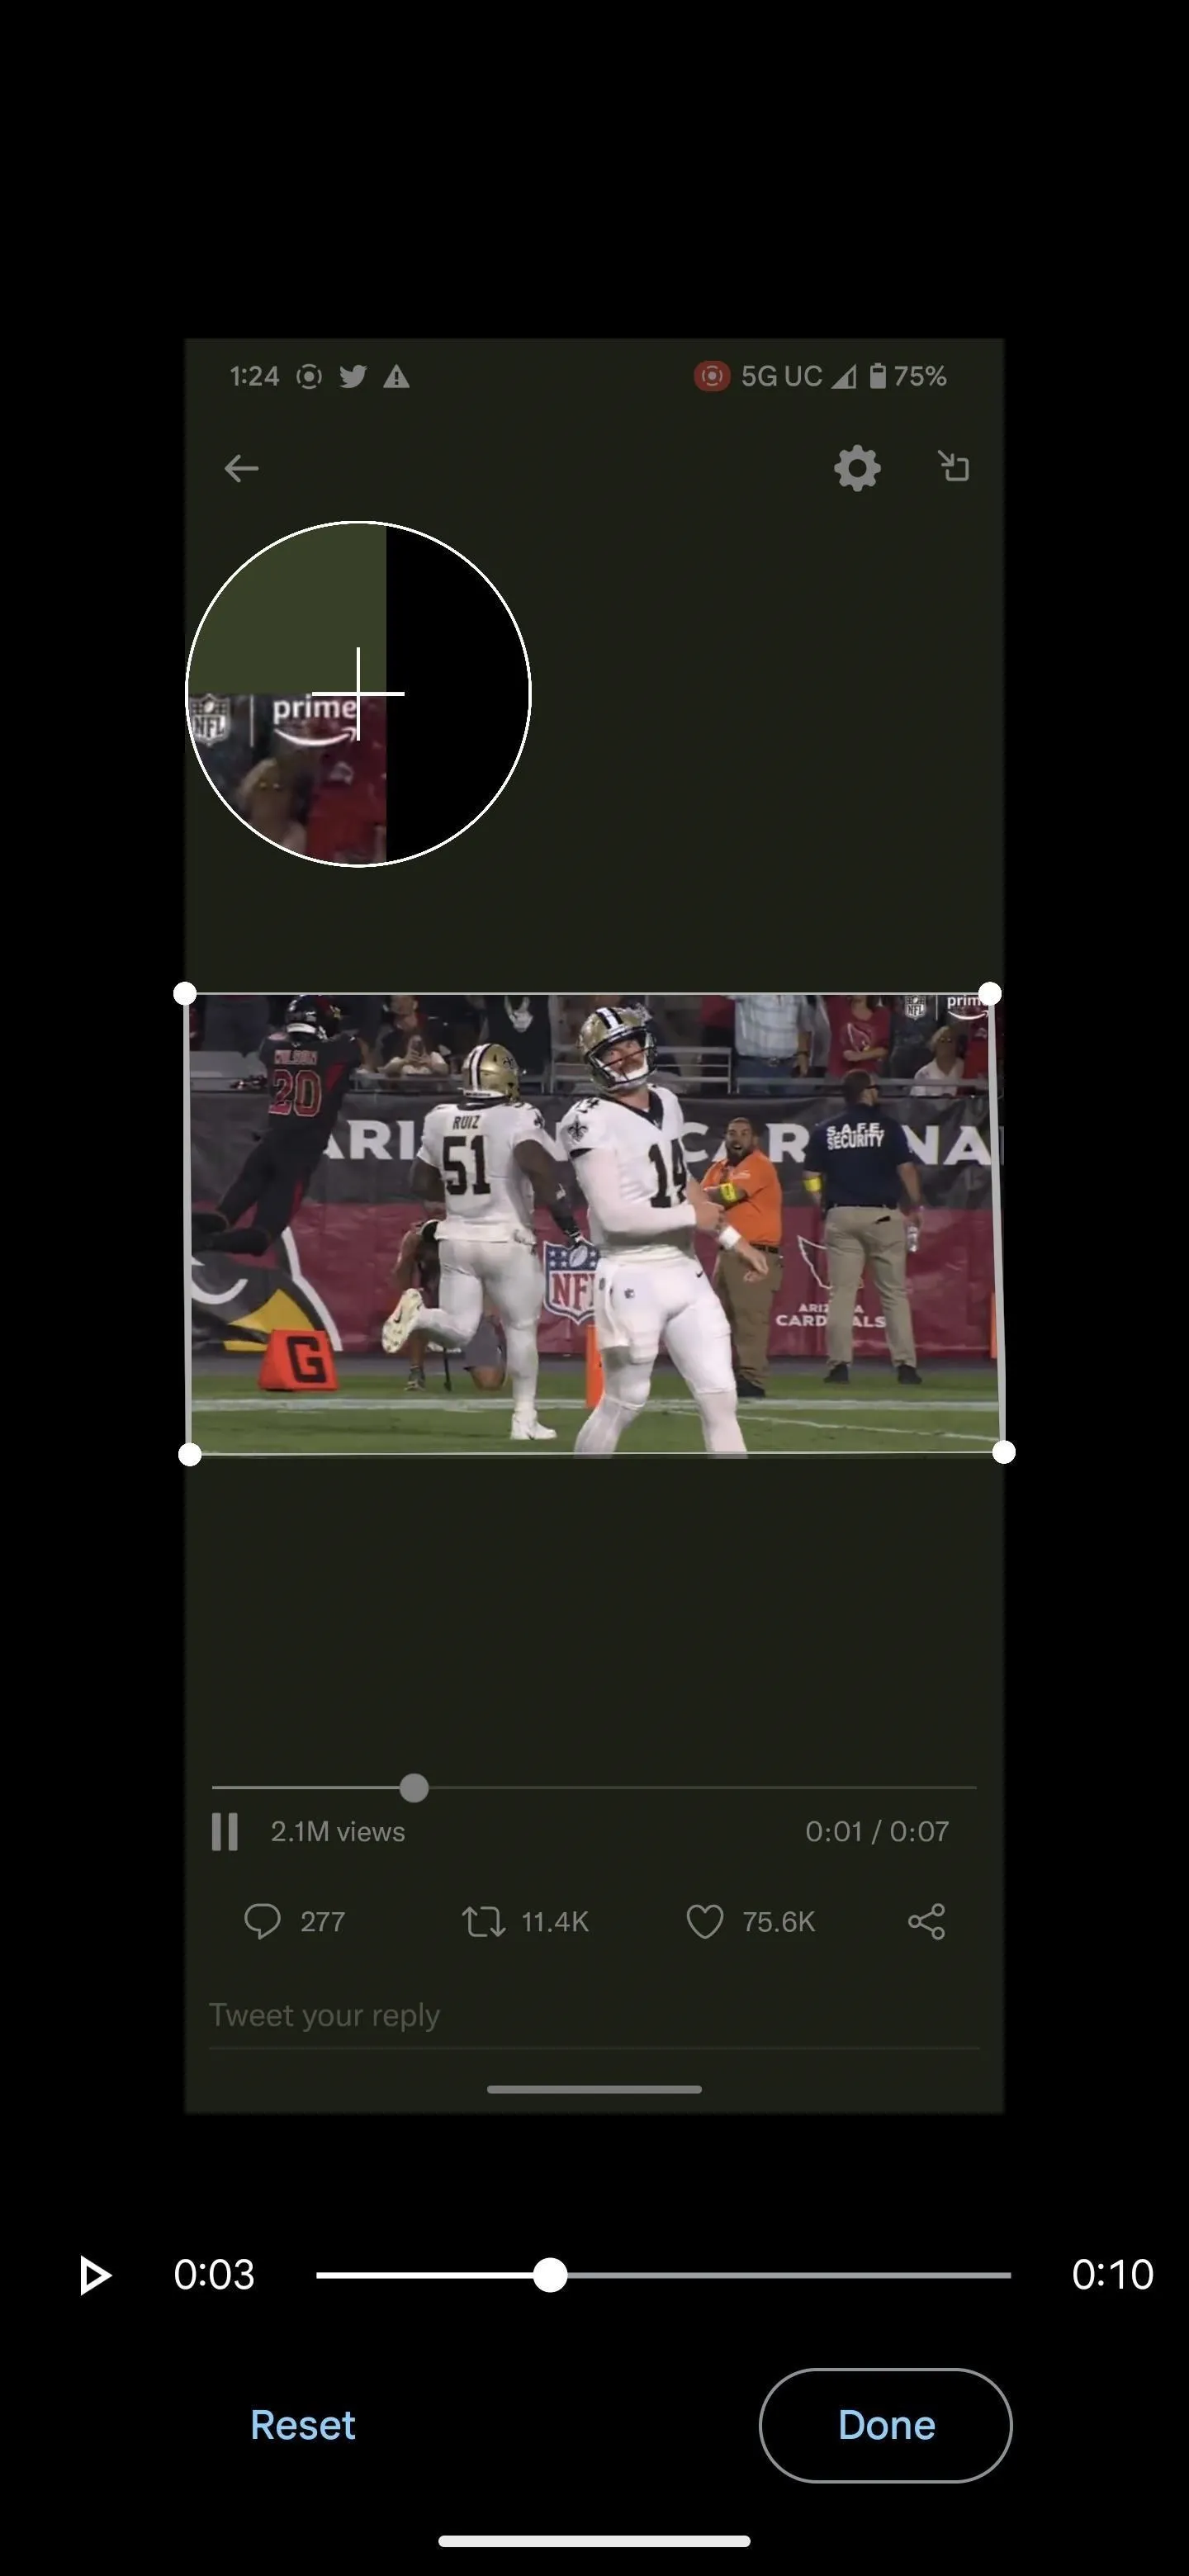


Once you've completed your edits, tap the "Save copy" button. Here's the result of the above example, where I cut away all the unnecessary UI elements.

Cover image, screenshots, and GIF by Tommy Palladino/Gadget Hacks


Comments
No Comments Exist
Be the first, drop a comment!